2022-11-13 21:12:15 +00:00
|
|
|
---
|
|
|
|
|
title: ThinkPad X230/X230T external flashing
|
|
|
|
|
x-toc-enable: true
|
|
|
|
|
...
|
|
|
|
|
|
|
|
|
|
Read the [Ivybridge/Haswell common guide](/docs/install/ivy_has_common.html) if you want more information.
|
2022-11-14 02:31:12 +00:00
|
|
|
All of the following instructions assume that you've cloned lbmk and are operating from the
|
2022-11-13 21:12:15 +00:00
|
|
|
root of that project. To do so, run
|
|
|
|
|
|
2022-11-14 02:31:12 +00:00
|
|
|
git clone https://notabug.org/libreboot/lbmk
|
|
|
|
|
cd lbmk
|
2022-11-13 21:12:15 +00:00
|
|
|
|
|
|
|
|
You can now follow the rest of the instructions.
|
|
|
|
|
|
|
|
|
|
Preparing a release Rom
|
|
|
|
|
-----------------------
|
|
|
|
|
|
|
|
|
|
You must patch the release rom with the necessary blobs *and then* flash it to your board.
|
|
|
|
|
|
2022-11-15 19:59:42 +00:00
|
|
|
Lbmk includes a script that will automatically inject the necessary blobs into a rom file.
|
2022-11-13 21:12:15 +00:00
|
|
|
The script can determine the board automatically if you have not changed the name, but you can also manually set the board name with the `-b` flag.
|
|
|
|
|
|
2022-11-14 02:31:12 +00:00
|
|
|
In order to inject the necessary blobs into a rom image, run the script from the root of lbmk and point to the rom image.
|
2022-11-13 21:12:15 +00:00
|
|
|
For example:
|
|
|
|
|
|
2022-11-14 02:31:12 +00:00
|
|
|
./blobutil inject -r x230_libreboot.rom -b x230_12mb
|
2022-11-13 21:12:15 +00:00
|
|
|
|
|
|
|
|
Optionally, you can use this script to modify the mac address of the rom with the `-m` flag.
|
|
|
|
|
For example:
|
|
|
|
|
|
2022-11-14 02:31:12 +00:00
|
|
|
./blobutil inject -r x230_libreboot.rom -b x230_12mb -m 00:f6:f0:40:71:fd
|
2022-11-13 21:12:15 +00:00
|
|
|
|
2022-11-17 11:51:52 +00:00
|
|
|
NOTE: this makes use of `nvmutil`, which you can read more about in
|
|
|
|
|
the [nvmutil documentation](nvmutil.md).
|
|
|
|
|
|
2022-11-13 21:12:15 +00:00
|
|
|
Splitting The Rom
|
|
|
|
|
-----------------
|
|
|
|
|
|
|
|
|
|
You can use `dd` to easily split your rom into the two separate portions for
|
|
|
|
|
external flashing.
|
|
|
|
|
|
2022-11-14 02:31:12 +00:00
|
|
|
dd if=libreboot.rom of=top.rom bs=1M skip=8
|
|
|
|
|
dd if=libreboot.rom of=bottom.rom bs=1M count=8
|
2022-11-13 21:12:15 +00:00
|
|
|
|
|
|
|
|
Flash the top chip with top.rom, and tho bottom chip with bottom.rom.
|
|
|
|
|
Don't worry about knowing which chip is which on a standard setup; flashrom will let you know if the
|
|
|
|
|
image size is incorrect for the chip you're flashing.
|
|
|
|
|
|
|
|
|
|
|
|
|
|
|
|
|
|
|
|
Disassembly
|
|
|
|
|
-----------
|
|
|
|
|
|
|
|
|
|
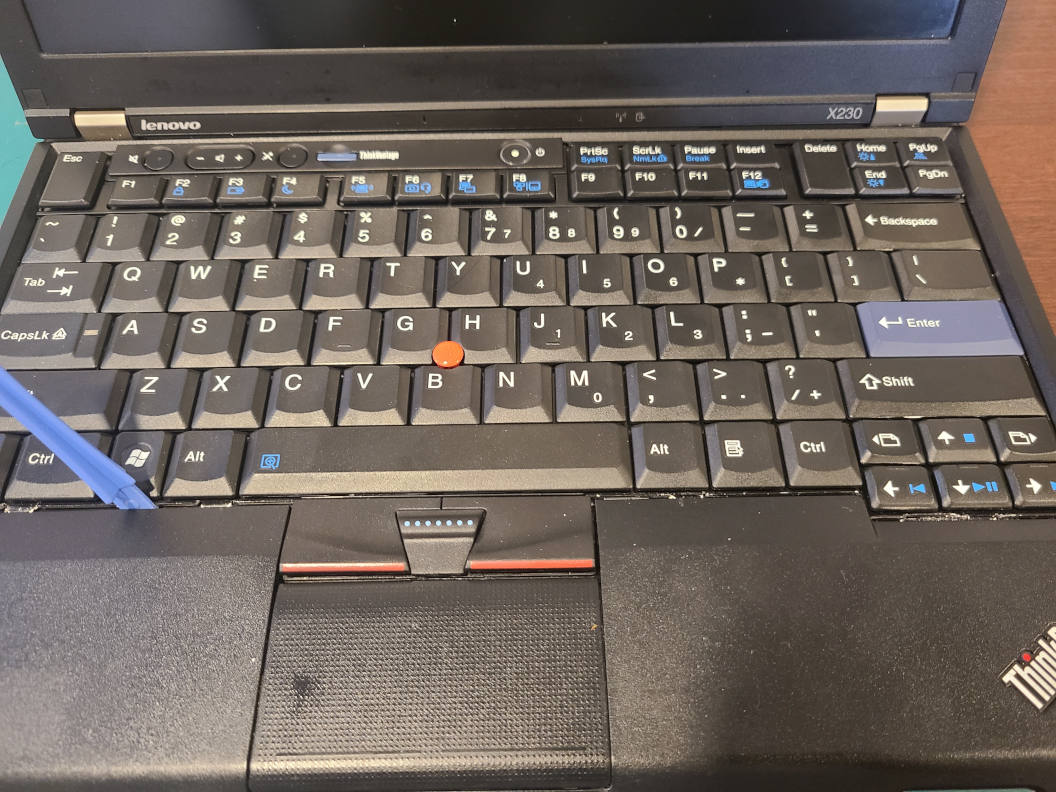
Start by removing the battery.
|
|
|
|
|
Remove every screw from the bottom of the machine marked with a keyboard/touchpad indicator.
|
|
|
|
|
|
|
|
|
|
Pry up the keyboard and separate it from the palmrest.
|
2022-11-14 02:31:12 +00:00
|
|
|
|
2022-11-13 21:12:15 +00:00
|
|
|
|
|
|
|
|
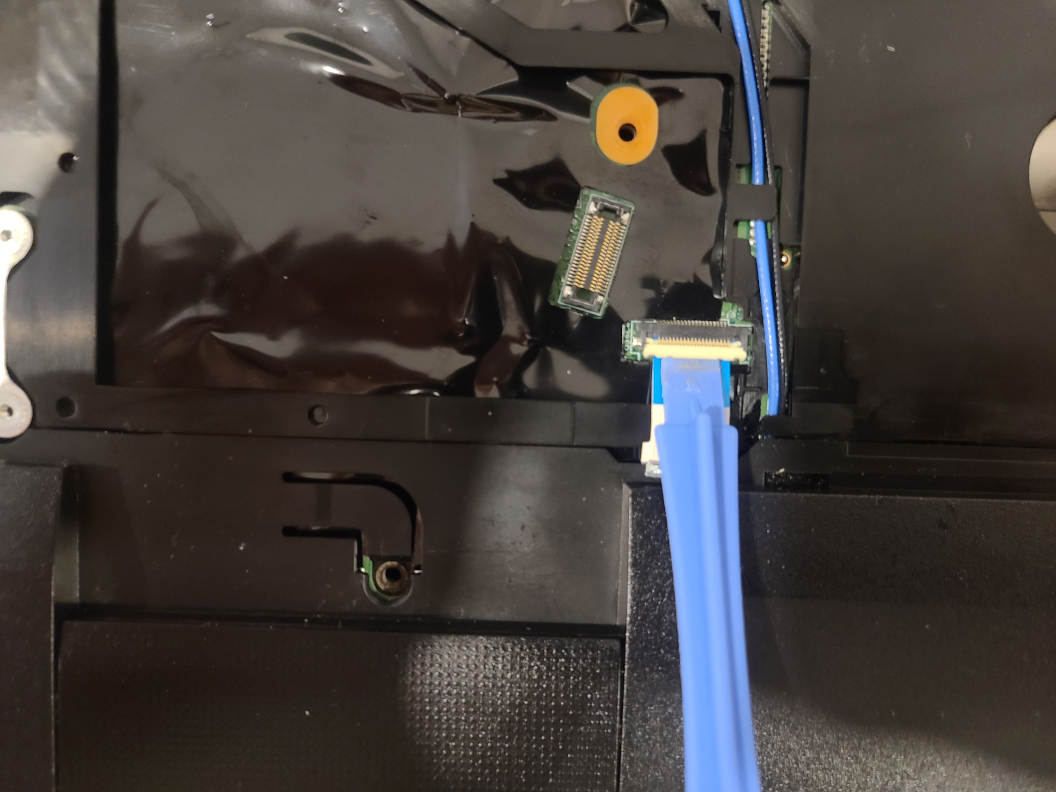
Unplug the ribbon cable from the palmrest and pry it off as well.
|
2022-11-14 02:31:12 +00:00
|
|
|
|
2022-11-13 21:12:15 +00:00
|
|
|
|
|
|
|
|
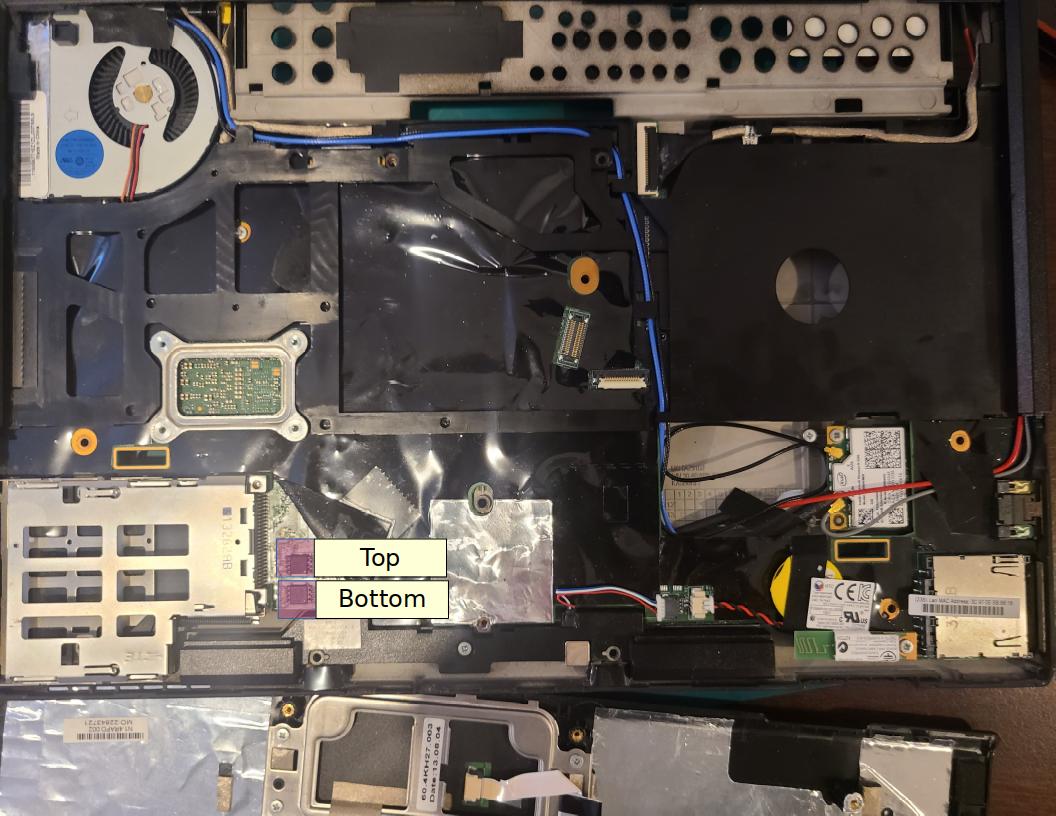
Pull up the protective cover to reveal the two soic chips for flashing.
|
2022-11-14 02:31:12 +00:00
|
|
|
|