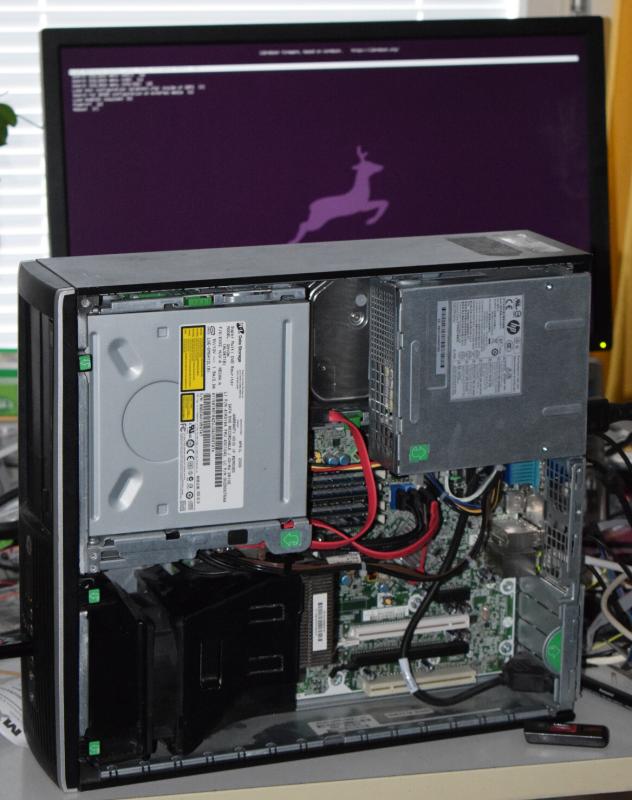
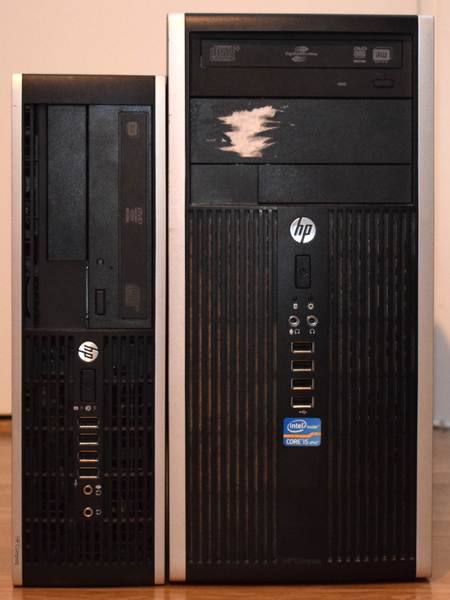
--- title: HP Elite 8200 SFF/MT and 6200 Pro Business x-toc-enable: true ... **[PLEASE READ THESE INSTRUCTIONS BEFORE INSTALLING](../../news/safety.md), OR YOU MIGHT BRICK YOUR MACHINE: [SAFETY PRECAUTIONS](../../news/safety.md)**
HP Compaq 8200 Elite SFF
| ***Specifications*** | | |---------------------------|---------------------------------------------| | **Manufacturer** | HP | | **Name** | Compaq 8200 Elite SFF | | | Compaq 8200 Elite MT | | **Released** | 2011 | | **Chipset** | Intel Q67 | | **CPU** | Intel Sandy/Ivy Bridge | | **Graphics** | Intel HD Graphics or PCI-e low profile card | | **Memory** | Up to 32GB (4x8GB) | | **Architecture** | x86_64 | | **Intel ME/AMD PSP** | Present, neutered | | **Flash chip** | SOIC-8 8MiB | ``` W+: Works without blobs; N: Doesn't work; W*: Works with blobs; U: Untested; P+: Partially works; P*: Partially works with blobs ``` | ***Features*** | | |---------------------------------------------------|----| | **Internal flashing with original boot firmware** | W* | | **Display (Intel GPU)** | W+ | | **Display (PCIe graphics card)** | W+ | | **Audio** | W+ | | **RAM Init** | W+ | | ***Payloads supported*** | | |---------------------------|-------| | **GRUB** | Works | | **SeaBIOS** | Works | | **SeaBIOS with GRUB** | Works |
Disable security before flashing ================================ Before internal flashing, you must first disable `/dev/mem` protections. Make sure to re-enable them after you're finished. See: [Disabling /dev/mem protection](../install/devmem.md) Introduction ============ Libreboot has support for this, in the Git repository and release versions from 20230423 onwards. Brief board info ---------------- HP Elite 8200 SFF is a small-form-factor desktop of Intel Sandybridge platform which you can read more about here: MT is an identical board with a larger chassis and more powerful power supply: Here's the [Technical Reference Manual](https://web.archive.org/web/20160109143257/https://h10032.www1.hp.com/ctg/Manual/c02778024.pdf). This system supports Ivy Bridge processors too. The original BIOS won't even POST with those, but with Libreboot they work fully. Installation of Libreboot ------------------------- You can actually just compile the Libreboot ROM for this, and flash the entire ROM. Internal flashing from OEM BIOS is possible by setting a jumper on the board. Step by step instructions for this are below. The *coreboot* project proper has technical details on why this works if you are interested. It also has external flashing instructions if you need to recover from an unbootable BIOS: You can build the images for it in Libreboot like so: ./mk -b coreboot hp8200sff_8mb More information about building ROM images can be found in the [build guide](../build/). If you plan on using a graphics card (other than the integrated graphics of your CPU), choose one of the files which name contains both "seabios" and "txtmode". This is a *Sandybridge* board which means that a neutered ME image is required if you wish to flash the ME region. Libreboot's build system automatically downloads, neuters (using `me_cleaner`) and inserts this if compiling from source. If you're using *Libreboot release* ROM images, the ME image has been scrubbed and you must re-insert it. Use the information on this guide to know how to do that: [Insert vendor files on Intel Sandybridge/Ivybridge/Haswell platforms](../install/ivy_has_common.md) You may also wish to change the *default MAC address* if you're planning to use the onboard Intel Gigabit Ethernet. You can do this using the information in the same guide linked above, or read the nvmutil manual: [Modify MAC addresses with nvmutil](../install/nvmutil.md). Internal flashing from vendor BIOS ---------------------------------- The vendor BIOS imposes write-protections in the Flash Descriptor and runtime. However, the flash descriptor can be bypassed by bridging a jumper and the runtime protections only apply to a fixed address block. Since neutering the Management Engine frees up a lot of space, we can just install an intermediate Libreboot image there. This removes all write-protections so has the same end result as external flashing: a completely unlocked system. Power off the computer. Remove the side panel. Near the back USB ports find the jumper labelled **FDO**. ![Location of the FDO jumper](https://av.libreboot.org/hp8200sff/fdo.jpg) You need to short the two pins circled. Use a [jumper block](https://en.wikipedia.org/wiki/Jumper_(computing)) if you have one but a screwdriver will do the job fine too. Hold the tip between the pins until you can see the normal BIOS boot screen. ![](https://av.libreboot.org/hp8200sff/fdo\_screwdriver.jpg) NOTE: Libreboot standardises on [flashprog](https://flashprog.org/wiki/Flashprog) now, as of 27 January 2024, which is a fork of flashrom. Now, run this command: flashprog -p internal -c MX25L6406E/MX25L6408E The output should contain the text "The Flash Descriptor Override Pin-Strap is set". If it doesn't, start again from the beginning. Now build the **4** MiB Libreboot image. ./mk -b coreboot hp8200sff_4mb More information about building ROM images can be found in the [build guide](../build/). Also build `ifdtool`. It will be needed soon. cd src/coreboot/default/util/ifdtool make sudo make install Now choose the image you want from `bin/hp8200sff_4mb`. We'll refer to it as `libreboot4.rom`. We need to pad it to 8 MiB: dd if=/dev/zero bs=4M count=1 >> libreboot4.rom Flash the Libreboot image with a tweaked layout: ifdtool libreboot4.rom -f layout flashprog -p internal -c MX25L6406E/MX25L6408E -w libreboot4.rom -l layout -i fd -i gbe -i bios -i me Power off the computer. Make sure to power off, rebooting is not enough! Power on the computer. Now we can flash the full 8 MiB image. Boot to an OS with flashprog again. NOTE: Libreboot standardises on [flashprog](https://flashprog.org/wiki/Flashprog) now, as of 27 January 2024, which is a fork of flashrom. Pick a Libreboot image of your choice from `bin/hp8200sff_8mb` or from a release archive. We'll refer to it as `libreboot8.rom`. flashprog -p internal -c MX25L6406E/MX25L6408E -w libreboot8.rom Power cycle the computer again. HP 6200 Pro Business PC ----------------------- According to this page from the vendor, HP BIOS updates are the same on both the 8200 SFF Elite *and* 6200 Pro Business desktop PCs; therefore, we believe that the Libreboot config for 8200 SFF will *also* work on 6200 Pro Business PCs. That page is here: The config for this board is courtesy of *Riku Viitanen* (`Riku_V` on Libreboot IRC), who tested and confirmed the following functionality: * Sandy Bridge (i5-2400) and Ivy Bridge (i5-3570S) CPUs * 4x8 GB RAM (Sandy Bridge: 1333MHz, Ivy Bridge: 1600MHz) * PS/2 keyboard and mouse * USB keyboard (a bit laggy on GRUB) * Boot from USB and DVD * Gigabit ethernet * VGA and DisplayPort (Intel graphics), with libgfxinit (native video init) * Headphone output, PC speaker * S3 suspend, wake on USB keyboard * lm\_sensors outputs CPU core temperatures only * Both PCIe x16 slots, external GPU works with SeaBIOS * PCI * SATA * USB ports * Serial port (RS-232) * Wake on LAN At the time of adding this board to Libreboot, the following is untested: * Parallel port (internal header on the board) * Floppy drive. The case has a spot for it, but I can't find the header (P10). According to the initial coreboot port from 2018, the following also works: * EHCI debug (not enabled by Libreboot configs) * Native (libre) raminit with up to four DIMM modules (also tested by Riku and confirmed working, with 32GB RAM installed as 4x8GB) TPM --- According to git logs, TPM should work, and a commit from 2018 at revision ID `39d0e2a2cf45e28cdddd0fe0c88f94ce527ab1ef` in coreboot makes the TPM visible to operating systems. PSU Fan control --------------- See coreboot commit `9bd601584350f51f112b15a7369f9aa82f1d0919` - labelled by commit message `superio/nuvoton/npcd378: Add PSU fan control`. Per this commit, SuperIO-based fan control is supported on HP Elite 8200 SFF. TODO for testing the above is here:\ This is controlled via `nvramtool` to modify the value in sram. See: * `psu_fan_lvl=3` <-- default setting in coreboot, and Libreboot. Other values possible: from reading the source code, it is implied that the number can be between 0 and 7. If the value is set higher than 7, it will default back to 3. Libreboot locks CMOS/NVRAM settings, but you can change the default setting in the *ROM* by using the `-C` option in nvramtool. You can find this under the directory `src/coreboot/default/util/nvramtool` when downloading coreboot inside of lbmk by running the command: ./mk -f coreboot default Go in there and type `make` to build nvramtool. Simply run nvramtool without arguments, and it will show a list of options.