65 lines
2.3 KiB
Markdown
65 lines
2.3 KiB
Markdown
---
|
|
title: ThinkPad X60 Tablet Recovery guide
|
|
x-toc-enable: true
|
|
...
|
|
|
|
NOTE: Libreboot standardises on [flashprog](https://flashprog.org/wiki/Flashprog)
|
|
now, as of 27 January 2024, which is a fork of flashrom.
|
|
|
|
"Unbricking" means flashing a known-good (working) ROM. The problem:
|
|
you can't boot the system, making this difficult. In this situation,
|
|
external hardware is needed which can flash the SPI chip (where Canoeboot
|
|
resides). First, disassemble the machine using the following steps, and refer
|
|
to the external flashing guide linked later from *this* guide.
|
|
|
|
|
|
|
|
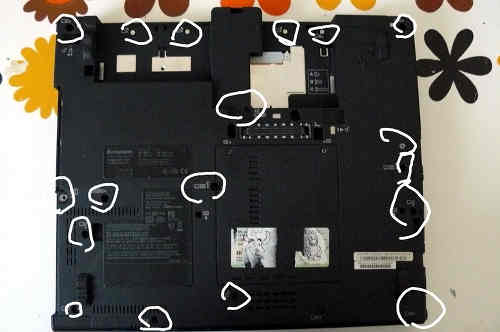
Remove those screws:\
|
|
|
|
|
|
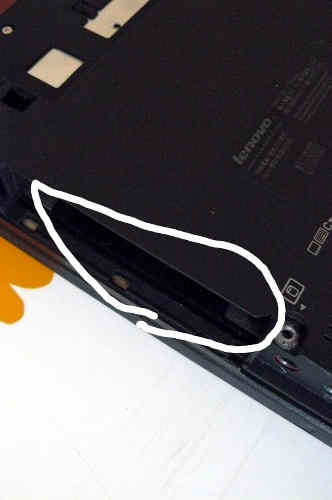
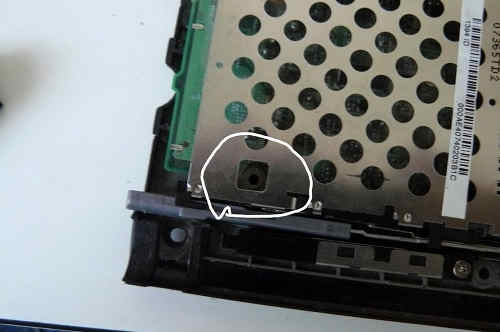
Remove the HDD:\
|
|
|
|
|
|
Push keyboard forward to loosen it:\
|
|

|
|
|
|
Lift:\
|
|
|
|
|
|
Remove those:\
|
|
|
|
|
|
|
|
|
|
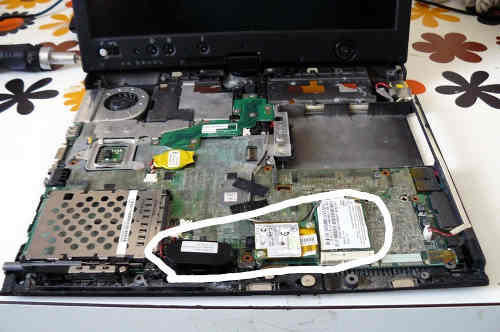
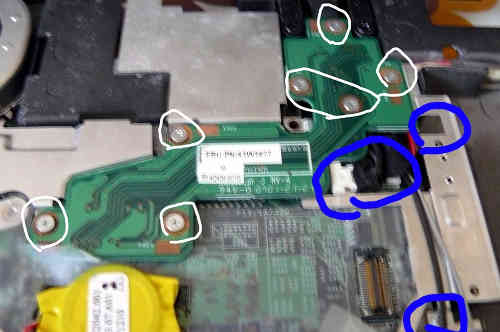
Also remove that (marked) and unroute the antenna cables:\
|
|
|
|
|
|
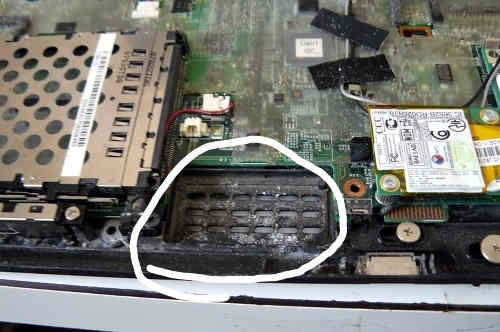
For some X60T laptops, you have to unroute those too:\
|
|
|
|
|
|
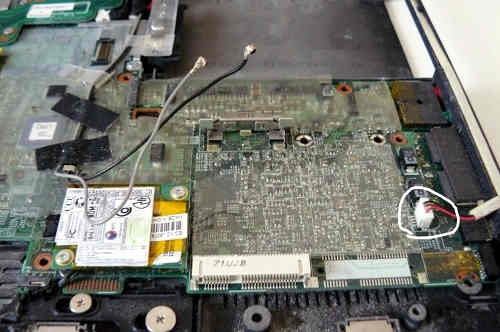
Remove the LCD extend board screws. Also remove those screws (see blue
|
|
marks) and remove/unroute the cables and remove the metal plate:\
|
|
|
|
|
|
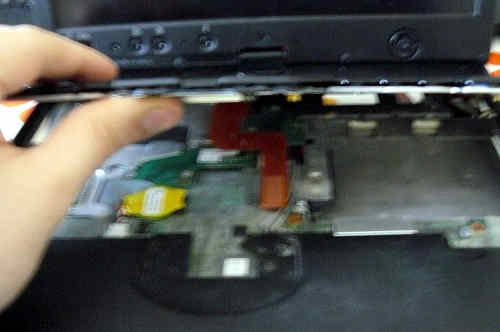
Remove that screw and then remove the board:\
|
|
|
|
|
|
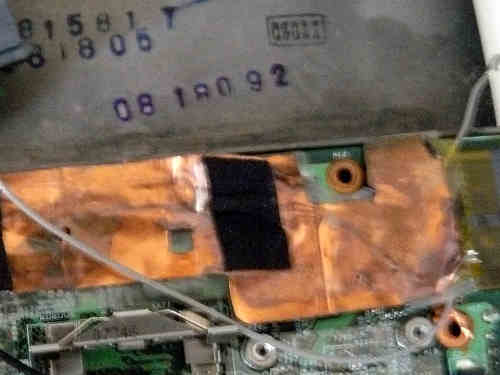
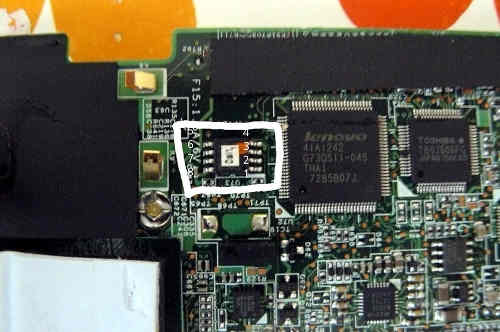
This photo shows the flash location:\
|
|
|
|
|
|
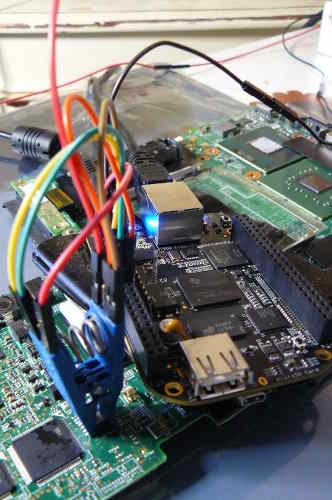
This photo shows an SPI flasher used, with SOIC8 test clip:\
|
|
|
|
|
|
Refer to the external flashing guide:
|
|
|
|
[Externally rewrite 25xx NOR flash via SPI protocol](spi.md)
|
|
|
|
NOTE: Do not use the 3.3v rail from your SPI programmer. Leave that disconnected.
|
|
For 3.3v, plug your charger into the mainboard (but do not power on the mainboard)
|
|
when the clip is connected. Before removing the clip, disconnect the charger.
|
|
This will provide adequate 3.3v DC at correct current levels. The SPI flash on an
|
|
X60 Tablet shares a common 3.3V rail with many other components on the mainboard,
|
|
which all draw a lot of current, more than most flashers can provide.
|
|
|
|
Reverse the steps to re-assemble your system, after you've flashed the chip.
|