86 lines
3.1 KiB
Markdown
86 lines
3.1 KiB
Markdown
---
|
|
title: ThinkPad X230/X230T external flashing
|
|
x-toc-enable: true
|
|
...
|
|
|
|
This machine is available to purchase with Libreboot pre-installed:
|
|
<https://minifree.org/product/libreboot-x230/>
|
|
|
|
NOTE: Libreboot standardises on [flashprog](https://flashprog.org/wiki/Flashprog)
|
|
now, as of 27 January 2024, which is a fork of flashrom.
|
|
|
|
**[PLEASE READ THESE INSTRUCTIONS BEFORE INSTALLING](../../news/safety.md),
|
|
OR YOU MIGHT BRICK YOUR MACHINE: [SAFETY PRECAUTIONS](../../news/safety.md)**
|
|
|
|
NOTE: Internal flashing (from vendor firmware) to Libreboot is possible, on
|
|
this board, but the steps are a bit more complex than using an external flasher.
|
|
See: [internal ivybridge flashing](ivy_internal.md)
|
|
|
|
Read the [Ivybridge/Haswell common guide](ivy_has_common.md) if you want more information.
|
|
All of the following instructions assume that you've cloned lbmk and are operating from the
|
|
root of that project. To do so, run
|
|
|
|
git clone https://codeberg.org/libreboot/lbmk
|
|
cd lbmk
|
|
|
|
You can now follow the rest of the instructions.
|
|
|
|
Preparing a release Rom
|
|
-----------------------
|
|
|
|
You must patch the release rom with the necessary vendor files *and then* flash it to your board.
|
|
|
|
Lbmk includes a script that will automatically inject the necessary files into a rom image.
|
|
The script can determine the board automatically if you have not changed the name, but you can also manually set the board name with the `-b` flag.
|
|
|
|
In order to inject the necessary files into a rom image, run the script from the root of lbmk and point to the rom image.
|
|
Run the injection script pointing to the release archive you downloaded:
|
|
|
|
./vendor inject /path/to/libreboot-20230319-18-g9f76c92_t440_12mb.tar.xz
|
|
|
|
The script can automatically detect the board as long as you do not change the file name.
|
|
You can then find flash-ready ROMs in `/bin/release/`
|
|
|
|
Alternatively, you may patch only a single rom file.
|
|
For example:
|
|
|
|
./vendor inject -r x230_libreboot.rom -b x230_12mb
|
|
|
|
Optionally, you can use this script to modify the mac address of the rom with the `-m` flag.
|
|
For example:
|
|
|
|
./vendor inject -r x230_libreboot.rom -b x230_12mb -m 00:f6:f0:40:71:fd
|
|
|
|
NOTE: this makes use of `nvmutil`, which you can read more about in
|
|
the [nvmutil documentation](nvmutil.md).
|
|
|
|
Splitting The Rom
|
|
-----------------
|
|
|
|
You can use `dd` to easily split your rom into the two separate portions for
|
|
external flashing.
|
|
|
|
dd if=libreboot.rom of=top.rom bs=1M skip=8
|
|
dd if=libreboot.rom of=bottom.rom bs=1M count=8
|
|
|
|
Flash the top chip with top.rom, and tho bottom chip with bottom.rom.
|
|
Don't worry about knowing which chip is which on a standard setup; flashprog will let you know if the
|
|
image size is incorrect for the chip you're flashing.
|
|
|
|
|
|
|
|
Disassembly
|
|
-----------
|
|
|
|
Start by removing the battery.
|
|
Remove every screw from the bottom of the machine marked with a keyboard/touchpad indicator.
|
|
|
|
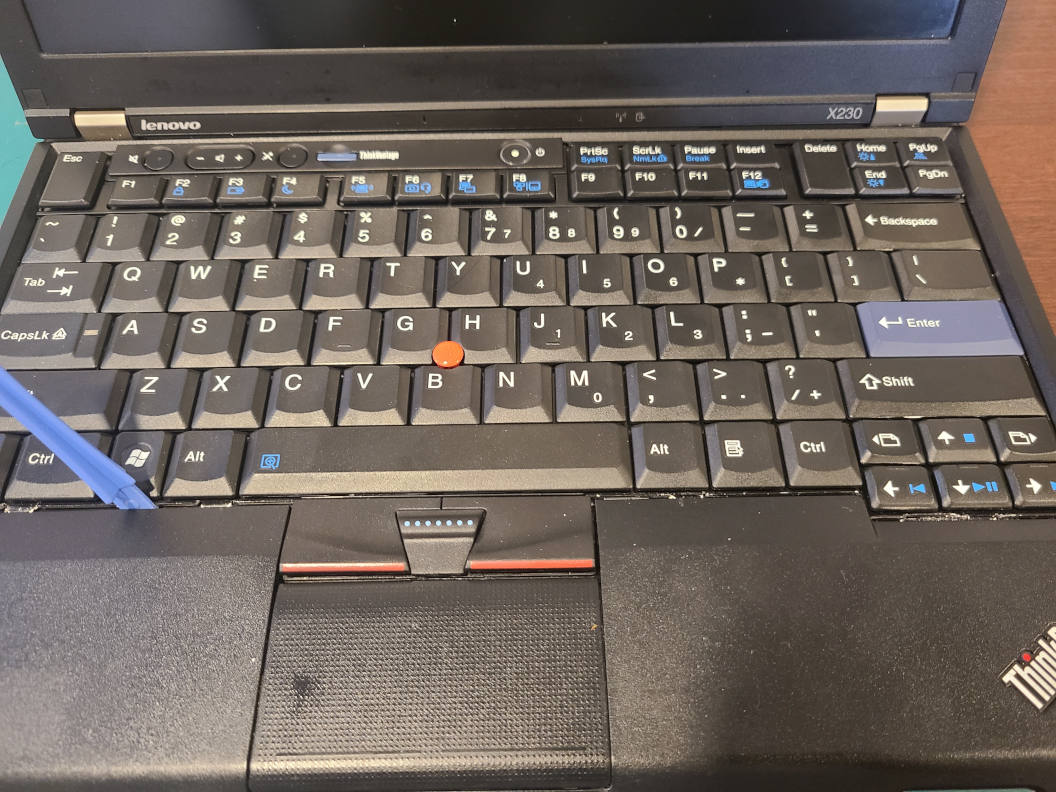
Pry up the keyboard and separate it from the palmrest.
|
|
|
|
|
|
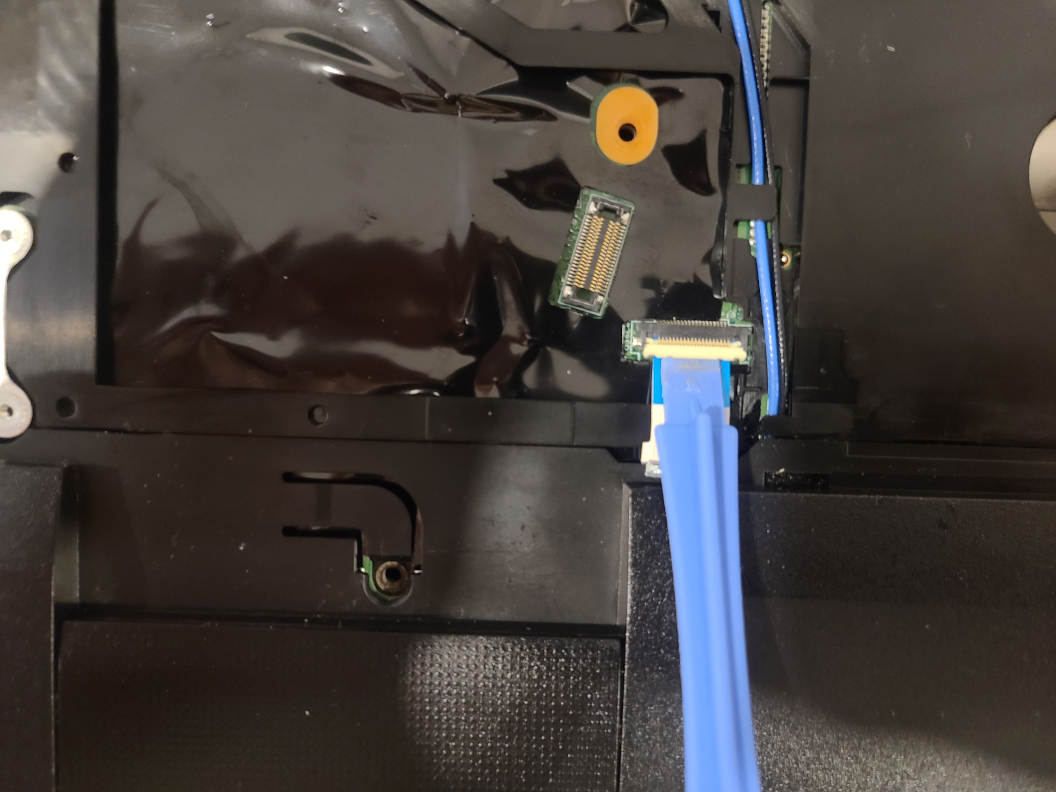
Unplug the ribbon cable from the palmrest and pry it off as well.
|
|
|
|
|
|
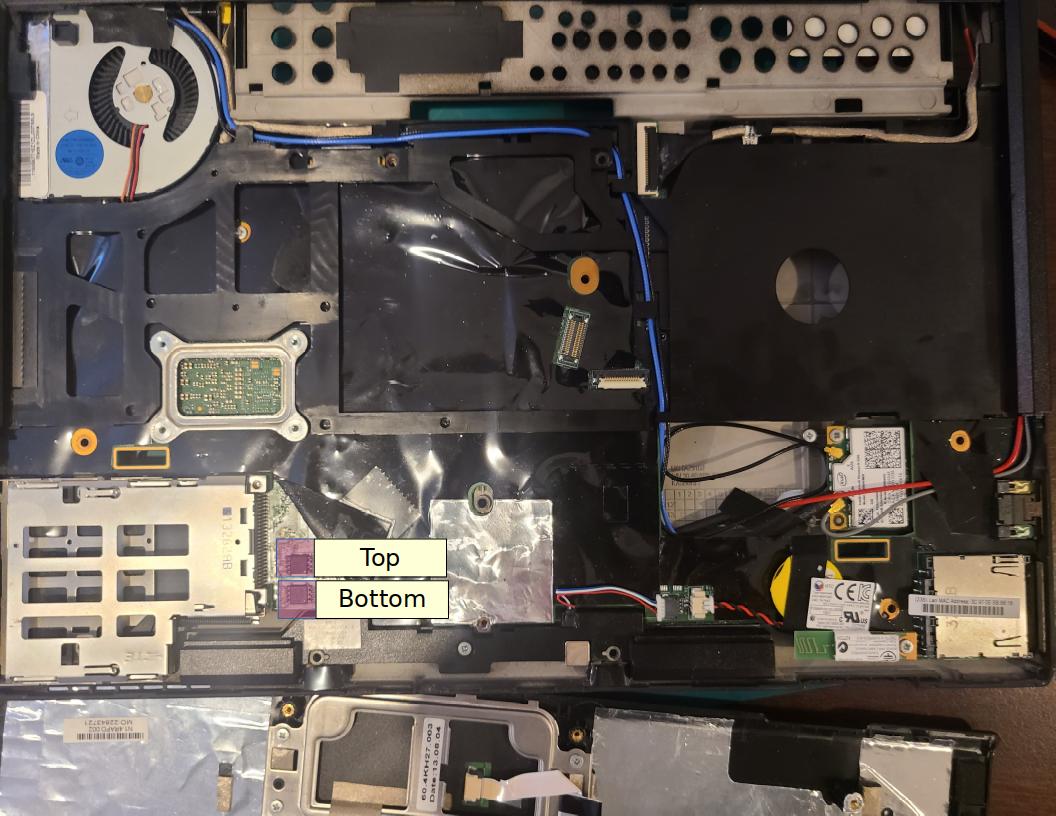
Pull up the protective cover to reveal the two soic chips for flashing.
|
|
|