2.9 KiB
You must patch the release rom with the necessary vendor files and then flash it to your board.
Lbmk includes a script that will automatically inject the necessary files into a rom image.
The script can determine the board automatically if you have not changed the name, but you can also manually set the board name with the -b flag.
In order to inject the necessary files into a rom image, run the script from the root of lbmk and point to the rom image. Run the injection script pointing to the release archive you downloaded:
./update vendor inject /path/to/libreboot-20230319-18-g9f76c92_t440_12mb.tar.xz
The script can automatically detect the board as long as you do not change the file name.
You can then find flash-ready ROMs in /bin/release/
Alternatively, you may patch only a single rom file. For example:
./update vendor inject -r x230_libreboot.rom -b x230_12mb
Optionally, you can use this script to modify the mac address of the rom with the -m flag.
For example:
./update vendor inject -r x230_libreboot.rom -b x230_12mb -m 00:f6:f0:40:71:fd
NOTE: this makes use of nvmutil, which you can read more about in
the nvmutil documentation.
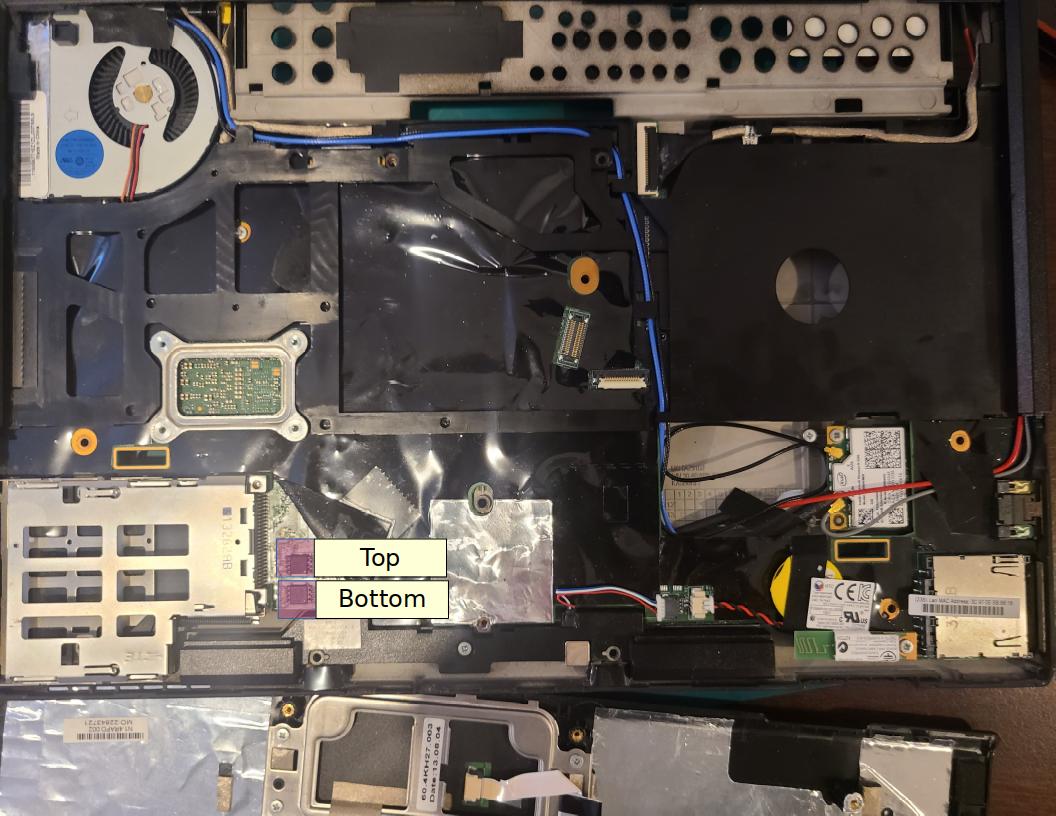
Splitting The Rom
You can use dd to easily split your rom into the two separate portions for
external flashing.
dd if=libreboot.rom of=top.rom bs=1M skip=8
dd if=libreboot.rom of=bottom.rom bs=1M count=8
Flash the top chip with top.rom, and tho bottom chip with bottom.rom. Don't worry about knowing which chip is which on a standard setup; flashrom will let you know if the image size is incorrect for the chip you're flashing.
Disassembly
Start by removing the battery. Remove every screw from the bottom of the machine marked with a keyboard/touchpad indicator.
Pry up the keyboard and separate it from the palmrest.
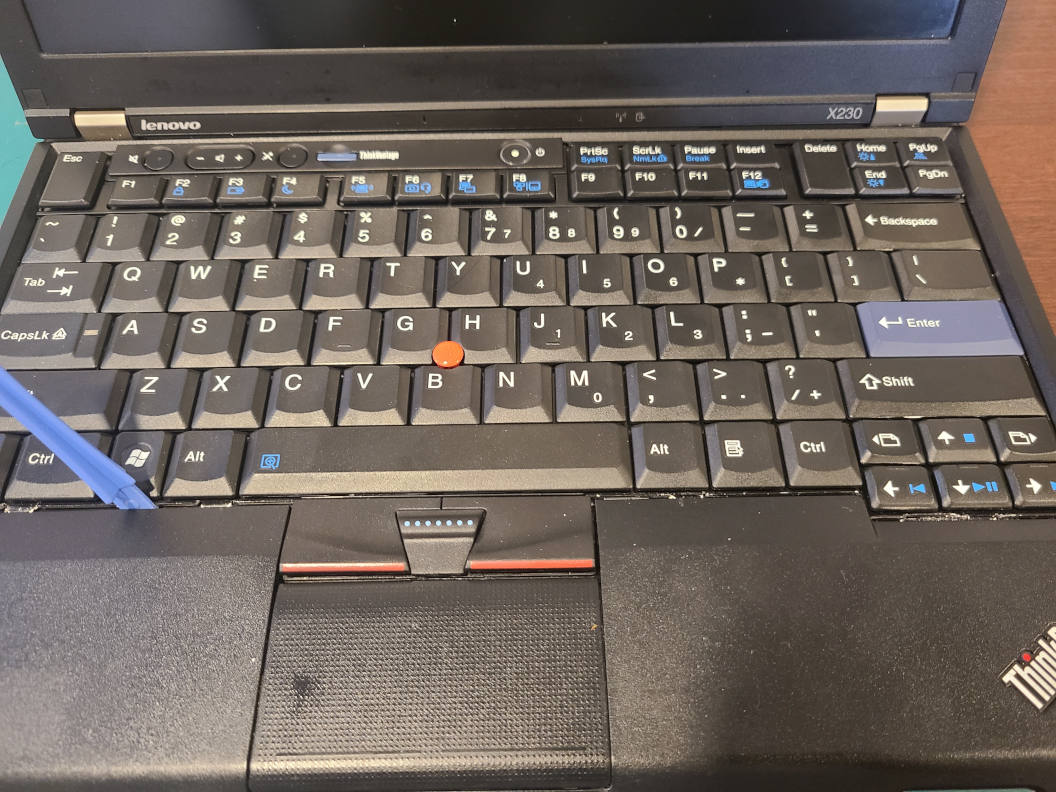
Unplug the ribbon cable from the palmrest and pry it off as well.
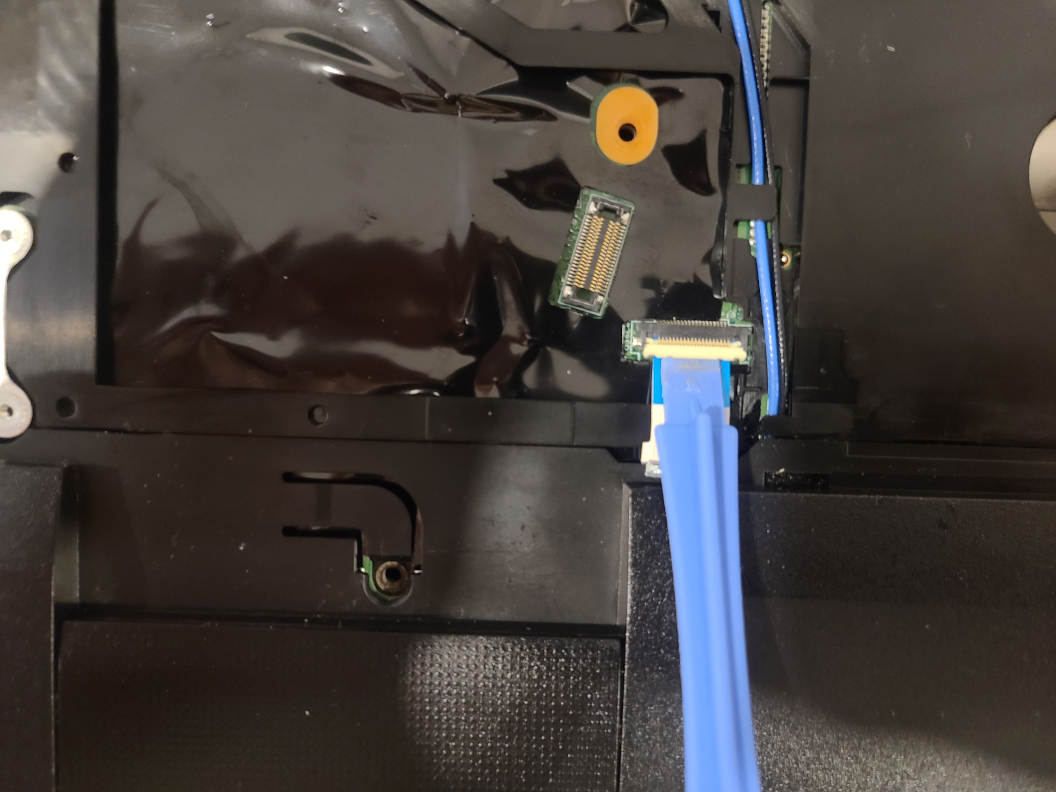
Pull up the protective cover to reveal the two soic chips for flashing.