Compare commits
278 Commits
| Author | SHA1 | Date |
|---|---|---|
|
|
5589d09492 | |
|
|
380d78a68e | |
|
|
7d51451492 | |
|
|
2095c95771 | |
|
|
02f623491b | |
|
|
40ca3087b7 | |
|
|
e484a829e3 | |
|
|
9a3fcc68af | |
|
|
8725126ec2 | |
|
|
fda7faffcd | |
|
|
fa485ebbe6 | |
|
|
d0c1908702 | |
|
|
24d1145ca4 | |
|
|
38be4f3ab3 | |
|
|
4dd4f756bc | |
|
|
990dc943d3 | |
|
|
6f6ccc1ea9 | |
|
|
7307e9eb33 | |
|
|
dd993be62f | |
|
|
6b1b574549 | |
|
|
dd0bf75198 | |
|
|
4e7473b822 | |
|
|
46ab4acf3a | |
|
|
84219b20eb | |
|
|
363fdf2d5e | |
|
|
cf64fdd409 | |
|
|
f628901f61 | |
|
|
987afae58a | |
|
|
5cf2ddde73 | |
|
|
3b90750b4b | |
|
|
98ac57b0ef | |
|
|
eb3c0fba23 | |
|
|
e48c951f25 | |
|
|
3d3ca98ade | |
|
|
a655788bdb | |
|
|
675e3d8593 | |
|
|
b9e94013d8 | |
|
|
9bd18ec1ae | |
|
|
f3b1187644 | |
|
|
3c2af034ed | |
|
|
0638856c1c | |
|
|
138b3e306f | |
|
|
755666a238 | |
|
|
51b53dc54f | |
|
|
e073938b8b | |
|
|
4eaaccbd0a | |
|
|
d9c07032e9 | |
|
|
73e9255f70 | |
|
|
0fc65e4fac | |
|
|
71228ffa0d | |
|
|
3ec8d5abb6 | |
|
|
d1921809b8 | |
|
|
57c5edbbf5 | |
|
|
246820568f | |
|
|
72121b9184 | |
|
|
2276bb3183 | |
|
|
07b4c69883 | |
|
|
b80d5e04ad | |
|
|
016bdaf4c4 | |
|
|
125c88f2ad | |
|
|
3257c13936 | |
|
|
aa1b889795 | |
|
|
6c924caffb | |
|
|
fceaf19cd8 | |
|
|
3f90f156c3 | |
|
|
c910f813c4 | |
|
|
121325f3fb | |
|
|
712f7395a1 | |
|
|
a6d2f10fb9 | |
|
|
d57edfcc87 | |
|
|
8d6c16a4b1 | |
|
|
a1b60ec64f | |
|
|
9a2da14a2e | |
|
|
1ba45bf5e5 | |
|
|
759616ba96 | |
|
|
b356cc3040 | |
|
|
c5ad70955d | |
|
|
7f16d5cc66 | |
|
|
97b6ffc5a0 | |
|
|
e4b30750d1 | |
|
|
77198f7f5d | |
|
|
6f9ec4cc4d | |
|
|
4c12433a6a | |
|
|
7c63e81b32 | |
|
|
927a06cdc6 | |
|
|
62b5b1950e | |
|
|
5662b578d8 | |
|
|
0d6d90bf1e | |
|
|
55722b5643 | |
|
|
6cfd22e1f6 | |
|
|
ee096776a9 | |
|
|
e64e6a065d | |
|
|
3f51720e2a | |
|
|
949f2bcc46 | |
|
|
a5cbc416f4 | |
|
|
a5a8a8daea | |
|
|
5d516331cb | |
|
|
ceaaeb98d9 | |
|
|
e5d30675db | |
|
|
4702e16767 | |
|
|
97b0fa3c60 | |
|
|
c278f8b5bf | |
|
|
ec57689078 | |
|
|
4fb11aaca6 | |
|
|
572ea3bdc1 | |
|
|
f78ee7861a | |
|
|
5afacd5138 | |
|
|
b5e0d96be5 | |
|
|
e94f06a744 | |
|
|
71e4a89c86 | |
|
|
0b7a136d73 | |
|
|
3809609b3e | |
|
|
ba3ca8c23d | |
|
|
8c678d515d | |
|
|
ee4aca89fc | |
|
|
4bd184da81 | |
|
|
aa98970a88 | |
|
|
d25c4185f0 | |
|
|
3d494145ad | |
|
|
d9a4d2c5ce | |
|
|
55d17ed3e9 | |
|
|
8ba82574fb | |
|
|
a7dd851f5b | |
|
|
c6d4b6fa6b | |
|
|
6be0468d05 | |
|
|
abceff29c6 | |
|
|
5443cd0d05 | |
|
|
e10c9b80f0 | |
|
|
315f4cd6b2 | |
|
|
d120ebf8f2 | |
|
|
a6478d6797 | |
|
|
090e58d4f8 | |
|
|
1b4326dd62 | |
|
|
4c54c12c83 | |
|
|
7421e9a8c7 | |
|
|
c1daf0fc5e | |
|
|
6a8e230d7a | |
|
|
fcb63c3c3b | |
|
|
fd1a0ae3a2 | |
|
|
7fddfaca82 | |
|
|
d641ee3378 | |
|
|
ff005cd9cf | |
|
|
44db45ac57 | |
|
|
32c057108e | |
|
|
90804582a8 | |
|
|
a3158f3f97 | |
|
|
990f550563 | |
|
|
a6026556c9 | |
|
|
43e7f2eff0 | |
|
|
00dacd33ef | |
|
|
9011218a8e | |
|
|
e6e952ac11 | |
|
|
08f35ff1b6 | |
|
|
c587cee2ac | |
|
|
2361a1de72 | |
|
|
b11a61c97c | |
|
|
1e117c77af | |
|
|
b6929f8381 | |
|
|
c303716569 | |
|
|
ed08e80f59 | |
|
|
37c0872287 | |
|
|
8c2e77e0c7 | |
|
|
ec57019f3e | |
|
|
6ae9714ecf | |
|
|
12b4f64b1b | |
|
|
9d018b474a | |
|
|
c3ad859ea0 | |
|
|
6c57ce1586 | |
|
|
4d7f0dbb9d | |
|
|
a1ff143fe6 | |
|
|
2c7d4c4df8 | |
|
|
965baf9bb0 | |
|
|
c5273bc020 | |
|
|
ab51fb8ba6 | |
|
|
8cdb2f257c | |
|
|
3b55fca2c9 | |
|
|
32c80dae9c | |
|
|
935e5aec14 | |
|
|
0893abd635 | |
|
|
bf443e2e4d | |
|
|
19fab47201 | |
|
|
6447f5d183 | |
|
|
58bab1695b | |
|
|
007136a010 | |
|
|
aad0b223e0 | |
|
|
2e2b6c7d52 | |
|
|
f2dd78251c | |
|
|
71b502349a | |
|
|
2ac7deeefc | |
|
|
443078014d | |
|
|
a69a1260c8 | |
|
|
40b8dec853 | |
|
|
8e3508c313 | |
|
|
4811a7683e | |
|
|
777ea30c59 | |
|
|
71cc1104e0 | |
|
|
8576804b30 | |
|
|
3ed4b4f6b3 | |
|
|
ca4a6756e3 | |
|
|
2a4b7d5943 | |
|
|
4aea280c60 | |
|
|
52da2a4d01 | |
|
|
63db2df0fe | |
|
|
207c641445 | |
|
|
3da0fb028f | |
|
|
332d9fa8d3 | |
|
|
69957dc6dd | |
|
|
cbb250dfda | |
|
|
66f217fba1 | |
|
|
5c92e8f188 | |
|
|
db8b4b3fe6 | |
|
|
b621f4fcf7 | |
|
|
dbe9dc6fe8 | |
|
|
e36d7b7ea2 | |
|
|
a4c441f642 | |
|
|
67c9386dc9 | |
|
|
7e8e045a00 | |
|
|
9b41e070bc | |
|
|
95d5b067cf | |
|
|
762f1516fe | |
|
|
a2cace6ea0 | |
|
|
e8c2795b6a | |
|
|
a776d13bc4 | |
|
|
8d40609ed7 | |
|
|
b29821a4b3 | |
|
|
7879fe48dd | |
|
|
91f6140863 | |
|
|
30387872fa | |
|
|
da5734ac34 | |
|
|
0eb22b1fa8 | |
|
|
0cd6d8de10 | |
|
|
670df4e5e3 | |
|
|
7c0d9349ed | |
|
|
66a862b10a | |
|
|
4fa9b69411 | |
|
|
853f2db51d | |
|
|
f191930c1f | |
|
|
1a5937905b | |
|
|
c372dde2d5 | |
|
|
3f41235319 | |
|
|
fe741e7acc | |
|
|
058ae354ed | |
|
|
7e1fa9ff12 | |
|
|
9b6df387ba | |
|
|
21aec25c8d | |
|
|
1c0b7b2aa8 | |
|
|
332faa80c9 | |
|
|
89131e1615 | |
|
|
29762494bc | |
|
|
942512a16c | |
|
|
3787d9eade | |
|
|
41572a9aa9 | |
|
|
d0acc3d450 | |
|
|
4d3e6640cb | |
|
|
cc2ee3d7ca | |
|
|
749464989f | |
|
|
4535cfc7ad | |
|
|
7726ba1d25 | |
|
|
4252ddd1cd | |
|
|
b8c5061c40 | |
|
|
398b561be6 | |
|
|
0e5f22ed49 | |
|
|
1894f05981 | |
|
|
e6e5b19fde | |
|
|
dffa2df965 | |
|
|
5896b5c167 | |
|
|
21e897ed5d | |
|
|
3616f9ca86 | |
|
|
f4c3c6a25c | |
|
|
640e8981e8 | |
|
|
d362563e61 | |
|
|
de31409392 | |
|
|
9205790387 | |
|
|
d4203520d0 | |
|
|
163876482f | |
|
|
9e233dbc4a | |
|
|
3be1e15f4a | |
|
|
ede57eb22a |
|
|
@ -1,4 +1,5 @@
|
|||
*.html
|
||||
/site/sitemap.xml
|
||||
/site/news/index*
|
||||
/site/sitemap.md
|
||||
/site/push
|
||||
|
|
|
|||
|
|
@ -1,10 +1,10 @@
|
|||
---
|
||||
title: Kontakt
|
||||
title: Kontakt der Libreboot projekt
|
||||
x-toc-enable: true
|
||||
...
|
||||
|
||||
Buy Libreboot pre-installed
|
||||
==========
|
||||
--------------------
|
||||
|
||||
If you want professional installation, Minifree Ltd sells [Libreboot
|
||||
pre-installed](https://minifree.org/) on select hardware, and it also provides
|
||||
|
|
@ -18,13 +18,13 @@ If you're installing Libreboot yourself, support for that is also available.
|
|||
Contact information (IRC, mailing list etc) is below:
|
||||
|
||||
User support
|
||||
============
|
||||
------------
|
||||
|
||||
IRC oder Reddit werden bevorzugt, sofern Du eine Support Anfrage hast (IRC empfohlen).
|
||||
Für Informationen bzgl. IRC and Reddit siehe unten.
|
||||
|
||||
Mailing list
|
||||
============
|
||||
------------
|
||||
|
||||
Libreboot has this mailing list:
|
||||
<https://lists.sr.ht/~libreboot/libreboot>
|
||||
|
|
@ -32,7 +32,7 @@ Libreboot has this mailing list:
|
|||
The email address is [~libreboot/libreboot@lists.sr.ht](mailto:~libreboot/libreboot@lists.sr.ht)
|
||||
|
||||
Entwicklungs Diskussion
|
||||
======================
|
||||
---------------------
|
||||
|
||||
Siehe unter
|
||||
[der Git Seite](git.md) für Informationen wie Du dich an der Entwicklung beteiligen kannst.
|
||||
|
|
@ -40,7 +40,7 @@ Siehe unter
|
|||
Hier finden sich ebenso Anleitungen zum Senden von Patches (via Pull-Requests).
|
||||
|
||||
IRC Chatraum
|
||||
============
|
||||
-------------
|
||||
|
||||
IRC ist hauptsächlich der Weg um Kontakt Libreboot Projekt aufzunehmen. `#libreboot` auf Libera
|
||||
IRC.
|
||||
|
|
@ -71,12 +71,11 @@ Website erläutern wie dies funktioniert:
|
|||
Grundsätzlich solltest Du die Dokumentation der von Dir verwendeten IRC Software konsultieren.
|
||||
|
||||
Soziale Medien
|
||||
============
|
||||
-----------------
|
||||
|
||||
Libreboot existiert offiziell an vielen Orten.
|
||||
|
||||
Mastodon
|
||||
--------
|
||||
### Mastodon
|
||||
|
||||
Gründerin und Haupt-Entwicklerin, Leah Rowe, ist auf Mastodon:
|
||||
|
||||
|
|
@ -85,8 +84,7 @@ Gründerin und Haupt-Entwicklerin, Leah Rowe, ist auf Mastodon:
|
|||
Leah kann zudem unter dieser eMail kontaktiert werden:
|
||||
[leah@libreboot.org](mailto:leah@libreboot.org)
|
||||
|
||||
Reddit
|
||||
------
|
||||
### Reddit
|
||||
|
||||
Hauptsächlich verwendet als Support Kanal und für Veröffentlichung von Neuigkeiten:
|
||||
<https://www.reddit.com/r/libreboot/>
|
||||
|
|
|
|||
|
|
@ -0,0 +1,79 @@
|
|||
---
|
||||
title: Contact the Libreboot project
|
||||
x-toc-enable: true
|
||||
...
|
||||
|
||||
Où acheter du matériel avec Libreboot pré-installé
|
||||
---------------------------------------------
|
||||
|
||||
Si vous souhaitez une installation professionnelle, Minifree Ltd vend des ordinateurs avec [Libreboot pré-installé](https://minifree.org/). L'entreprise propose également [un service d'installation de Libreboot](https://minifree.org/product/installation-service/) si vous voulez l'installer sur votre propre machine.
|
||||
|
||||
Leah Rowe, fondateur et principal développeur du projet Libreboot, est également propriétaire de Minifree Ltd. Les ventes contribuent à financer le développement du projet Libreboot.
|
||||
|
||||
Si vous installez Libreboot vous-même, un support est disponible via différents canaux de communication (IRC, mail, etc.) :
|
||||
|
||||
|
||||
Suport utilisateur
|
||||
------------------
|
||||
|
||||
IRC et Reddit sont recommandés pour demander de l'aide (IRC est à privilégier) :
|
||||
|
||||
|
||||
Mail
|
||||
----
|
||||
|
||||
Libreboot dispose d'une liste de diffusion : <https://lists.sr.ht/~libreboot/libreboot>
|
||||
|
||||
L'adresse mail est [~libreboot/libreboot@lists.sr.ht](mailto:~libreboot/libreboot@lists.sr.ht)
|
||||
|
||||
Discussion sur le developpement
|
||||
-------------------------------
|
||||
|
||||
Pour participer au développement, consultez la pag [GIT](git.md) du projet. Vous y trouverez des instructions détaillées sur l'envoi de patchs via pull request.
|
||||
|
||||
IRC chatroom
|
||||
------------
|
||||
|
||||
Le chat IRC est le principal moyen de contact pour le projet Libreboot via `#libreboot` sur Libera IRC.
|
||||
|
||||
Webchat:
|
||||
<https://web.libera.chat/#libreboot>
|
||||
|
||||
Libera est un des plus grands réseaux IRC utilisé pour les projets en lien avec le logiciel libre. Vous trouverez plus d'information ici : <https://libera.chat/>
|
||||
|
||||
Si vous souhaitez vous connecter via votre client préféré ( comme weechat ou irssi), veuillez utiliser ces informations :
|
||||
|
||||
* Server: `irc.libera.chat`
|
||||
* Channel: `#libreboot`
|
||||
* Port (TLS): `6697`
|
||||
* Port (non-TLS): `6667`
|
||||
|
||||
Nous vous recommandons d'utiliser le port `6697` avec l'encryption TLS activée.
|
||||
|
||||
Il est recommandé d'utiliser SASL pour l'authentification. Ces pages vous indiqueront comment l'utiliser :
|
||||
|
||||
* WeeChat SASL guide: <https://libera.chat/guides/weechat>
|
||||
* Irssi SASL guide: <https://libera.chat/guides/irssi>
|
||||
* HexChat SASL guide: <https://libera.chat/guides/hexchat>
|
||||
|
||||
De manière générale, reportez-vous à la documentation de votre logiciel IRC.
|
||||
|
||||
|
||||
Réseaux sociaux
|
||||
---------------
|
||||
|
||||
Libreboot existe officiellement sur différents réseaux sociaux.
|
||||
|
||||
### Mastodon
|
||||
|
||||
Le fondateur et principal developpeur, Leah Rowe, est sur Mastodon:
|
||||
|
||||
* <https://mas.to/@libreleah>
|
||||
|
||||
Leah peut également être contacté par mail :
|
||||
[leah@libreboot.org](mailto:leah@libreboot.org)
|
||||
|
||||
### Reddit
|
||||
|
||||
Généralement utilisé pour le support mais aussi pour l'annonces des dernières nouveautés :
|
||||
<https://www.reddit.com/r/libreboot/>
|
||||
|
|
@ -4,7 +4,7 @@ x-toc-enable: true
|
|||
...
|
||||
|
||||
Buy Libreboot pre-installed
|
||||
==========
|
||||
---------------------------
|
||||
|
||||
If you want professional installation, Minifree Ltd sells [Libreboot
|
||||
pre-installed](https://minifree.org/) on select hardware, and it also provides
|
||||
|
|
@ -18,14 +18,14 @@ If you're installing Libreboot yourself, support for that is also available.
|
|||
Contact information (IRC, mailing list etc) is below:
|
||||
|
||||
Supporto utenti
|
||||
===============
|
||||
---------------
|
||||
|
||||
IRC o Reddit sono consigliati, sebbene preferiamo che usi il canale IRC
|
||||
per avere o per offrire supporto tecnico. Continua a leggere per avere
|
||||
ulteriori informazioni.
|
||||
|
||||
Mailing list
|
||||
============
|
||||
------------
|
||||
|
||||
Libreboot has this mailing list:
|
||||
<https://lists.sr.ht/~libreboot/libreboot>
|
||||
|
|
@ -33,7 +33,7 @@ Libreboot has this mailing list:
|
|||
The email address is [~libreboot/libreboot@lists.sr.ht](mailto:~libreboot/libreboot@lists.sr.ht)
|
||||
|
||||
Discussione sullo sviluppo
|
||||
==========================
|
||||
--------------------------
|
||||
|
||||
Per ora dai un occhiata sulla
|
||||
[pagina Git](git.md) per avere maggiori informazioni su come puoi
|
||||
|
|
@ -43,7 +43,7 @@ Su quella stessa pagina puoi trovare informazioni su come inviare
|
|||
correzioni (patches) tramite pull requests.
|
||||
|
||||
Canale IRC
|
||||
==========
|
||||
----------
|
||||
|
||||
IRC e' il modo principale per contattare chi collabora con il progetto libreboot.
|
||||
Il canale ufficiale e' `#libreboot` su Libera IRC.
|
||||
|
|
@ -73,26 +73,22 @@ di Libera spiegano come:
|
|||
Comunque dovresti sempre controllare la documentazione del tuo client IRC preferito.
|
||||
|
||||
Reti sociali online
|
||||
===================
|
||||
-------------------
|
||||
|
||||
Libreboot esiste ufficialmente in molte piattaforme.
|
||||
|
||||
Mastodon
|
||||
--------
|
||||
### Mastodon
|
||||
|
||||
Il fondatore e sviluppatore principale, Leah Rowe, e' su Mastodon:
|
||||
|
||||
* <https://mas.to/@libreleah>
|
||||
|
||||
Posta elettronica
|
||||
-----------------
|
||||
### Posta elettronica
|
||||
|
||||
Leah puo' essere contattata anche via email a questo indirizzo:
|
||||
[leah@libreboot.org](mailto:leah@libreboot.org)
|
||||
|
||||
Reddit
|
||||
------
|
||||
### Reddit
|
||||
|
||||
Usato principalmente come canale di supporto e per annunciare notizie:
|
||||
<https://www.reddit.com/r/libreboot/>
|
||||
|
||||
|
|
|
|||
|
|
@ -1,10 +1,10 @@
|
|||
---
|
||||
title: Contact
|
||||
title: Contact the Libreboot project
|
||||
x-toc-enable: true
|
||||
...
|
||||
|
||||
Buy Libreboot pre-installed
|
||||
==========
|
||||
--------------------------
|
||||
|
||||
If you want professional installation, Minifree Ltd sells [Libreboot
|
||||
pre-installed](https://minifree.org/) on select hardware, and it also provides
|
||||
|
|
@ -18,13 +18,13 @@ If you're installing Libreboot yourself, support for that is also available.
|
|||
Contact information (IRC, mailing list etc) is below:
|
||||
|
||||
User support
|
||||
============
|
||||
-------------
|
||||
|
||||
IRC or Reddit are recommended, if you wish to ask for support (IRC recommended).
|
||||
See below for information about IRC and Reddit.
|
||||
|
||||
Mailing list
|
||||
============
|
||||
------------
|
||||
|
||||
Libreboot has this mailing list:
|
||||
<https://lists.sr.ht/~libreboot/libreboot>
|
||||
|
|
@ -32,7 +32,7 @@ Libreboot has this mailing list:
|
|||
The email address is [~libreboot/libreboot@lists.sr.ht](mailto:~libreboot/libreboot@lists.sr.ht)
|
||||
|
||||
Development discussion
|
||||
======================
|
||||
--------------------
|
||||
|
||||
See notes
|
||||
on [the Git page](git.md) for information about how to assist with development.
|
||||
|
|
@ -40,7 +40,7 @@ on [the Git page](git.md) for information about how to assist with development.
|
|||
Instructions are also on that page for sending patches (via pull requests).
|
||||
|
||||
IRC chatroom
|
||||
============
|
||||
-------------
|
||||
|
||||
IRC is the main way to contact the libreboot project. `#libreboot` on Libera
|
||||
IRC.
|
||||
|
|
@ -71,12 +71,11 @@ website tells you how:
|
|||
In general, you should check the documentation provided by your IRC software.
|
||||
|
||||
Social media
|
||||
============
|
||||
-------------
|
||||
|
||||
libreboot exists officially on many places.
|
||||
|
||||
Mastodon
|
||||
--------
|
||||
### Mastodon
|
||||
|
||||
The founder and lead developer, Leah Rowe, is on Mastodon:
|
||||
|
||||
|
|
@ -85,8 +84,7 @@ The founder and lead developer, Leah Rowe, is on Mastodon:
|
|||
Leah can also be contacted by this email address:
|
||||
[leah@libreboot.org](mailto:leah@libreboot.org)
|
||||
|
||||
Reddit
|
||||
------
|
||||
### Reddit
|
||||
|
||||
Mostly used as a support channel, and also for news announcements:
|
||||
<https://www.reddit.com/r/libreboot/>
|
||||
|
|
|
|||
|
|
@ -4,7 +4,7 @@ x-toc-enable: true
|
|||
...
|
||||
|
||||
Купите Libreboot предустановленным
|
||||
==================================
|
||||
----------------------------------
|
||||
|
||||
Если вы хотите, чтобы профессионал установил Libreboot для вас, то Minifree Ltd продает [Libreboot предустановленным](https://minifree.org/) на определенном оборудование, и также предоставляет сервис по [установке Libreboot](https://minifree.org/product/installation-service/) на ваши машины.
|
||||
|
||||
|
|
@ -13,26 +13,26 @@ x-toc-enable: true
|
|||
Если вы самостоятельно устанавливаете Libreboot, вы можете получить поддержку:
|
||||
|
||||
Поддержка пользователей
|
||||
=======================
|
||||
-----------------------
|
||||
|
||||
IRC и Reddit предпочительнее, если вы хотите попросить помощи (IRC рекомендуется). Информация об IRC и Reddit ниже.
|
||||
|
||||
Почтовая рассылка
|
||||
=================
|
||||
-----------------
|
||||
|
||||
У Libreboot есть своя почтовая рассылка: <https://lists.sr.ht/~libreboot/libreboot>
|
||||
|
||||
Адрес электронной почты: [~libreboot/libreboot@lists.sr.ht](mailto:~libreboot/libreboot@lists.sr.ht)
|
||||
|
||||
Обсуждение разработки
|
||||
=====================
|
||||
---------------------
|
||||
|
||||
Смотрите [страницу по Git](git.md) для того, чтобы узнать, как помогать с разработкой Libreboot.
|
||||
|
||||
На этой странице также содержаться инструкции, как отправлять патчи (с помощью pull request).
|
||||
|
||||
Чат в IRC
|
||||
==========
|
||||
---------
|
||||
|
||||
IRC - главный метод связи с проектом Libreboot. `#libreboot` на Libera IRC.
|
||||
|
||||
|
|
@ -59,10 +59,9 @@ Libera - самая большая сеть IRC, используемая для
|
|||
В общем, вы должны проверить документацию вашего клиента для IRC.
|
||||
|
||||
Социальные сети
|
||||
===============
|
||||
---------------
|
||||
|
||||
Mastodon
|
||||
--------
|
||||
### Mastodon
|
||||
|
||||
Основатель и велущий разработчик, Лия Роу, есть на Mastodon:
|
||||
|
||||
|
|
@ -71,8 +70,7 @@ Mastodon
|
|||
Связаться с Лией также можно и по этому адресу электронной почты:
|
||||
[leah@libreboot.org](mailto:leah@libreboot.org)
|
||||
|
||||
Reddit
|
||||
------
|
||||
### Reddit
|
||||
|
||||
Чаще всего используется для поддержки пользователей, а также для новостей и анонсов:
|
||||
<https://www.reddit.com/r/libreboot/>
|
||||
<https://www.reddit.com/r/libreboot/>
|
||||
|
|
|
|||
|
|
@ -4,7 +4,7 @@ x-toc-enable: true
|
|||
...
|
||||
|
||||
Buy Libreboot pre-installed
|
||||
==========
|
||||
---------------------------
|
||||
|
||||
If you want professional installation, Minifree Ltd sells [Libreboot
|
||||
pre-installed](https://minifree.org/) on select hardware, and it also provides
|
||||
|
|
@ -18,13 +18,13 @@ If you're installing Libreboot yourself, support for that is also available.
|
|||
Contact information (IRC, mailing list etc) is below:
|
||||
|
||||
Підтримка користувачів
|
||||
============
|
||||
----------------------
|
||||
|
||||
IRC або Reddit рекомендовані, якщо ви бажаєте попросити про допомогу (найкраще IRC).
|
||||
Дивіться інформацію нижче щодо IRC та Reddit.
|
||||
|
||||
Mailing list
|
||||
============
|
||||
------------
|
||||
|
||||
Libreboot has this mailing list:
|
||||
<https://lists.sr.ht/~libreboot/libreboot>
|
||||
|
|
@ -32,7 +32,7 @@ Libreboot has this mailing list:
|
|||
The email address is [~libreboot/libreboot@lists.sr.ht](mailto:~libreboot/libreboot@lists.sr.ht)
|
||||
|
||||
Обговорення розробки
|
||||
======================
|
||||
--------------------
|
||||
|
||||
Зараз, подивіться нотатки
|
||||
на [сторінці Git](git.md) для інформації щодо допомоги з розробкою.
|
||||
|
|
@ -40,7 +40,7 @@ The email address is [~libreboot/libreboot@lists.sr.ht](mailto:~libreboot/libreb
|
|||
На цій сторінці також знаходяться інструкції по відправці патчів (через pull request'и).
|
||||
|
||||
Кімната IRC
|
||||
============
|
||||
-----------
|
||||
|
||||
IRC це головний спосіб зв'язку з проектом Libreboot. `#libreboot` на Libera
|
||||
IRC.
|
||||
|
|
@ -71,12 +71,11 @@ Libera є однією з найбільших мереж IRC, використ
|
|||
Взагалі, вам варто перевірити документацію, яка передбачена вашою програмою IRC.
|
||||
|
||||
Соціальні мережі
|
||||
============
|
||||
----------------
|
||||
|
||||
Libreboot офіційно існує в багатьох місцях.
|
||||
|
||||
Mastodon
|
||||
--------------------
|
||||
### Mastodon
|
||||
|
||||
Засновник та головний розробник, Лія Роу, є в Mastodon:
|
||||
|
||||
|
|
@ -85,8 +84,7 @@ Mastodon
|
|||
Також можливо зв'язатися з Лією за ії електронною адресою:
|
||||
[leah@libreboot.org](mailto:leah@libreboot.org)
|
||||
|
||||
Reddit
|
||||
------
|
||||
### Reddit
|
||||
|
||||
Найбільше використовується як канал підтримки, та також для оголошення новин:
|
||||
<https://www.reddit.com/r/libreboot/>
|
||||
|
|
|
|||
489
site/contrib.md
489
site/contrib.md
|
|
@ -1,5 +1,5 @@
|
|||
---
|
||||
title: Project contributors
|
||||
title: People who contributed to the Libreboot project
|
||||
x-toc-enable: true
|
||||
...
|
||||
|
||||
|
|
@ -10,9 +10,6 @@ If we forgot to mention you here, let us know and we'll add you. (or if
|
|||
you don't want to be mentioned, let us know and we'll remove your
|
||||
entry)
|
||||
|
||||
Information about who works on libreboot, and how the project is run, can
|
||||
be found on this page: [who.md](who.md)
|
||||
|
||||
You can know the history of the libreboot project, simply by reading this page.
|
||||
It goes into detail about all of the major contributions to the project, and in
|
||||
general how the project was created (and who helped create it).
|
||||
|
|
@ -40,32 +37,15 @@ works on all aspects of libreboot, such as:
|
|||
that libreboot uses
|
||||
* Providing user support on IRC
|
||||
|
||||
Caleb La Grange
|
||||
---------------
|
||||
|
||||
**Secondary developer, number two to Leah.** Caleb is a full time libreboot developer
|
||||
with a narrower focus. Caleb focuses on several areas of development:
|
||||
|
||||
* Build system. Caleb is responsible for improving and fixing the libreboot Make build
|
||||
system. Specifically: automation, and reproducibility.
|
||||
* Hardware modification. Caleb has a passion for hardware alteration; soldering,
|
||||
desoldering, and testing libreboot software on the resulting hardware.
|
||||
* Board porting. Anything supported in Coreboot can be ported to libreboot, Caleb
|
||||
will test and port any board he can get his hands on. Additionally, anyone can
|
||||
contact Caleb to generate libreboot roms for testing on their board.
|
||||
* Documentation. Caleb actively maintains documentation on the above areas of
|
||||
interest. Additionally, Caleb is responsible for disassembly guides with his own
|
||||
pictures and diagrams for several boards.
|
||||
* User support. Caleb is active on irc and willing to help any user interested in
|
||||
using libreboot or in need of help.
|
||||
* Project goals. Caleb collaborates with Leah on determining project goals.
|
||||
Leah has the final say in every decision.
|
||||
Check the Git repositories to find my own contributions to the project. There
|
||||
are a lot, too many to list here, but my work is enabled by the many people
|
||||
who help me, and those who work on all the upstream projects that I use in
|
||||
Libreboot. I regularly work with all sorts of people.
|
||||
|
||||
External projects
|
||||
=================
|
||||
-----------------
|
||||
|
||||
Coreboot project
|
||||
----------------
|
||||
### Coreboot project
|
||||
|
||||
Without coreboot, the libreboot project simply would not be possible.
|
||||
|
||||
|
|
@ -73,28 +53,36 @@ The people and companies that work on coreboot are numerous, and they make the
|
|||
libreboot project what it is. The libreboot project makes heavy use of coreboot, to
|
||||
provide hardware initialization.
|
||||
|
||||
GRUB
|
||||
--------
|
||||
### GRUB
|
||||
|
||||
GRUB is the bootloader used by libreboot. It goes without saying that the GRUB
|
||||
developers enable libreboot, through their work.
|
||||
|
||||
SeaBIOS
|
||||
-------
|
||||
### SeaBIOS
|
||||
|
||||
The libreboot firmware provides SeaBIOS as a payload option. SeaBIOS provides a
|
||||
legacy x86 BIOS implementation.
|
||||
|
||||
U-Boot
|
||||
------
|
||||
### U-Boot
|
||||
|
||||
Libreboot uses U-Boot as the coreboot payload on supported ARM Chromebooks.
|
||||
|
||||
Contributors in alphabetical order
|
||||
==================================
|
||||
### Flashprog
|
||||
|
||||
Alper Nebi Yasak
|
||||
----------------
|
||||
Libreboot uses Nico Huber's *flashprog* to provide flashing on all boards;
|
||||
without this code, you would not be able to install Libreboot in freedom,
|
||||
because other NOR flashing tools are typically proprietary (and not as good).
|
||||
|
||||
Contributors in alphabetical order
|
||||
------------------------------
|
||||
|
||||
### Alexei Sorokin
|
||||
|
||||
Sent minor fixes to lbmk; improved sha512sum verification on images, config
|
||||
improvements e.g. hide MEI device where neutered ME is used. General
|
||||
improvements and tweaks.
|
||||
|
||||
### Alper Nebi Yasak
|
||||
|
||||
Contributed the build system integration and documentation for using
|
||||
U-Boot as payload, and initial Libreboot ports of some ARM Chromebooks
|
||||
|
|
@ -103,8 +91,7 @@ based on that.
|
|||
Alper also does upstream development on U-Boot, e.g. continued an almost
|
||||
complete port of the `gru-kevin` board and got it merged upstream.
|
||||
|
||||
Alyssa Rosenzweig
|
||||
-----------------
|
||||
### Alyssa Rosenzweig
|
||||
|
||||
Switched the website to use markdown in lieu of handwritten HTML and custom
|
||||
PHP. **Former libreboot project maintainer (sysadmin for libreboot.org).**
|
||||
|
|
@ -117,18 +104,52 @@ now been heavily modified and forked into a formal project, by Leah Rowe:
|
|||
Alyssa's original work on the static site generator that Libreboot used to use;
|
||||
the Libreboot website is now built with Untitled)
|
||||
|
||||
Andrew Robbins
|
||||
--------------
|
||||
### Andrea Perotti
|
||||
|
||||
Sent several small fixes to Libreboot's dependencies scripts for Debian, Fedora
|
||||
and Ubuntu distros.
|
||||
|
||||
### Andrew Robbins
|
||||
|
||||
Worked on large parts of Libreboot's old build system and related documentation.
|
||||
Andrew joined the Libreboot project as a full time developer during June 2017,
|
||||
until his departure in March 2021.
|
||||
until his departure in March 2021. Although the work was ultimately scrapped
|
||||
in 2021, in favour of Libreboot's
|
||||
current [lbmk design](docs/maintain/), he provided countless hours of work to
|
||||
the project over the years, helping users on IRC and generally being a very
|
||||
passionate Libreboot developer.
|
||||
|
||||
Andrew was working on a build system re-write
|
||||
that ultimately never reached a stable state, and he abandoned the project
|
||||
after his work was replaced, but the feeling of disgust that he had was not
|
||||
mutual.
|
||||
|
||||
I, Leah Rowe, am very grateful to Andrew Robbins for his numerous contributions
|
||||
over the years.
|
||||
over the years. Anyone who contributes to Libreboot is a hero. Look at the
|
||||
old Libreboot repository on [notabug](https://notabug.org/libreboot) to find
|
||||
his contributions.
|
||||
|
||||
Arthur Heymans
|
||||
--------------
|
||||
### Angel Pons
|
||||
|
||||
Angel is a coreboot developer. Their contributions are numerous, in that and
|
||||
many other projects. Countless patches in coreboot from them have enabled
|
||||
Libreboot to be what it is.
|
||||
|
||||
The most noteworthy work by Angel, that Libreboot imported, is the native
|
||||
raminit (NRI) for Intel Haswell platform, which Libreboot was able to use
|
||||
for replacing the Intel MRC. Because of these patches, Libreboot is able to
|
||||
provide wholly free initialisation on that platform, in the BIOS region of
|
||||
the flash. For example, the ThinkPad T440p and OptiPlex 9020 ports boot in
|
||||
such a configuration, since these are Haswell machines.
|
||||
|
||||
Over 2000 commits in coreboot were written by Angel, as of January 2025. They
|
||||
are one of coreboot's most active developers.
|
||||
|
||||
### Arsen Arsenović
|
||||
|
||||
Added the config for ThinkPad T430 to Libreboot.
|
||||
|
||||
### Arthur Heymans
|
||||
|
||||
Merged a patch from coreboot into libreboot, enabling C3 and C4 power
|
||||
states to work correctly on GM45 laptops. This was a long-standing issue
|
||||
|
|
@ -141,8 +162,54 @@ project. He still works on coreboot, to this day, and Libreboot greatly
|
|||
benefits from his work. His contributions to the coreboot project, and Libreboot,
|
||||
are invaluable.
|
||||
|
||||
Damien Zammit
|
||||
-------------
|
||||
### Ben Westover
|
||||
|
||||
Added info about internal flashing for Dell OptiPlex 9020, in the Libreboot
|
||||
documentation.
|
||||
|
||||
### Caleb La Grange
|
||||
|
||||
Caleb contributed heavily to the Libreboot build system, and even implemented
|
||||
the first version of
|
||||
Libreboot's [vendor inject script](docs/install/ivy_has_common.md), back when
|
||||
it was part of the erstwhile osboot project, which formally merged with
|
||||
Libreboot in November 2022.
|
||||
|
||||
Before Caleb came along, Libreboot didn't have any sort of structure in its
|
||||
package management. The current `include/git.sh` script in Libreboot, which
|
||||
uses a centralised set of configuration files, is ultimately derived from the
|
||||
work that Caleb did.
|
||||
|
||||
Caleb was the one who figured out how to auto-download and neuter the Intel ME
|
||||
on ThinkPad T440p, where previous osboot versions had used one that had to be
|
||||
extracted from a dump of the original firmware; the Heads project also made use
|
||||
of his work, in their project, to add the ThinkPad T440p, since their build
|
||||
system focuses a lot on reproducibility so they place an emphasis on auto
|
||||
downloading such files, to get the same version each time. Caleb's work in
|
||||
Libreboot was largely inspired by Heads, which did the same thing at that time
|
||||
on the ThinkPad X230. Libreboot's checksum-based design was also implemented
|
||||
by him; when inserting vendor files, checksums are verified on images, to
|
||||
ensure that they match what was built in the original release, for each given
|
||||
release.
|
||||
|
||||
Caleb worked heavily on the Libreboot documentation, vastly improving much of
|
||||
the installation instructions, and provided a lot of user support on IRC.
|
||||
|
||||
In general, Caleb heavily audited the entire project. The very nature of its
|
||||
design, now, is based directly on the work that he did, when looking at the
|
||||
design of the build system. The various Libreboot build system audits that
|
||||
started in 2023 were essentially turbo-charged versions of the same work he
|
||||
was doing.
|
||||
|
||||
Caleb has also been a good friend to me, Leah, and provided a lot of advice
|
||||
during the osboot merger. I avoided a lot of stupid mistakes because of his
|
||||
advice.
|
||||
|
||||
### Canberk TURAN
|
||||
|
||||
Added Turkish Q keyboard layout to Libreboot's GRUB payload.
|
||||
|
||||
### Damien Zammit
|
||||
|
||||
Maintains the Gigabyte GA-G41M-ES2L coreboot port, which is integrated
|
||||
in libreboot. Also works on other hardware for the benefit of the
|
||||
|
|
@ -152,8 +219,11 @@ Damien didn't work directly on Libreboot itself, but he worked heavily with
|
|||
Leah Rowe, integrating patches and new board ports into Libreboot, based on
|
||||
Damien's upstream work on coreboot.
|
||||
|
||||
Denis Carikli
|
||||
-------------
|
||||
### Daniil Prokofev
|
||||
|
||||
Translated several Libreboot website pages into the Russian language.
|
||||
|
||||
### Denis Carikli
|
||||
|
||||
Based on the work done by Peter Stuge, Vladimir Serbinenko and others in
|
||||
the coreboot project, got native graphics initialization to work on the
|
||||
|
|
@ -174,8 +244,52 @@ didn't work with ACPI based brightness controls. Others in coreboot later
|
|||
improved it, making ACPI-based backlight controls work properly, based on this
|
||||
earlier work.
|
||||
|
||||
Ferass El Hafidi
|
||||
--------
|
||||
Very cool guy!!!
|
||||
|
||||
### Eason aka ezntek
|
||||
|
||||
Sent a SOIC8 photo for Raspberry Pi Pico pinout, where previously only SOIC16
|
||||
info existed. Also added info about `thinkpad_acpi` Linux kernel module for
|
||||
ThinkPad T480.
|
||||
|
||||
I (Leah) worked with ezntek on some testing and he discovered several bugs
|
||||
on the ThinkPad T480, while Mate and I were working on it for Libreboot.
|
||||
|
||||
ezntek wrote this guide:
|
||||
<https://ezntek.com/posts/librebooting-the-thinkpad-t480-20241207t0933/>
|
||||
|
||||
This guide was written based on my and other people's help, on IRC, while we
|
||||
were in the process of adding the T480 to Libreboot. Several parts of this guide
|
||||
were in fact used to improve the Libreboot guide, such as the info about how
|
||||
to update the Lenovo UEFI firmware prior to Libreboot installation, by using
|
||||
USB boot media instead of needing to boot Windows.
|
||||
|
||||
Eason's guide also made number one on hacker news that day, and as a result,
|
||||
many more people learned about Libreboot, especially its support for T480,
|
||||
which helped to spread the news about the work.
|
||||
|
||||
Absolute legend. One of Libreboot's many great champions.
|
||||
|
||||
### E. Blåsten
|
||||
|
||||
Documented several quirks of the MacBook2,1 and ThinkPad X200T, such as
|
||||
swivel/rotation on X200T, and various alt keys on the MacBook to make it more
|
||||
usable with Linux, when used on Libreboot.
|
||||
|
||||
Also helped me (Leah) in a very fundamental way, in 2018. The help I got enabled
|
||||
me to be who I am today.
|
||||
|
||||
### Fedja Beader
|
||||
|
||||
Wrote several guides for Libreboot, including the original version of the
|
||||
GRUB hardening guide. Wrote the info about the Linux kernel panic/netconsole
|
||||
on Libreboot's FAQ.
|
||||
|
||||
Also sent some small fixes to Libreboot's GRUB configuration, enabling USB
|
||||
devices to boot more reliably. Also improved Libreboot's documentation
|
||||
pertaining to Full Disk Encryption.
|
||||
|
||||
### Ferass El Hafidi
|
||||
|
||||
Added cstate 3 support on macbook21, enabling higher battery life and cooler
|
||||
CPU temperatures on idle usage.
|
||||
|
|
@ -184,17 +298,44 @@ Also has a series of extensive improvements to the entire Libreboot system;
|
|||
for example, Ferass made the entire build system use POSIX `sh`, removing
|
||||
bashisms that previously plagued it.
|
||||
|
||||
Libreboot's original support for cross-compiling AArch64 coreboot was added
|
||||
by him. He also submitted a few bug fixes to the GRUB configuration used by
|
||||
Libreboot.
|
||||
|
||||
This is IRC nick `f_` on Libreboot IRC. Cool guy!
|
||||
|
||||
Jeroen Quint
|
||||
------------
|
||||
### hslick
|
||||
|
||||
Documented Arch Linux ARM installation on ARM64 U-Boot targets.
|
||||
|
||||
### Integral
|
||||
|
||||
Translated the Libreboot home page into Chinese language.
|
||||
|
||||
### Jason Lenz
|
||||
|
||||
Sent instructions for installing Debian Linux on ARM64-based chromebooks
|
||||
with Libreboot and Alper's U-Boot ARM64 payload.
|
||||
|
||||
### Jeroen Quint
|
||||
|
||||
Contributed several fixes to the libreboot documentation, relating to
|
||||
installing on Arch-based systems with full disk encryption on libreboot
|
||||
systems.
|
||||
|
||||
Joshua Gay
|
||||
----------
|
||||
### John Doe
|
||||
|
||||
This person never gave their name, but they sent two patches:
|
||||
|
||||
```
|
||||
* 676eb110c7f Perform the silentoldconfig step of seabios before full make
|
||||
* acc57bda6df scripts: process git versions when lbmk is a worktree or submodule
|
||||
```
|
||||
|
||||
Every contribution is appreciated. Every contributor gets their own entry in
|
||||
the Libreboot Hall of Fame.
|
||||
|
||||
### Joshua Gay
|
||||
|
||||
Joshua was in a position during 2014-2016 to help promote Libreboot in the
|
||||
media, in his capacity working for the employer he worked for at the time;
|
||||
|
|
@ -204,14 +345,16 @@ He made sure everyone knew what I was doing, and he taught me a *lot* about
|
|||
licensing; many of Libreboot's practises today are still based on his lessons,
|
||||
such as the pitfalls of GPL compliance and how to really audit everything.
|
||||
|
||||
Klemens Nanni
|
||||
-------------
|
||||
### Klemens Nanni
|
||||
|
||||
Made many fixes and improvements to the GRUB configuration used in
|
||||
libreboot, and several tweaks to the build system.
|
||||
|
||||
Lisa Marie Maginnis
|
||||
-------------------
|
||||
### Linear Cannon
|
||||
|
||||
Added NetBSD support for `dell-flash-unlock`.
|
||||
|
||||
### Lisa Marie Maginnis
|
||||
|
||||
Lisa was one of Libreboot's early contributors to Libreboot. She personally
|
||||
helped me set up a lot of the early infrastructure, including things like IRC,
|
||||
|
|
@ -225,8 +368,15 @@ in Libreboot, e.g. ASUS Chromebook C201PA - at the time, this was using
|
|||
Google's own Depthcharge payload, which you can find in 2016 Libreboot
|
||||
releases.
|
||||
|
||||
Lorenzo Aloe
|
||||
------------
|
||||
### Livio
|
||||
|
||||
Sent a small enhancement for GRUB, allowing the user to turn on or off several
|
||||
options at boot time, such as graphical options or spkmodem output, so that
|
||||
these features can be included on every image, and used flexibly.
|
||||
|
||||
Sent some small fixes to the QEMU target, fixing a bug in the SMBIOS info.
|
||||
|
||||
### Lorenzo Aloe
|
||||
|
||||
Provided hardware testing for the [Dell OptiPlex 9020](docs/install/dell9020.md),
|
||||
also provided testing for proxmox with GPU passthrough on Dell Precision T1650,
|
||||
|
|
@ -236,13 +386,63 @@ that OS is not natively supported.
|
|||
|
||||
All round good guy, an honest and loyal fan.
|
||||
|
||||
Marcus Moeller
|
||||
--------------
|
||||
### Luke T. Shumaker
|
||||
|
||||
Sent a patch to Libreboot, fixing vboot on 32-bit (i686) hosts; it previously
|
||||
only compiled on 64-bit x86 (amd64) machines.
|
||||
|
||||
### Marcus Moeller
|
||||
|
||||
Made the libreboot logo.
|
||||
|
||||
Nicholas Chin
|
||||
-------------
|
||||
### Mate Kukri
|
||||
|
||||
Mate Kukri is a *major* contributor to Libreboot, and several of the upstreams
|
||||
that it uses; he is a coreboot developer, and also contributes heavily to the
|
||||
GRUB bootloader project.
|
||||
|
||||
Off the top of my head, here are just a few of the contributions that he has
|
||||
made:
|
||||
|
||||
* Wrote several enhancements for `pico-serprog`, based on the original work
|
||||
done by [stacksmashing](https://github.com/stacksmashing), who also has
|
||||
this very interesting [youtube channel](https://www.youtube.com/channel/UC3S8vxwRfqLBdIhgRlDRVzw);
|
||||
Riku's work is heavily inspired by Mate's and stacksmashing's work.
|
||||
* Ported the Dell OptiPlex 9020 SFF and MT, and provided several fixes on it
|
||||
for the Libreboot project; several fixes that I (Leah) did were also based on
|
||||
advice that he gave me.
|
||||
* Wrote the [deguard](docs/install/deguard.md) utility for disabling Intel
|
||||
Boot Guard on MEv11; this is used for the Dell OptiPlex 3050 Micro
|
||||
and ThinkPad T480 ports.
|
||||
* Ported the Dell OptiPlex 3050 Micro and Lenovo ThinkPad T480/T480s to
|
||||
coreboot, directly providing Leah with advice when integrating these ports
|
||||
into Libreboot. This work included heavy amounts of reverse engineering
|
||||
Lenovo's EC firmware.
|
||||
* Ported the ASUS H610M-K D4 motherboard to coreboot, an Alderlake machine that
|
||||
Libreboot is interested in, for the release planned by April 2025; this
|
||||
bullet-point is being written on 5 January 2025 prior to its addition in
|
||||
Libreboot.
|
||||
* Wrote the NVMe driver that Libreboot uses in GRUB, based upon work done for
|
||||
the SeaBIOS project.
|
||||
|
||||
Mate Kukri is a hero to the Libreboot project. Without him, Libreboot would not
|
||||
be what it is today.
|
||||
|
||||
### Michael Reed
|
||||
|
||||
Wrote Libreboot's original OpenBSD installation guide.
|
||||
|
||||
Also sent fixes to the original static site generator that Alyssa wrote, upon
|
||||
which the Untitled Static Site Generator was later based.
|
||||
|
||||
### Michał Masłowski
|
||||
|
||||
Sent several fixes to Libreboot's early build system, back in the early days
|
||||
of the project. Also taught Leah how to use Git, because the very first revisions
|
||||
were released only as tarballs, without Git history; the first commits in
|
||||
the old repository were imports of those tarballs.
|
||||
|
||||
### Nicholas Chin
|
||||
|
||||
[Ported Dell Latitude E6400 to Libreboot](news/e6400.md)
|
||||
and also [Dell Latitude E6430](docs/install/latitude.md) - author of
|
||||
|
|
@ -250,23 +450,52 @@ the `dell-flash-unlock` (formerly `e6400-flash-unlock`) utility, which
|
|||
can unlock the flash on these boards, allowing internal flashing of
|
||||
Libreboot directly from host OS running under the original Dell firmware.
|
||||
|
||||
Patrick "P. J." McDermott
|
||||
---------------------------
|
||||
Nicholas has ported many more Dell Latitude laptops to Libreboot, and he works
|
||||
heavily on the upstream coreboot project. In fact, *every* Dell Latitude
|
||||
board supported in Libreboot was done by him, at least as of 5 January 2025.
|
||||
|
||||
Nicholas has provided countless hours of user support on the Libreboot IRC
|
||||
channel and in those of projects which Libreboot uses, and submitted many
|
||||
fixes to Libreboot, both in terms of code and documentation.
|
||||
|
||||
He has advised me, Leah, on many occasions, teaching me things. Needless to
|
||||
say, he is one of Libreboot's champions.
|
||||
|
||||
Nicholas also contributes to coreboot heavily, to flashprog, and several
|
||||
other projects that Libreboot uses.
|
||||
|
||||
### 0xloem
|
||||
|
||||
Added info about LPC flashing on Libreboot's external flashing guide.
|
||||
|
||||
### Patrick "P. J." McDermott
|
||||
|
||||
Patrick also did a lot of research and wrote the libreboot FAQ section
|
||||
relating to the [Intel Management Engine](../faq.md#intelme), in addition
|
||||
to making several improvements to the build system in libreboot. **Former
|
||||
libreboot project maintainer.**
|
||||
|
||||
Paul Kocialkowski
|
||||
-----------------
|
||||
### Patrick Rudolph
|
||||
|
||||
Coreboot developer. Also wrote the xHCI GRUB driver, that Libreboot uses;
|
||||
without it, several ports in Libreboot would not be feasible, unless they
|
||||
excluded GRUB as a payload, because several newer Intel platforms no longer
|
||||
have (or configure) EHCI controllers. Upstream GRUB currently has no xHCI
|
||||
driver, but Patrick sent patches in 2020 that Libreboot later re-based,
|
||||
on top of GRUB 2.12.
|
||||
|
||||
### Paul Kocialkowski
|
||||
|
||||
Ported the ARM (Rockchip RK3288 SoC) based *Chromebook* laptops to
|
||||
libreboot. Also one of the main [Replicant](http://www.replicant.us/)
|
||||
developers.
|
||||
|
||||
Paul Menzel
|
||||
-----------
|
||||
He was also responsible for the original re-write of the Libreboot build
|
||||
system, upon which Libreboot's effort from 2017-2021 was based; ultimately,
|
||||
this work never became stable and the work was scrapped in 2021, in favour of
|
||||
the current Libreboot build system design, named lbmk.
|
||||
|
||||
### Paul Menzel
|
||||
|
||||
Investigated and fixed a bug in coreboot on the ThinkPad X60/T60 exposed
|
||||
by Linux kernel 3.12 and up, which caused 3D acceleration to stop
|
||||
|
|
@ -279,15 +508,17 @@ Paul worked with Libreboot on
|
|||
this, sending patches to test periodically until the bug was fixed
|
||||
in coreboot, and then helped her integrate the fix in libreboot.
|
||||
|
||||
Peter Stuge
|
||||
-----------
|
||||
### Peaksol
|
||||
|
||||
Translated several pages, including the SPI flashing guide, into Chinese
|
||||
language.
|
||||
|
||||
### Peter Stuge
|
||||
|
||||
Helped write the [FAQ section about DMA](../faq.md#hddssd-firmware), and provided
|
||||
general advice in the early days of the project. Peter was a coreboot developer
|
||||
in those days, and a major developer in the *libusb* project (which flashrom
|
||||
in those days, and a major developer in the *libusb* project (which flashprog
|
||||
makes heavy use of).
|
||||
NOTE: Libreboot standardises on [flashprog](https://flashprog.org/wiki/Flashprog)
|
||||
now, as of 27 January 2024.
|
||||
|
||||
Peter also wrote the *bucts* utility used to set Backup Control (BUC) Top Swap
|
||||
(TS) bit on i945 laptops such as ThinkPad X60/T60, which is useful for a
|
||||
|
|
@ -300,16 +531,72 @@ bucts before flashing the ROM again, to flash the main bootblock. Libreboot
|
|||
hosts a copy of his work, because his website hosting bucts is no longer
|
||||
responsive.
|
||||
|
||||
Riku Viitanen
|
||||
-------------
|
||||
### Riku Viitanen
|
||||
|
||||
Added support for HP Elite 8200 SFF desktop PC to Libreboot. You can read
|
||||
about this in the hardware page:
|
||||
|
||||
[HP Elite 8200 SFF](docs/install/hp8200sff.md)
|
||||
|
||||
Steve Shenton
|
||||
-------------
|
||||
Riku also ported the HP Elite 8300 USDT.
|
||||
|
||||
Riku implemented MXM support as an INT15h handler in SeaBIOS, and wrote
|
||||
some tooling for it, which enables the HP EliteBook 8560w port to work reliably
|
||||
in Libreboot.
|
||||
|
||||
Riku also added the HP Folio 9470m to Libreboot.
|
||||
|
||||
Riku is also in charge of Libreboot's fork of `pico-serprog`, which is used
|
||||
to provide serprog firmware on RP2040 and RP2530 devices. These devices can
|
||||
be used to set up a cheap but reliable NOR flasher, which is now the default
|
||||
recommended one for flashing Libreboot externally. Riku's fork contains several
|
||||
enhancements, such as a higher default drive level of 12mA and the ability to
|
||||
control multiple chip select pins, useful for flashing dual-chip Intel boards.
|
||||
|
||||
Riku has submitted numerous bug fixes to many boards, and generally sent many
|
||||
improvements for the build system and also the Libreboot documentation. He
|
||||
also added the HP EliteBook 2560p to Libreboot.
|
||||
|
||||
Riku also contributes to coreboot and flashprog, and several other projects
|
||||
that Libreboot uses.
|
||||
|
||||
### samuraikid
|
||||
|
||||
Added Portuguese keyboard layout to Libreboot's GRUB payload.
|
||||
|
||||
### semigel
|
||||
|
||||
Added BTRFS subvolume support to Libreboot's GRUB configuration, for auto-booting
|
||||
various Linux distros.
|
||||
|
||||
### Simon Glass
|
||||
|
||||
Simon Glass is principally responsible for the x86 U-Boot payload that Libreboot
|
||||
now uses as a coreboot payload. Simon provided Leah with several critical patches
|
||||
and advised Leah on several aspects of U-Boot's design, that helped a lot
|
||||
when integrating it.
|
||||
|
||||
Without him, Libreboot would not have a functioning U-Boot implementation on
|
||||
x86.
|
||||
|
||||
### Snooze Function
|
||||
|
||||
Translated several pages on the Libreboot documentation into the German
|
||||
language.
|
||||
|
||||
### StackSmashing
|
||||
|
||||
Author of the original [pico-serprog](https://github.com/stacksmashing/pico-serprog)
|
||||
project, upon which Libreboot's fork (maintained by Riku Viitanen) is based.
|
||||
|
||||
StackSmashing didn't do this specifically for Libreboot, but their work is
|
||||
outstanding, so their name is honoured here.
|
||||
|
||||
StackSmashing also has a [YouTube channel](https://www.youtube.com/channel/UC3S8vxwRfqLBdIhgRlDRVzw)
|
||||
with a lot of really cool videos on it about all things electronics, and hacking
|
||||
of electronics. Check it out!
|
||||
|
||||
### Steve Shenton
|
||||
|
||||
Steve did the early reverse engineering work on the Intel Flash Descriptor used
|
||||
by ICH9M machines such as ThinkPad X200. He created a C struct defining (using
|
||||
|
|
@ -344,23 +631,21 @@ engineered the layout of the Intel GbE NVM (non-volatile memory) region in the
|
|||
boot flash. This region defines configuration options for the onboard Intel
|
||||
GbE NIC, if present.
|
||||
|
||||
Based on this, I was able to take Steve's initial proof of concept and write
|
||||
Based on this, I was able to take Steve's initial proof of concept
|
||||
and work with him extensively to write
|
||||
the `ich9gen` utility, which generates an Intel Flash Descriptor and GbE NVM
|
||||
region, from scratch, without an Intel ME region defined. It is this tool,
|
||||
the `ich9gen` tool, that Libreboot uses to provide ROM images for GM45+ICH9M
|
||||
region, from scratch, without an Intel ME region defined,
|
||||
without needing a dump of the original Lenovo BIOS firmware.
|
||||
Libreboot used to use `ich9gen` to provide ROM images for GM45+ICH9M
|
||||
platforms (such as ThinkPad X200/T400/T500/W500), with a fully functional
|
||||
descriptor and functional Gigabit Ethernet, but *without* needing Intel
|
||||
Management Engine (ME) firmware, thus making those machines *libre* (the ME
|
||||
is fully disabled, when you use a descriptor+gbe image generated by `ich9gen`).
|
||||
Note that `ich9gen` is now obsolete as the Flash Descriptor and NVM region
|
||||
are generated pre-assembled, and `nvmutil` is used to change MAC addresses
|
||||
instead.
|
||||
|
||||
With *my* `ich9gen` tool (Steve's tool was called `ich9deblob`), you didn't
|
||||
need a dump of the original Lenovo BIOS firmware anymore! I could not have
|
||||
written this tool, without Steve's initial proof of concept. I worked with him,
|
||||
extensively, for many months. All GM45+ICH9M support (X200, T400, etc) in
|
||||
Libreboot is made possible because of the work he did, back in 2014.
|
||||
|
||||
Swift Geek
|
||||
----------
|
||||
### Swift Geek
|
||||
|
||||
Contributed a patch for ich9gen to generate 16MiB descriptors.
|
||||
|
||||
|
|
@ -377,14 +662,17 @@ lot about hardware. Swift Geek also did some upstream development on GRUB.
|
|||
Swift Geek has provided technical advice on numerous occasions, to Leah Rowe,
|
||||
and helped her to improve her soldering skills in addition to teaching her
|
||||
some repair skills, to the point where she can now repair most faults on
|
||||
ThinkPad mainboards (while looking at the schematics and boardview).
|
||||
ThinkPad motherboards (while looking at the schematics and boardview).
|
||||
|
||||
Swiftgeek left the project in March 2021. I, Leah Rowe, wish him all the best
|
||||
in his endeavours, and I'm very grateful to his numerous contributions over the
|
||||
years.
|
||||
|
||||
Timothy Pearson
|
||||
---------------
|
||||
### Timothee Benedet
|
||||
|
||||
Translated several Libreboot website pages into the French language.
|
||||
|
||||
### Timothy Pearson
|
||||
|
||||
Ported the ASUS KGPE-D16 board to coreboot for the company Raptor
|
||||
Engineering of which Timothy is the CEO.
|
||||
|
|
@ -395,8 +683,7 @@ contact details are on the raptor site.
|
|||
**D16 support was removed on 19 November 2022. You can still use older
|
||||
revisions of Libreboot, and older release versions.**
|
||||
|
||||
Vladimir Serbinenko
|
||||
-------------------
|
||||
### Vladimir Serbinenko
|
||||
|
||||
Ported many of the thinkpads supported in libreboot, to coreboot, and
|
||||
made many fixes in coreboot which benefited the libreboot project.
|
||||
|
|
@ -406,3 +693,13 @@ Intel platforms in Libreboot, when flashing it (now rewritten
|
|||
by others in Ada, for libgfxinit in coreboot, but originally it was written in
|
||||
C and included directly in coreboot; libgfxinit is a 3rdparty submodule of
|
||||
coreboot).
|
||||
|
||||
### Vladislav Shapovalov
|
||||
|
||||
Translated several pages of the Libreboot website into Ukranian language.
|
||||
|
||||
-------------------------------------------------------------------------------
|
||||
|
||||
**Did we forget your name?**
|
||||
|
||||
**If so, and you would like to be listed here, please contact the Libreboot project.**
|
||||
|
|
|
|||
|
|
@ -1,26 +1,120 @@
|
|||
---
|
||||
title: BSD operating systems
|
||||
title: Install a BSD operating system on Libreboot
|
||||
x-toc-enable: true
|
||||
...
|
||||
|
||||
Guide last updated on 16 November 2022.
|
||||
It is assumed here that you are using the *SeaBIOS* payload, *not* the GRUB
|
||||
payload; the U-Boot payload may also work, but that is not covered here. The
|
||||
SeaBIOS payload must ideally run in text mode (`txtmode` images from Libreboot
|
||||
releases).
|
||||
|
||||
NOTE: This guide pertains to x86 hosts, and does not cover supported CrOS/ARM
|
||||
chromebooks. For ARM targets, you should refer to u-boot documentation.
|
||||
This guide pertains to x86 hosts, and does not cover supported CrOS/ARM
|
||||
chromebooks. For ARM targets, you should refer to [u-boot
|
||||
documentation](../uboot/) - and [U-Boot x86](../uboot/uboot-x86.md) is also
|
||||
available. The U-Boot x86 payload is interesting, because it can in fact boot
|
||||
OpenBSD via UEFI method (U-Boot provides a lightweight UEFI implementation
|
||||
independently of, say, EDK2).
|
||||
|
||||
libreboot is capable of booting many BSD systems. This section mostly documents
|
||||
the peculiarities of libreboot as it pertains to BSD; you can otherwise refer to
|
||||
the official documentation for whatever BSD system you would like to use.
|
||||
What is BSD?
|
||||
------------
|
||||
|
||||
Kernel Mode Setting
|
||||
===================
|
||||
In our context, we are referring to those descendents of 4.4BSD-Lite starting
|
||||
in the early 1990s. On balance, they are about equal to Linux in many ways,
|
||||
and some would argue that they are *better* (higher code quality). It can be
|
||||
said that the BSDs are the closest we have to *true* open source Unix systems,
|
||||
since they ultimately descend from that code lineage. For example, the
|
||||
FreeBSD project briefly covers its own history in the Hand Book:
|
||||
<https://docs.freebsd.org/en/books/handbook/introduction/#history>
|
||||
|
||||
Chief among them are:
|
||||
|
||||
* [FreeBSD](https://www.freebsd.org/) (HardenedBSD probably also works)
|
||||
* [NetBSD](https://netbsd.org/)
|
||||
* [OpenBSD](https://www.openbsd.org/)
|
||||
* [DragonFlyBSD](https://www.dragonflybsd.org/) (UNTESTED)
|
||||
|
||||
**TODO: DragonFlyBSD is untested, as of January 2025. It ought to be tested.**
|
||||
|
||||
Many other BSD systems exist, that are largely derived from these.
|
||||
|
||||
Why use BSD (instead of Linux)?
|
||||
-------------------------------
|
||||
|
||||
BSD operating systems are in wide use today, powering much of the world's
|
||||
most critical infrastructure, and they're quite competent laptop/desktop or
|
||||
workstation systems. Some of them have unique features that you can't find
|
||||
anywhere else (e.g. FreeBSD jails, OpenBSD's numerous security enhancements,
|
||||
NetBSD's rump kernel design and clean code quality).
|
||||
|
||||
BSD systems are superficially similar to Linux systems, but they are very
|
||||
different under the hood (different kernel designs, different userspace
|
||||
implementations, and so on). However, almost all of the Linux userspace programs
|
||||
that you enjoy using are probably available in the various BSD *ports trees*,
|
||||
or they can be compiled with little to no modification. This is because, despite
|
||||
the actual differences under the hood, the BSDs and various Linux distros all
|
||||
adhere to the same basic standards (e.g. Single Unix Specification).
|
||||
|
||||
If you want to enjoy using a high quality operating system, with many unique
|
||||
features, BSD systems can be quite fun to use, and quite challenging. They tend
|
||||
to have a much more conservative take on implementations, compared to Linux
|
||||
distros, instead opting for technical correctness and minimalism; this is a
|
||||
good thing, because lots of Linux distros these days are extremely bloated.
|
||||
Using a BSD system feels like Linux did in the year 2005, just with much better
|
||||
hardware support, and that's a *good thing*; the reason why is that BSD systems
|
||||
simply have fewer users, and a higher concentration of *technical* users, and
|
||||
this *shows* when you use it. Linux is *much* more mass market and has to cater
|
||||
to all sorts of people, and these days Linux distros have to *Just Work*.
|
||||
|
||||
You can look at the documentation of each BSD system and try each one out, to
|
||||
see which one is right for you. Be warned, BSD systems *are* typically harder
|
||||
to use than Linux systems. Even the most seasoned Linux user will often have a
|
||||
hard time with any BSD, if it's their first time using a BSD system. This is
|
||||
mitigated by excellent documentation, which is one of the things that the BSDs
|
||||
excel at, but you are expected to *read* the documentation; many Linux distros
|
||||
try to hold your hand ("it Just Works"), but the BSDs generally don't do that.
|
||||
|
||||
If you're already a power user on Linux, and comfortable with the more hands-on
|
||||
distros like Arch Linux or Gentoo Linux, you'll have a much easier time
|
||||
learning a BSD. FreeBSD for example comes completely barebones by default, and
|
||||
you add packages to it, configuring it to your liking, much like Arch Linux; if
|
||||
you're wily enough, you might also use the CURRENT tree and install all packages
|
||||
by building them from *ports* (akin to how Gentoo Linux is used).
|
||||
|
||||
BSD systems also have much more relaxed licensing than Linux systems, by and
|
||||
large; most of the software in the base system, on any BSD project, will use
|
||||
a permissive license instead of copyleft. They can be regarded as Free Software,
|
||||
but it's a very different ideology than, say, GNU. Some might argue that this
|
||||
is better, because licensing conflicts are common among copyleft licenses, even
|
||||
among different versions of the GPL. A BSD-style license permits *anyone* to
|
||||
use the code, *without* requiring modified versions to ship source code, so it
|
||||
can be said that the BSD license model contains [far fewer
|
||||
restrictions](https://docs.freebsd.org/en/articles/bsdl-gpl/). One might say
|
||||
that the BSD systems are *more free* than GNU/Linux systems.
|
||||
|
||||
Basically, your choice to use BSD will likely be based on a combination of
|
||||
technical and/or ideological preferences. But don't say we didn't warn you.
|
||||
BSD is hard. On the flip side of that coin, BSD is *easy*, because it forces
|
||||
you to really learn how your system works; when you become proficient with
|
||||
BSD, you'll learn everything else much easier, and you may find yourself doing
|
||||
things more efficiently *in Linux* as well!
|
||||
|
||||
That's enough BSD fanaticism. Please read the following sections, *before*
|
||||
you embark on your BSD Libreboot journey:
|
||||
|
||||
Common issues with BSD+Libreboot
|
||||
--------------------------------
|
||||
|
||||
This page will not tell you how to install BSD systems; that is best left to
|
||||
the documentation for your BSD system. Instead, these next sections cover only
|
||||
the idiosyncrasies of Libreboot as they relate to BSD:
|
||||
|
||||
### Kernel Mode Setting
|
||||
|
||||
Your BSD system *must* support Kernel Mode Setting for your graphics
|
||||
device (most of them do nowadays). The reasons will become apparent, as
|
||||
you read this article.
|
||||
|
||||
Boot BSD, using SeaBIOS
|
||||
=======================
|
||||
### Boot BSD, using SeaBIOS
|
||||
|
||||
On x86 platforms, Libreboot provides the choice of GRUB and/or
|
||||
SeaBIOS payload. GRUB can technically boot BSD kernels, but the code is
|
||||
|
|
@ -37,8 +131,18 @@ If you don't plan to set up Xorg/Wayland, then that's all you really need to
|
|||
do. For example, you might want to run a headless server, in which case you
|
||||
probably don't mind running in text mode all the time.
|
||||
|
||||
OpenBSD and corebootfb
|
||||
----------------------
|
||||
#### GRUB payload
|
||||
|
||||
GRUB *can* directly boot many BSD systems, but this is ill advisable. You are
|
||||
advised to use either SeaBIOS, and boot a BIOS-based BSD bootloader, or use
|
||||
Libreboot's [U-Boot payload](../uboot/) and use it to boot via UEFI; U-Boot's
|
||||
bootflow menu can achieve this.
|
||||
|
||||
The U-Boot coreboot payload is still experimental, on ARM64 *and* x86/x86\_64,
|
||||
so you should probably use SeaBIOS for now (on x86). U-Boot is the *only*
|
||||
coreboot payload for Libreboot on ARM64 motherboards.
|
||||
|
||||
### OpenBSD and corebootfb
|
||||
|
||||
It's still recommended to use SeaBIOS in text mode, but OpenBSD specifically
|
||||
can work with SeaBIOS booting in a coreboot framebuffer, with SeaVGABIOS. In
|
||||
|
|
@ -46,19 +150,22 @@ Libreboot ROM images, this would be SeaBIOS images with `corebootfb` in the
|
|||
file name.
|
||||
|
||||
Make sure to select MBR-style partitioning on the installer, and it will
|
||||
Just Work.
|
||||
Just Work. **GPT partitioning won't work in OpenBSD, if you use the SeaBIOS
|
||||
payload, but will work if you boot/install it via UEFI boot method with
|
||||
Libreboot's [U-Boot UEFI payload](../uboot/uboot-x86.md) instead.**
|
||||
|
||||
If you're using the GRUB payload but SeaBIOS is available in the boot menu,
|
||||
you can just select SeaBIOS at said menu, and OpenBSD will work fine.
|
||||
|
||||
FreeBSD and corebootfb
|
||||
----------------------
|
||||
### FreeBSD and corebootfb
|
||||
|
||||
Assumed broken, so please ensure that you boot with SeaBIOS payload in text
|
||||
mode (lbmk ROM images with `txtmode` in the file name, not `corebootfb`).
|
||||
|
||||
Warnings for X11 users
|
||||
----------------------
|
||||
Please boot in *text mode*. FreeBSD can be configured to use KMS, if you need
|
||||
Xorg or wayland.
|
||||
|
||||
### Warnings for X11 users
|
||||
|
||||
One important peculiarity of most libreboot systems is: VGA mode
|
||||
support exists, if booting with corebootfb (coreboot's own framebuffer) and
|
||||
|
|
@ -113,43 +220,7 @@ You should not rely on the above instruction (for FreeBSD), because the exact
|
|||
step might change, and it does not go into full detail either. Refer to the
|
||||
documentation provided by your system, to know how KMS is configured.
|
||||
|
||||
ALWAYS READ THE MANUAL
|
||||
----------------------
|
||||
|
||||
All of the BSDs have *excellent* documentation; it's one of the defining
|
||||
characteristics, versus typical Linux distros.
|
||||
|
||||
Aside from this quirk in coreboot, regarding *BIOS* video modes, the BSDs
|
||||
otherwise work in exactly the same way as you would expect, and you can
|
||||
follow along to their official documentation without much fuss.
|
||||
|
||||
No specific or detailed guides will be provided here, because SeaBIOS is
|
||||
fairly self-explanatory; you can otherwise refer to the SeaBIOS
|
||||
documentation.
|
||||
|
||||
If you're flashing a ROM for a machine where `seabios_withgrub`
|
||||
and `seabios_grubfirst` ROMs are available, choose `seabios_withgrub`.
|
||||
|
||||
DO NOT USE ROM IMAGES WITH `seabios_grubfirst` IN THE FILE NAME! These were
|
||||
present in older Libreboot releases, and supported in previous revisions
|
||||
of the build system, but they did not work for the intended purpose. More
|
||||
info is written on the [Libreboot installation guide](../install/). ROM
|
||||
images with `seabios_grubfirst` in the filename will NOT be included in
|
||||
future Libreboot releases.
|
||||
|
||||
Dubious mention: Tianocore
|
||||
--------------------------
|
||||
|
||||
Tianocore is extremely bloated, and unauditable, so it is not included
|
||||
in Libreboot firmware, but it is the reference UEFI implementation by
|
||||
Intel and contributors. It can boot most BSD systems very well.
|
||||
|
||||
More robust ways to provide UEFI services in Libreboot are to be investigated.
|
||||
Tianocore integration will not be provided officially, in any current or future
|
||||
releases of Libreboot.
|
||||
|
||||
Desktop users
|
||||
-------------
|
||||
### Desktop users
|
||||
|
||||
NOTE: This section may not be full accurate; for example, the hardware page
|
||||
about HP Elite 8200 SFF talks about use of graphics cards on both corebootfb
|
||||
|
|
@ -173,3 +244,36 @@ extremely expensive computationally speaking. This is why modern kernels
|
|||
You can learn more about INT10H text/VGA modes here:
|
||||
|
||||
<https://en.wikipedia.org/wiki/INT_10H>
|
||||
|
||||
If you use the *U-Boot* payload, INT10H is irrelevant because you will rely on
|
||||
an EFI framebuffer instead, which U-Boot does provide (piggybacking off of the
|
||||
coreboot framebuffer where one is available).
|
||||
|
||||
Regardless of whether you have an EFI framebuffer or INT10H VGA interrupts,
|
||||
the various BSD systems all support KMS so you should be able to use Xorg or
|
||||
Wayland just fine.
|
||||
|
||||
ALWAYS READ THE MANUAL
|
||||
----------------------
|
||||
|
||||
All of the BSDs have *excellent* documentation; it's one of the defining
|
||||
characteristics, versus typical Linux distros. This is precisely *because*
|
||||
the BSDs develop everything in-house, so the various components of a BSD
|
||||
system are much more heavily integrated, and this means that they can provide
|
||||
much more reliable documentation; reliable from both the user's perspective
|
||||
and from the perspective of technical correctness.
|
||||
|
||||
Aside from these and other quirks when installing BSD *on Libreboot*, the BSDs
|
||||
otherwise work in exactly the same way as you would expect, and you can
|
||||
follow along to their official documentation without much fuss.
|
||||
|
||||
No specific or detailed guides will be provided here, because SeaBIOS is
|
||||
fairly self-explanatory; you can otherwise refer to the SeaBIOS
|
||||
documentation.
|
||||
|
||||
DO NOT USE ROM IMAGES WITH `seabios_grubfirst` IN THE FILE NAME! These were
|
||||
present in older Libreboot releases, and supported in previous revisions
|
||||
of the build system, but they did not work for the intended purpose. More
|
||||
info is written on the [Libreboot installation guide](../install/). ROM
|
||||
images with `seabios_grubfirst` in the filename will NOT be included in
|
||||
future Libreboot releases.
|
||||
|
|
|
|||
|
|
@ -0,0 +1 @@
|
|||
Learn how to install OpenBSD, FreeBSD, NetBSD and other BSD operating systems on Libreboot. Libreboot provides free/opensource BIOS/UEFI firmware based on coreboot.
|
||||
|
|
@ -1,32 +1,39 @@
|
|||
---
|
||||
title: Build from source
|
||||
title: Compile Libreboot from source
|
||||
x-toc-enable: true
|
||||
...
|
||||
|
||||
WARNING: Flash from bin/, NOT elf/
|
||||
==================================
|
||||
|
||||
**WARNING: When you build a ROM image from the Libreboot build system, please
|
||||
ensure that you flash the appropriate ROM image from `bin/`, NOT `elf/`.
|
||||
The `elf/` coreboot ROMs do not contain payloads. Libreboot's build system
|
||||
builds no-payload ROMs under `elf/`, and payloads separately under `elf/`. Then
|
||||
it copies from `elf/` and inserts payloads from `elf/`, and puts the final ROM
|
||||
images (containing payloads) in `bin/`. This design is more efficient, and
|
||||
permits many configurations without needless duplication of work. More info
|
||||
is available in the [lbmk maintenance manual](../maintain/)**
|
||||
If you need to build Libreboot from source, this guide is for you.
|
||||
|
||||
Introduction
|
||||
============
|
||||
------------
|
||||
|
||||
libreboot's build system is named `lbmk`, short for `LibreBoot MaKe`, and this
|
||||
Libreboot's build system is named `lbmk`, short for `LibreBoot MaKe`, and this
|
||||
document describes how to use it. With this guide, you can know how to compile
|
||||
libreboot from the available source code.
|
||||
|
||||
The following document describes how `lbmk` works, and how you can make changes
|
||||
to it: [libreboot maintenance manual](../maintain/)
|
||||
|
||||
### WARNING: eCryptfs file name limits
|
||||
|
||||
Do not run the build system on a eCryptfs file system, because it has
|
||||
very short file name limits and Libreboot's build system deals with very
|
||||
long file names. We commonly get reports from this by Linux Mint users
|
||||
who encrypt their home directory with eCryptfs; regular LUKS encryption will
|
||||
do nicely.
|
||||
|
||||
System requirements
|
||||
-------------------
|
||||
|
||||
You must ensure that you have the correct operating system, CPU, RAM, disk space
|
||||
and so on.
|
||||
|
||||
System requirements are documented in
|
||||
the [lbmk maintenance manual](../maintain/#system-requirements).
|
||||
|
||||
Multi-threaded builds
|
||||
=====================
|
||||
---------------------
|
||||
|
||||
Libreboot's build system defaults to a single build thread, but you can change
|
||||
it by doing e.g.
|
||||
|
|
@ -40,42 +47,22 @@ is passed, where THREADS is the number of threads. This is also set when running
|
|||
xz commands for compression, using the `-t` option.
|
||||
|
||||
Environmental variables
|
||||
=======================
|
||||
-----------------------
|
||||
|
||||
Please read about environmental variables in [the build
|
||||
instructions](../maintain/), before running lbmk. You should set
|
||||
your variables accordingly, though you do not technically need to; some
|
||||
of them may be useful, e.g. `LBMK_THREADS` (sets the number of build threads).
|
||||
of them may be useful, e.g. `XBMK_THREADS` (sets the number of build threads).
|
||||
|
||||
Sources
|
||||
=======
|
||||
-------
|
||||
|
||||
This version, if hosted live on libreboot.org, assumes that you are using
|
||||
the `lbmk` git repository, which
|
||||
you can download using the instructions on [the code review page](../../git.md).
|
||||
|
||||
A note about documentation (and this page)
|
||||
------------------------------------------
|
||||
|
||||
From Libreboot 20231021 onwards, *all* releases (including 20231021)
|
||||
have `lbwww.git` (the website) and `lbwww-img.git` (images for the website)
|
||||
archived in the *src* tar archive for that release; older releases were hit
|
||||
or miss, from 20210522 to 20230625, as to whether they came with documentation;
|
||||
releases older than 20210522 generally always came with documentation. Modern
|
||||
Libreboot documentation is written in Markdown (pandoc variant)
|
||||
|
||||
If you're working with *release* documentation, you don't get the full HTML
|
||||
files (such as the one you're viewing now, if you're reading *this* page in a
|
||||
web browser), so either read the Markdown files directly, or compile them to
|
||||
HTML using the [Untitled Static Site Generator](https://untitled.vimuser.org/)
|
||||
(which is what the Libreboot project uses to generate HTML from those files).
|
||||
|
||||
NOTE: `av.libreboot.org` is hardcoded as the domain name where images are
|
||||
pointed to, in `lbwww.git`, so you will need to replace these references in
|
||||
your local version, unless you're happy to just continue using those.
|
||||
|
||||
Git
|
||||
===
|
||||
---
|
||||
|
||||
Libreboot's build system uses Git, extensively. You should perform the steps
|
||||
below, *even if you're using a release archive*.
|
||||
|
|
@ -94,39 +81,20 @@ Change the name and email address to whatever you want, when doing this.
|
|||
You may also want to follow more of the steps here:
|
||||
<https://git-scm.com/book/en/v2/Getting-Started-First-Time-Git-Setup>
|
||||
|
||||
Python
|
||||
======
|
||||
|
||||
You should ensure that the `python` command runs python 3, on your system.
|
||||
Python2 is unused by lbmk or anything that it pulls down as modules.
|
||||
|
||||
If building on Debian/Ubuntu based systems, you can achieve that via:
|
||||
|
||||
sudo apt install python-is-python3
|
||||
|
||||
On Fedora, you can use the following
|
||||
|
||||
sudo dnf install python-unversioned-command
|
||||
|
||||
On most modern distros, Python 2 is no longer included and Python 3 will be
|
||||
the only one available on the `python`.
|
||||
|
||||
How to compile Libreboot
|
||||
========================
|
||||
------------------------
|
||||
|
||||
Actual development/testing is always done using lbmk directly, and this
|
||||
includes when building from source. Here are some instructions to get you
|
||||
started:
|
||||
|
||||
Zero..st, check time/date
|
||||
-------------------------
|
||||
### Zero..st, check time/date
|
||||
|
||||
Make sure date/hwclock report the correct time and date on your system,
|
||||
because parts of the build process download from HTTPS servers and wrong
|
||||
time or date can cause connections to be dropped during negotiation.
|
||||
|
||||
First, install build dependencies
|
||||
---------------------------------
|
||||
### First, install build dependencies
|
||||
|
||||
Libreboot includes a script that automatically installs build dependencies
|
||||
according to the selected linux distro.
|
||||
|
|
@ -143,12 +111,16 @@ or
|
|||
|
||||
or
|
||||
|
||||
./mk dependencies fedora38
|
||||
./mk dependencies fedora41
|
||||
|
||||
or
|
||||
|
||||
./mk dependencies arch
|
||||
|
||||
NOTE: For versioned files, such as `fedora41`, typically other versions will
|
||||
be available too, e.g. `fedora38`. Make sure to check `config/dependencies/`,
|
||||
so that you know whether or not a file is available for your distro.
|
||||
|
||||
NOTE: In case of Ubuntu 20.04 LTS or derived distros for that specific release,
|
||||
use the dedicated configuration file:
|
||||
|
||||
|
|
@ -160,8 +132,59 @@ Technically, any Linux distribution can be used to build libreboot.
|
|||
However, you will have to write your own script for installing build
|
||||
dependencies.
|
||||
|
||||
Next, build ROM images
|
||||
----------------------
|
||||
### Debian Trixie/Sid
|
||||
|
||||
Debian Trixie, the testing release as of 3 January 2025, and Debian Sid,
|
||||
provide `gnat` and `gcc` as you expect, but `gnat` resolves to `gnat-13` and
|
||||
installs `gcc-13` as a dependency, while `gcc` resolves to `gcc-14` and other
|
||||
toolchain components correspond to this version.
|
||||
|
||||
The GCC/GNAT versions need to match during build time, so Libreboot's build
|
||||
system hacks the `PATH` environmental variable, setting up symlinks, matching
|
||||
GNAT to GCC or GNAT to GCC. When you run `./mk dependencies debian`, you get
|
||||
GNAT 13 and GCC 14. This seems to make most boards compile; in our testing, the
|
||||
KGPE-D16 board failed to compile in this configuration. This PATH hack is only
|
||||
done for compiling the coreboot crossgcc toolchain, and nothing else; after that,
|
||||
coreboot's toolchain is used.
|
||||
|
||||
GNAT is used by coreboot, because some of the Intel graphics devices are
|
||||
initialised natively, with code written in Ada spark (called `libgfxinit`).
|
||||
|
||||
When updating from Debian stable to Debian Trixie(testing) or Sid, you should
|
||||
also check for orphaned packages, using `aptitude search '~o'`. Do this,
|
||||
removing what was leftover from the old release, and make sure to re-run the
|
||||
Debian dependencies script, but do it like this:
|
||||
|
||||
./mk dependencies debian --reinstall
|
||||
|
||||
For better reliability, you should, after running the dependencies script,
|
||||
remove `gnat` and install `gnat-14` instead, which is available on this day
|
||||
of 3 December 2025, but currently marked experimental. When you install
|
||||
GNAT 14, GNAT 13 is removed but `gnat` (in `PATH`) still won't resolve to
|
||||
anything. Libreboot *still* accomodates this, detecting and matching the GCC
|
||||
and GNAT versions, which would in this instance match version 14 between them,
|
||||
so that `gnat` and `gcc` are both in PATH at build time, resolving to v14.x.
|
||||
When we tested with this configuration, the KGPE-D16 images also compiled.
|
||||
|
||||
NOTE: Ubuntu 24.10 also has the issue described above. Some other distros may
|
||||
also have it, if they're based on Debian Testing/Sid or Ubuntu 24.10.
|
||||
|
||||
### MIPS cross compiler
|
||||
|
||||
Libreboot has support for the Sony PlayStation (PS1/PSX), based on
|
||||
the PCSX-Redux Open BIOS. If you're doing a full release build, and/or
|
||||
specifically building the PSX BIOS, you need a MIPS cross compiler.
|
||||
|
||||
Arch-based systems have a mipsel cross compiler available from AUR, and most
|
||||
Debian-based systems have a mipsel cross compiler in apt; for these, the normal
|
||||
dependencies installation command will provide them. We know Void Linux and
|
||||
Fedora don't have a MIPS compiler, for instance.
|
||||
|
||||
If your distro doesn't have the MIPS compiler available,
|
||||
the [PlayStation](../install/playstation.md) page provides instructions for
|
||||
manual installation; please do this in addition to the normal dependencies.
|
||||
|
||||
### Next, build ROM images
|
||||
|
||||
Libreboot MaKe (lbmk) automatically runs all necessary commands; for
|
||||
example, `./mk -b coreboot` will automatically build the required payloads
|
||||
|
|
@ -180,8 +203,7 @@ or get a list of supported build targets:
|
|||
|
||||
./mk -b coreboot list
|
||||
|
||||
Or maybe just build payloads?
|
||||
-----------------------------
|
||||
### Or maybe just build payloads?
|
||||
|
||||
If you wish to build payloads, you can also do that. For example:
|
||||
|
||||
|
|
@ -206,3 +228,24 @@ example want to modify a config, e.g.:
|
|||
|
||||
Or perhaps add a new board! The maintenance manual will teach you how the
|
||||
Libreboot build system (lbmk) works!
|
||||
|
||||
A note about documentation (and this page)
|
||||
-------------------------------
|
||||
|
||||
From Libreboot 20231021 onwards, *all* releases (including 20231021)
|
||||
have `lbwww.git` (the website) and `lbwww-img.git` (images for the website)
|
||||
archived in the *src* tar archive for that release; older releases were hit
|
||||
or miss, from 20210522 to 20230625, as to whether they came with documentation;
|
||||
releases older than 20210522 generally always came with documentation. Modern
|
||||
Libreboot documentation is written in Markdown (pandoc variant)
|
||||
|
||||
If you're working with *release* documentation, you don't get the full HTML
|
||||
files (such as the one you're viewing now, if you're reading *this* page in a
|
||||
web browser), so either read the Markdown files directly, or compile them to
|
||||
HTML using the [Untitled Static Site Generator](https://untitled.vimuser.org/)
|
||||
(which is what the Libreboot project uses to generate HTML from those files).
|
||||
|
||||
NOTE: `av.libreboot.org` is hardcoded as the domain name where images are
|
||||
pointed to, in `lbwww.git`, so you will need to replace these references in
|
||||
your local version, unless you're happy to just continue using those.
|
||||
|
||||
|
|
|
|||
|
|
@ -0,0 +1 @@
|
|||
Libreboot project documentation. Learn about Libreboot installation, how Libreboot is designed and how you can contribute to the project.
|
||||
|
|
@ -3,22 +3,12 @@ title: Побудова з джерельного коду
|
|||
x-toc-enable: true
|
||||
...
|
||||
|
||||
WARNING: Flash from bin/, NOT elf/
|
||||
==================================
|
||||
|
||||
TODO: translate this section into ukrainian language
|
||||
|
||||
**WARNING: When you build a ROM image from the Libreboot build system, please
|
||||
ensure that you flash the appropriate ROM image from `bin/`, NOT `elf/`.
|
||||
The `elf/` coreboot ROMs do not contain payloads. Libreboot's build system
|
||||
builds no-payload ROMs under `elf/`, and payloads separately under `elf/`. Then
|
||||
it copies from `elf/` and inserts payloads from `elf/`, and puts the final ROM
|
||||
images (containing payloads) in `bin/`. This design is more efficient, and
|
||||
permits many configurations without needless duplication of work. More info
|
||||
is available in the [lbmk maintenance manual](../maintain/)**
|
||||
**TODO: This page needs to be re-translated. Much of the newer sections are
|
||||
still in English, and there may be some differences aside from translation,
|
||||
versus the English version.**
|
||||
|
||||
Introduction
|
||||
============
|
||||
------------
|
||||
|
||||
Система побудови libreboot, називається `lbmk`, скорочення від `LibreBoot MaKe`, і цей
|
||||
документ описує те, як використовувати її. З цим керівництвом ви можете узнати те, як побудувати
|
||||
|
|
@ -35,31 +25,25 @@ libreboot з доступного джерельного коду.
|
|||
Наступний документ описує те, як працює `lbmk`, і як ви можете робити зміни
|
||||
до нього: [керівництво обслуговування libreboot](../maintain/)
|
||||
|
||||
Release status
|
||||
==============
|
||||
### WARNING: eCryptfs file name limits
|
||||
|
||||
Information about status will be reported during builds; if a board is
|
||||
marked as stable, the build proceeds without further input. If the board is
|
||||
marked anything other, a warning appears asking if you wish to proceed; to
|
||||
disable these warnings, do this before building (not recommended):
|
||||
Do not run the build system on a eCryptfs file system, because it has
|
||||
very short file name limits and Libreboot's build system deals with very
|
||||
long file names. We commonly get reports from this by Linux Mint users
|
||||
who encrypt their home directory with eCryptfs; regular LUKS encryption will
|
||||
do nicely.
|
||||
|
||||
export XBMK_STATUS=n
|
||||
System requirements
|
||||
-------------------
|
||||
|
||||
In Libreboot, we specify: `stable`, `unstable`, `broken` or `untested`.
|
||||
The "unstable" marking means that the board boots mostly/entirely reliably
|
||||
annd should be safe to use, but may have a few issues, but nothing which would,
|
||||
for example, cause safety issues e.g. thermal, data reliability etc.
|
||||
You must ensure that you have the correct operating system, CPU, RAM, disk space
|
||||
and so on.
|
||||
|
||||
The `broken` setting means that a given board will likely brick if flashed.
|
||||
The `untested` setting means untested.
|
||||
|
||||
Release status is always set with regards to the current lbmk revision, on
|
||||
the theory that the current revision is being used to generate a full release.
|
||||
The setting is decided on a board-by-board basis, taking its various quirks
|
||||
and idiosynrasies into account.
|
||||
System requirements are documented in
|
||||
the [lbmk maintenance manual](../maintain/#system-requirements).
|
||||
|
||||
Multi-threaded builds
|
||||
=====================
|
||||
---------------------
|
||||
|
||||
Libreboot's build system defaults to a single build thread, but you can change
|
||||
it by doing e.g.
|
||||
|
|
@ -69,7 +53,7 @@ it by doing e.g.
|
|||
This would make lbmk run on 4 threads.
|
||||
|
||||
Environmental variables
|
||||
=======================
|
||||
-----------------------
|
||||
|
||||
Please read about environmental variables in [the build
|
||||
instructions](../maintain/), before running lbmk. You should set
|
||||
|
|
@ -77,7 +61,7 @@ your variables accordingly, though you do not technically need to; some
|
|||
of them may be useful, e.g. `XBMK_THREADS` (sets the number of build threads).
|
||||
|
||||
Environmental variables
|
||||
=======================
|
||||
-----------------------
|
||||
|
||||
Please read about environmental variables in [the build
|
||||
instructions](../maintain/), before running lbmk. You should set
|
||||
|
|
@ -85,7 +69,7 @@ your variables accordingly, though you do not technically need to; some
|
|||
of them may be useful, e.g. `XBMK_THREADS` (sets the number of build threads).
|
||||
|
||||
Git
|
||||
===
|
||||
---
|
||||
|
||||
Система побудови Libreboot використовує Git, обширно. Ви маєте виконати кроки
|
||||
знизу, *навіть, якщо ви використовуєте архів випуску*.
|
||||
|
|
@ -104,21 +88,16 @@ Git
|
|||
Ви також можете захотіти прослідувати більшій кількості етапів тут:
|
||||
<https://git-scm.com/book/en/v2/Getting-Started-First-Time-Git-Setup>
|
||||
|
||||
Python
|
||||
======
|
||||
Build
|
||||
-----
|
||||
|
||||
Python2 не використовується lbmk або будь-чим, що завантажується в якості модулів. Ви
|
||||
маєте переконатись, що команда `python` виконує python 3 на вашій системі.
|
||||
|
||||
Zero..st, check time/date
|
||||
-------------------------
|
||||
### Zero..st, check time/date
|
||||
|
||||
Make sure date/hwclock report the correct time and date on your system,
|
||||
because parts of the build process download from HTTPS servers and wrong
|
||||
time or date can cause connections to be dropped during negotiation.
|
||||
|
||||
Побудова з джерельного коду
|
||||
============================
|
||||
### Побудова з джерельного коду
|
||||
|
||||
Фактична розробка/тестування завжди виконується безпосередньо за допомогою `lbmk`, і це також
|
||||
стосується збирання з джерельного коду. Ось кілька інструкцій, щоб
|
||||
|
|
@ -143,9 +122,59 @@ Check: `config/dependencies/` for list of supported distros.
|
|||
Однак, вам потрібно буде написано свій власний сценарій для встановлення залежностей
|
||||
побудови.
|
||||
|
||||
libreboot Make (lbmk) автоматично виконує всі необхідні команди; наприклад,
|
||||
`./build roms` автоматично виконає `./build grub`,
|
||||
якщо затребувані утиліти для GRUB не збудовано, для виготовлення корисних навантажень.
|
||||
### Debian Trixie/Sid
|
||||
|
||||
Debian Trixie, the testing release as of 3 January 2025, and Debian Sid,
|
||||
provide `gnat` and `gcc` as you expect, but `gnat` resolves to `gnat-13` and
|
||||
installs `gcc-13` as a dependency, while `gcc` resolves to `gcc-14` and other
|
||||
toolchain components correspond to this version.
|
||||
|
||||
The GCC/GNAT versions need to match during build time, so Libreboot's build
|
||||
system hacks the `PATH` environmental variable, setting up symlinks, matching
|
||||
GNAT to GCC or GNAT to GCC. When you run `./mk dependencies debian`, you get
|
||||
GNAT 13 and GCC 14. This seems to make most boards compile; in our testing, the
|
||||
KGPE-D16 board failed to compile in this configuration. This PATH hack is only
|
||||
done for compiling the coreboot crossgcc toolchain, and nothing else; after that,
|
||||
coreboot's toolchain is used.
|
||||
|
||||
GNAT is used by coreboot, because some of the Intel graphics devices are
|
||||
initialised natively, with code written in Ada spark (called `libgfxinit`).
|
||||
|
||||
When updating from Debian stable to Debian Trixie(testing) or Sid, you should
|
||||
also check for orphaned packages, using `aptitude search '~o'`. Do this,
|
||||
removing what was leftover from the old release, and make sure to re-run the
|
||||
Debian dependencies script, but do it like this:
|
||||
|
||||
./mk dependencies debian --reinstall
|
||||
|
||||
For better reliability, you should, after running the dependencies script,
|
||||
remove `gnat` and install `gnat-14` instead, which is available on this day
|
||||
of 3 December 2025, but currently marked experimental. When you install
|
||||
GNAT 14, GNAT 13 is removed but `gnat` (in `PATH`) still won't resolve to
|
||||
anything. Libreboot *still* accomodates this, detecting and matching the GCC
|
||||
and GNAT versions, which would in this instance match version 14 between them,
|
||||
so that `gnat` and `gcc` are both in PATH at build time, resolving to v14.x.
|
||||
When we tested with this configuration, the KGPE-D16 images also compiled.
|
||||
|
||||
NOTE: Ubuntu 24.10 also has the issue described above. Some other distros may
|
||||
also have it, if they're based on Debian Testing/Sid or Ubuntu 24.10.
|
||||
|
||||
### MIPS cross compiler
|
||||
|
||||
Libreboot has support for the Sony PlayStation (PS1/PSX), based on
|
||||
the PCSX-Redux Open BIOS. If you're doing a full release build, and/or
|
||||
specifically building the PSX BIOS, you need a MIPS cross compiler.
|
||||
|
||||
Arch-based systems have a mipsel cross compiler available from AUR, and most
|
||||
Debian-based systems have a mipsel cross compiler in apt; for these, the normal
|
||||
dependencies installation command will provide them. We know Void Linux and
|
||||
Fedora don't have a MIPS compiler, for instance.
|
||||
|
||||
If your distro doesn't have the MIPS compiler available,
|
||||
the [PlayStation](../install/playstation.md) page provides instructions for
|
||||
manual installation; please do this in addition to the normal dependencies.
|
||||
|
||||
### Next, build ROM images
|
||||
|
||||
В якості результату, ви тепер можете (після встановлення правильних залежностей побудови) виконати
|
||||
лише одну команду, з свіжого Git clone, для побудови образів ROM:
|
||||
|
|
|
|||
|
|
@ -1,24 +1,26 @@
|
|||
---
|
||||
title: GRUB payload
|
||||
title: Libreboot GRUB payload documentation
|
||||
x-toc-enable: true
|
||||
...
|
||||
|
||||
GRUB already has excellent
|
||||
documentation, but there are aspects of libreboot that deserve special
|
||||
treatment. libreboot provides the option to boot GRUB directly, running on
|
||||
treatment. Libreboot provides the option to boot GRUB directly, running on
|
||||
bare metal (instead of using BIOS or UEFI services).
|
||||
|
||||
Boot Linux from GRUB
|
||||
--------------------
|
||||
|
||||
[The Linux section](../linux/) also has libreboot-specific guides for
|
||||
dealing with Linux distributions when using GRUB directly, in this
|
||||
setup. [A similar section exists for BSD operating systems](../bsd/)
|
||||
|
||||
GRUB keyboard layouts
|
||||
=====================
|
||||
---------------------
|
||||
|
||||
It is possible to use *any* keymap in GRUB.
|
||||
|
||||
Custom keyboard layout
|
||||
----------------------
|
||||
### Custom keyboard layout
|
||||
|
||||
Keymaps are stored in `config/grub/keymap/`
|
||||
|
||||
|
|
|
|||
|
|
@ -0,0 +1 @@
|
|||
Documentation pertaining to the GNU boot loader named GRUB, as it applies to Libreboot. GRUB is provided as a coreboot payload, on many Libreboot configurations.
|
||||
|
|
@ -1,5 +1,5 @@
|
|||
---
|
||||
title: Documentation
|
||||
title: Installing Libreboot Free/Opensource BIOS/UEFI firmware
|
||||
...
|
||||
|
||||
Always check [libreboot.org](https://libreboot.org/) for the latest updates to
|
||||
|
|
@ -9,7 +9,7 @@ the [main news section](../news/).
|
|||
[Answers to Frequently Asked Questions about libreboot](../faq.md).
|
||||
|
||||
Need help?
|
||||
==========
|
||||
----------
|
||||
|
||||
Help is available on [Libreboot IRC](../contact.md) and other channels.
|
||||
|
||||
|
|
@ -22,18 +22,18 @@ Leah Rowe, the founder and lead developer of Libreboot, also owns and
|
|||
operates Minifree Ltd; sales provide funding for the Libreboot project.
|
||||
|
||||
Installing libreboot
|
||||
====================
|
||||
--------------------
|
||||
|
||||
- [How to install libreboot](install/)
|
||||
|
||||
Documentation related to operating systems
|
||||
============================
|
||||
Installing operating systems
|
||||
----------------------------
|
||||
|
||||
- [How to install BSD on an x86 host system](bsd/)
|
||||
- [Linux Guides](linux/)
|
||||
- [Install BSD operating systems on Libreboot](bsd/)
|
||||
- [Install Linux on a Libreboot system](linux/)
|
||||
|
||||
Information for developers
|
||||
==========================
|
||||
--------------------------
|
||||
|
||||
- [How to compile the libreboot source code](build/)
|
||||
- [Build system developer documentation](maintain/)
|
||||
|
|
@ -41,8 +41,9 @@ Information for developers
|
|||
- [U-Boot payload](uboot/)
|
||||
|
||||
Other information
|
||||
=================
|
||||
-----------------
|
||||
|
||||
- [Libreboot Static Site Generator](sitegen/)
|
||||
- [Miscellaneous](misc/)
|
||||
- [List of codenames](misc/codenames.md)
|
||||
|
||||
|
|
|
|||
|
|
@ -0,0 +1 @@
|
|||
Documentation pertaining to Libreboot installation. Learn how to install Libreboot, and use coreboot payloads such as the GNU boot loader GRUB.
|
||||
|
|
@ -9,7 +9,7 @@ libreboot. Новини, включаючи оголошення про випу
|
|||
[Відповіді на поширені запитання про libreboot](../faq.md).
|
||||
|
||||
Need help?
|
||||
==========
|
||||
----------
|
||||
|
||||
Help is available on [Libreboot IRC](../contact.md) and other channels.
|
||||
|
||||
|
|
@ -22,18 +22,18 @@ Leah Rowe, the founder and lead developer of Libreboot, also owns and
|
|||
operates Minifree Ltd; sales provide funding for the Libreboot project.
|
||||
|
||||
Встановлення libreboot
|
||||
====================
|
||||
----------------------
|
||||
|
||||
- [Як встановити libreboot](install/)
|
||||
|
||||
Документація, яка має відношення до операційних систем
|
||||
============================
|
||||
-----------------------------------------------------
|
||||
|
||||
- [Як встановити BSD на x86 хостову систему](bsd/)
|
||||
- [Керівництва Linux](linux/)
|
||||
|
||||
Інформація для розробників
|
||||
==========================
|
||||
--------------------------
|
||||
|
||||
- [Як зібрати джерельний код libreboot](build/)
|
||||
- [Документація розробника системи побудови](maintain/)
|
||||
|
|
@ -41,8 +41,9 @@ operates Minifree Ltd; sales provide funding for the Libreboot project.
|
|||
- [Корисне навантаження U-Boot](uboot/)
|
||||
|
||||
Інша інформація
|
||||
=================
|
||||
---------------
|
||||
|
||||
- [Libreboot Static Site Generator](sitegen/)
|
||||
- [Різне](misc/)
|
||||
- [Список кодових назв](misc/codenames.md)
|
||||
|
||||
|
|
|
|||
|
|
@ -7,7 +7,7 @@ libreboot 的最新更新,可以在 [libreboot.org](https://libreboot.org) 上
|
|||
[libreboot 常见问题解答](../faq.md).
|
||||
|
||||
Need help?
|
||||
==========
|
||||
----------
|
||||
|
||||
Help is available on [Libreboot IRC](../contact.md) and other channels.
|
||||
|
||||
|
|
@ -20,18 +20,18 @@ Leah Rowe, the founder and lead developer of Libreboot, also owns and
|
|||
operates Minifree Ltd; sales provide funding for the Libreboot project.
|
||||
|
||||
安装 libreboot
|
||||
====================
|
||||
--------------
|
||||
|
||||
- [如何安装 libreboot](install/)
|
||||
|
||||
操作系统相关文档
|
||||
============================
|
||||
----------------
|
||||
|
||||
- [如何在 x86 机器上安装 BSD](bsd/)
|
||||
- [Linux 指南](linux/)
|
||||
|
||||
开发者信息
|
||||
==========================
|
||||
----------
|
||||
|
||||
- [如何编译 libreboot 源代码](build/)
|
||||
- [构建系统开发者文档](maintain/)
|
||||
|
|
@ -39,8 +39,9 @@ operates Minifree Ltd; sales provide funding for the Libreboot project.
|
|||
- [U-Boot payload](uboot/)
|
||||
|
||||
其它信息
|
||||
=================
|
||||
--------
|
||||
|
||||
- [Libreboot Static Site Generator](sitegen/)
|
||||
- [杂项](misc/)
|
||||
- [代号列表](misc/codenames.md)
|
||||
|
||||
|
|
|
|||
|
|
@ -0,0 +1 @@
|
|||
Libreboot 项目提供基于 coreboot 的自由且开源的引导固件. GNU GRUB, SeaBIOS, U-Boot.
|
||||
|
|
@ -0,0 +1 @@
|
|||
Learn how to install Libreboot free/opensource BIOS/UEFI boot firmware on your Acer G43T-AM3 motherboard.
|
||||
|
|
@ -1,22 +1,29 @@
|
|||
---
|
||||
title: ASUS Chromebook C201 installation guide
|
||||
title: Install Libreboot ASUS Chromebook C201
|
||||
x-toc-enable: true
|
||||
...
|
||||
|
||||
Open source BIOS/UEFI firmware
|
||||
------------------------------
|
||||
|
||||
This document will teach you how to install Libreboot, on your
|
||||
ASUS Chromebook C201 motherboard.
|
||||
Libreboot is a [Free Software](https://writefreesoftware.org/learn) project
|
||||
that replaces proprietary BIOS/UEFI firmware.
|
||||
|
||||
WARNING: This board is known to have non-functioning video init at the time
|
||||
of writing, 19 February 2023. It is as yet unsolved.
|
||||
|
||||
See: <https://notabug.org/libreboot/lbmk/issues/136>
|
||||
|
||||
Introduction
|
||||
===========
|
||||
------------
|
||||
|
||||
This page contains information about assembly and disassembly, for flashing
|
||||
the ASUS Chromebook C201 externally. It will also link to internal flashing
|
||||
instructions, and information about U-Boot.
|
||||
|
||||
Flashrom
|
||||
--------
|
||||
### Flashrom
|
||||
|
||||
A special fork of flashrom, maintained by Google, is required for flashing.
|
||||
More information about this is present in the generic [chromebook flashing
|
||||
|
|
@ -26,8 +33,7 @@ NOTE: Libreboot standardises on [flashprog](https://flashprog.org/wiki/Flashprog
|
|||
now, as of 27 January 2024, which is a fork of flashrom, but the chromium fork
|
||||
is another fork of flashrom, and you should use that on chromebooks.
|
||||
|
||||
Depthcharge payload (obsolete)
|
||||
------------------------------
|
||||
### Depthcharge payload (obsolete)
|
||||
|
||||
This board was also supported in Libreboot 20160907, with the Depthcharge
|
||||
payload. Support was dropped in later releases, and then re-added in the
|
||||
|
|
@ -40,7 +46,7 @@ instructions pertaining to Depthcharge:
|
|||
* <https://notabug.org/libreboot/lbwww/src/4be2eed23e11b1071cd500a329abf654ab25f942/site/docs/hardware/c201.md>
|
||||
|
||||
U-boot payload
|
||||
==============
|
||||
--------------
|
||||
|
||||
U-Boot was ported to coreboot CrOS devices, courtesy of Alper Nebi
|
||||
Yasak (`alpernebbi` on Libreboot IRC).
|
||||
|
|
@ -50,7 +56,7 @@ Read the section pertaining to U-boot payload:
|
|||
[u-boot payload documentation for Libreboot](../uboot/)
|
||||
|
||||
Internal flashing
|
||||
=================
|
||||
------------------
|
||||
|
||||
External flashing is possible, but only necessary in the event of a *brick*.
|
||||
If you're flashing good firmware, and the machine boots properly, you can
|
||||
|
|
@ -62,8 +68,7 @@ the information has moved.
|
|||
|
||||
See: [chromebook flashing instructions](chromebooks.md)
|
||||
|
||||
Write-protect screw
|
||||
-------------------
|
||||
### Write-protect screw
|
||||
|
||||
The chromebook flashing instructions, linked above, refer to a *screw* that
|
||||
can be turned, to disable flash protection. This is necessary, for internally
|
||||
|
|
@ -78,15 +83,15 @@ below. The write protect screw is located next to the SPI flash chip, circled
|
|||
in red in the picture below. It has to be removed. Refer to the following
|
||||
photos:
|
||||
|
||||
[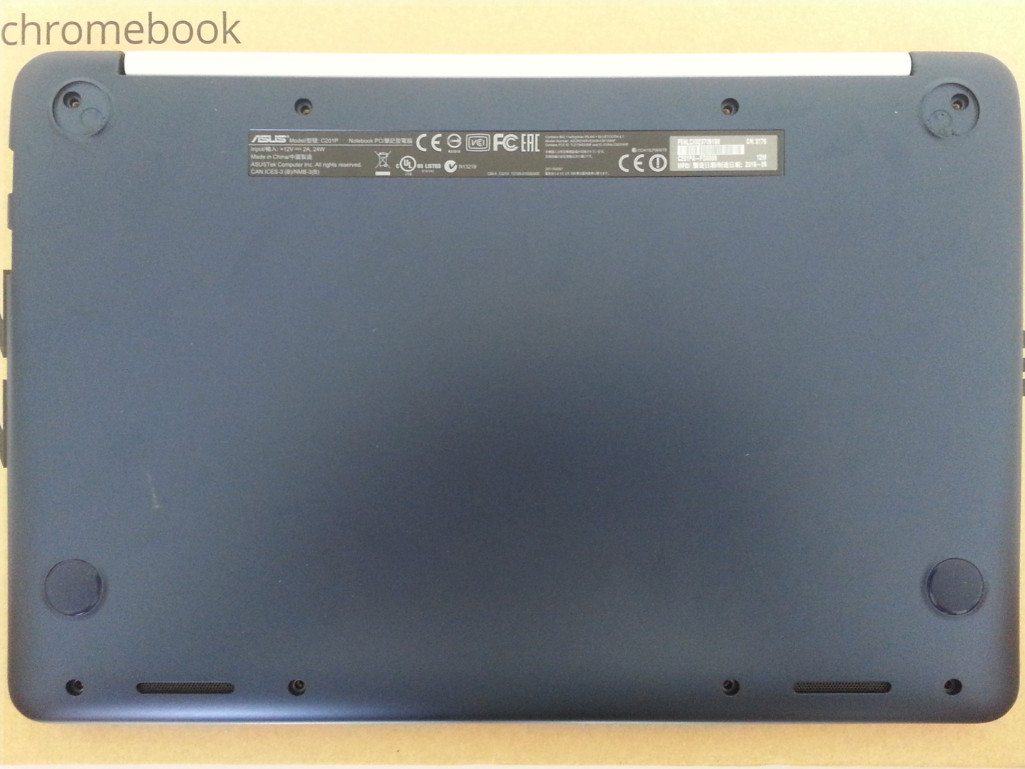](https://av.libreboot.org/c201/screws.jpg)
|
||||

|
||||
|
||||
[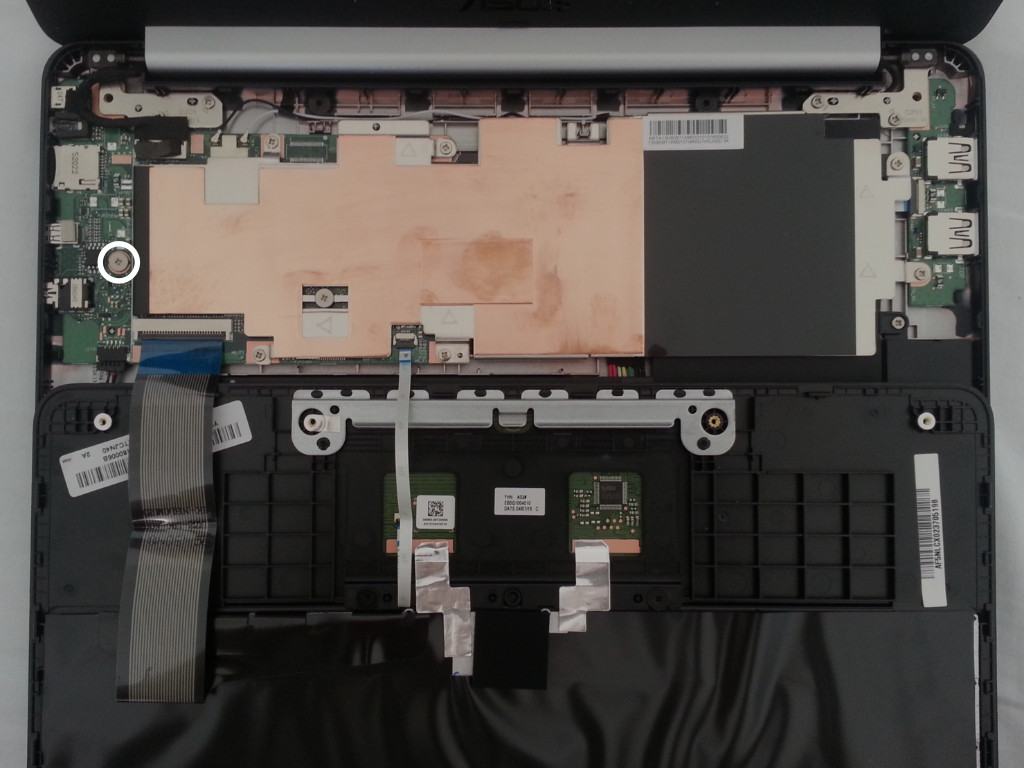](https://av.libreboot.org/c201/wp-screw.jpg)
|
||||

|
||||
|
||||
The write protect screw can be put back in place later, when the device
|
||||
is known to be in a working state.
|
||||
|
||||
External flashing
|
||||
=================
|
||||
-----------------
|
||||
|
||||
If the machine is no longer booting, due to bad firmware, you can unbrick
|
||||
it externally. Refer to [external flash instructions](spi.md).
|
||||
|
|
|
|||
|
|
@ -0,0 +1 @@
|
|||
Learn how to install Libreboot free/opensource BIOS/UEFI boot firmware on your ASUS Chromebook C201.
|
||||
|
|
@ -1,8 +1,19 @@
|
|||
---
|
||||
title: Chromebook flashing instructions
|
||||
title: Install Libreboot on a Chromebook
|
||||
x-toc-enable: true
|
||||
...
|
||||
|
||||
Open source BIOS/UEFI firmware
|
||||
------------------------------
|
||||
|
||||
This document will teach you how to install Libreboot, on various ARM64-based
|
||||
Chromebook laptops. Libreboot replaces proprietary BIOS/UEFI firmware, though
|
||||
it should be noted that Google already ships coreboot and their own payload
|
||||
called Depthcharge, which is all free software; the difference with Libreboot
|
||||
is that it replaces Depthcharge with *U-Boot* (as a coreboot payload), which
|
||||
provides a lightweight UEFI boot implementation that can boot regular Linux and
|
||||
BSD systems more easily than Depthcharge.
|
||||
|
||||
NOTE: daisy, peach and veyron boards were temporarily removed from
|
||||
lbmk. They should be re-added to Libreboot at a later date. The reasons
|
||||
are written on the hardware compatibility page. For now, Libreboot only
|
||||
|
|
@ -13,17 +24,20 @@ custom firmware on ChromeOS devices. This guide usually refers to all of
|
|||
them as "Chromebook"s since it's the most common form factor.
|
||||
|
||||
Flashrom
|
||||
========
|
||||
--------
|
||||
|
||||
A special fork of flashrom, maintained by Google, is required for flashing
|
||||
these Chromebook devices. See:
|
||||
|
||||
<https://chromium.googlesource.com/chromiumos/third_party/flashrom/>
|
||||
|
||||
You must then compile this from source, and run it.
|
||||
This document assumes you’ll be using ChromeOS to do the internal flashing.
|
||||
ChromeOS already comes with this special fork of flashrom pre-installed. But if
|
||||
you are using another OS or an external flasher, you will need to compile and
|
||||
use the aforementioned flashrom fork.
|
||||
|
||||
Enable ChromeOS "Developer Mode"
|
||||
================================
|
||||
--------------------------------
|
||||
|
||||
Chromebooks are locked-down by default to only run ChromeOS. Most things
|
||||
you will want to do on these require you unlock it by enabling their
|
||||
|
|
@ -37,6 +51,26 @@ screen. Waiting for 30 seconds or pressing `Ctrl + D` on this screen will
|
|||
proceed to boot into ChromeOS, which then erases all data on the device
|
||||
and reboots again into a clean ChromeOS installation.
|
||||
|
||||
Before following steps to configure your device as new in the first screen, you
|
||||
should be able to see a “Enable debugging features” link that you should click
|
||||
on. A confirmation dialog displays. Click Proceed. The system reboots, use
|
||||
`Ctrl + D` again and displays a dialog with password prompts. Set the new root
|
||||
password. Click Enable. The screen displays messages indicating success or
|
||||
failure. Click OK. You'll see the first screen again. Follow the remaining
|
||||
prompts to configure your Chrome device.
|
||||
|
||||
Once you are finished configuring your device, you’ll be giving the option to
|
||||
sign in; here you may use the guest account option in the bottom if you like.
|
||||
|
||||
Now in the desktop we’ll set a password to use “sudo”: Use
|
||||
`Ctrl+Alt+Forward Arrow` (the one two key to the right of esc key, representing
|
||||
F2) to open a “Developer console” (similar to opening a tty) where the first
|
||||
line ends with “localhost login”. Enter root and the password you just set for
|
||||
it. Then you must run `chromeos-setdevpassword` and set another password, which
|
||||
is the one that is actually used when running “sudo”. Now use
|
||||
`Ctrl+Alt+Backward Arrow` (the key next to the right of esc, representing F1)
|
||||
to get back to the desktop.
|
||||
|
||||
With Developer Mode enabled, you can launch a terminal emulator inside
|
||||
ChromeOS by pressing the `Ctrl + Alt + T` key combination. Run `shell`
|
||||
inside the resulting `crosh` prompt to actually get to a `bash` session
|
||||
|
|
@ -44,7 +78,7 @@ where you can run programs. Most of the root file system is read-only,
|
|||
except for `/usr/local` and any mounted drives under `/media/removable`.
|
||||
|
||||
Identify your device
|
||||
====================
|
||||
--------------------
|
||||
|
||||
It's more common to refer to ChromeOS boards by their codenames, and
|
||||
many compatible devices can share a single codename. Libreboot ROM
|
||||
|
|
@ -56,7 +90,7 @@ device's. There are a number of ways to find it, some are:
|
|||
- Run `crossystem hwid` or `crossystem fwid` in a terminal
|
||||
|
||||
Back up stock firmware
|
||||
======================
|
||||
----------------------
|
||||
|
||||
The stock firmware on your device comes with some irreplaceable data
|
||||
that is unique to your device. This can include the serial number and
|
||||
|
|
@ -78,7 +112,7 @@ If you can already boot a conventional Linux distro on your Chromebook,
|
|||
you may be able to use `flashrom -p linux_mtd` on that system instead.
|
||||
|
||||
Check external flashability
|
||||
===========================
|
||||
---------------------------
|
||||
|
||||
If a ROM image you flash is broken, you may need to restore the stock
|
||||
firmware to fix the board to get internal flashing working. Refer to the
|
||||
|
|
@ -93,7 +127,7 @@ mechanism that lets you flash externally using a special USB debugging
|
|||
cable. However, most boards that Libreboot supports do not have this.
|
||||
|
||||
Disable write protection
|
||||
========================
|
||||
------------------------
|
||||
|
||||
Chromebooks have the SPI flash chip partially write-protected by
|
||||
default, but thankfully this protection can be disabled by the device
|
||||
|
|
@ -108,6 +142,12 @@ that asserts the WP pin on the flash chip. The screw can be identified
|
|||
by the fact that it bridges electrical contacts, but finding and
|
||||
removing it might require you to disassemble most of the board.
|
||||
|
||||
In my case as an example, my kevin board had the protection screw
|
||||
[here](https://av.libreboot.org/board/kevin/write_protection_screw.jpg). It was
|
||||
tricky for me to find it since it was one of the screws that seemed to holds
|
||||
the heat sink in place, which I thought made it an unlikely candidate. I
|
||||
recommend you leave it unscrew never the less after flashing.
|
||||
|
||||
Newer boards have a root-of-trust chip enforcing write-protection. The
|
||||
[Closed Case Debugging](https://chromium.googlesource.com/chromiumos/platform/ec/+/cr50_stab/docs/case_closed_debugging_gsc.md)
|
||||
mechanism should be used to disable hardware write-protection. Opening
|
||||
|
|
@ -128,7 +168,7 @@ compile and use that flashrom fork to disable write-protection. There is
|
|||
no `lbmk` support yet for automatically building it.
|
||||
|
||||
Prepare the ROM image
|
||||
=====================
|
||||
---------------------
|
||||
|
||||
Libreboot ROM image layouts are currently incompatible with the regions
|
||||
that should be carried over from the stock firmware. However, the
|
||||
|
|
@ -143,7 +183,7 @@ keep backups of the original firmware.
|
|||
TODO: Instructions to preserve vital data when FMAPs are compatible.
|
||||
|
||||
Flash the ROM image
|
||||
===================
|
||||
-------------------
|
||||
|
||||
WARNING: Although none are supported yet, make sure not to flash ROM
|
||||
images on x86 Chromebooks without injecting non-redistributable code
|
||||
|
|
@ -163,7 +203,7 @@ If you can already boot a conventional Linux distro on your Chromebook,
|
|||
you may be able to use `flashrom -p linux_mtd` on that system instead.
|
||||
|
||||
Install an operating system (experimental research)
|
||||
===========================
|
||||
------------------------------------------------
|
||||
|
||||
In general, ARM-compatible distros targeting U-boot can be used. There are
|
||||
three general methods for installing that vary depending on the distribution:
|
||||
|
|
@ -173,25 +213,22 @@ three general methods for installing that vary depending on the distribution:
|
|||
3. extlinux.conf - a newer flat, bootloader-spec text file that typically lives
|
||||
in /boot/extlinux/extlinux.conf
|
||||
|
||||
Successful installations:
|
||||
-------------------------
|
||||
### Successful installations:
|
||||
|
||||
* [ArchLinuxARM on RK3399-based Chromebooks](../uboot/uboot-archlinux.md).
|
||||
* [Debian Bookworm on Samsung Chromebook Plus XE513C24](../uboot/uboot-debian-bookworm.md).
|
||||
* [Debian on Asus Chromebook C201](https://wiki.debian.org/InstallingDebianOn/Asus/C201).
|
||||
|
||||
Unsuccessful installations:
|
||||
---------------------------
|
||||
### Unsuccessful installations:
|
||||
|
||||
* [OpenBSD on Samsung Chromebook Plus XE513C24](../uboot/uboot-openbsd.md).
|
||||
|
||||
Other promising ARM-compatible distros:
|
||||
---------------------------------------
|
||||
### Other promising ARM-compatible distros:
|
||||
|
||||
* [Armbian](https://www.armbian.com/uefi-arm64/).
|
||||
|
||||
See also
|
||||
========
|
||||
--------
|
||||
|
||||
* [ChromiumOS Documentation](https://chromium.googlesource.com/chromiumos/docs/+/HEAD/)
|
||||
* [ChromiumOS Firmware Test Manual](https://chromium.googlesource.com/chromiumos/docs/+/HEAD/firmware_test_manual.md)
|
||||
|
|
|
|||
|
|
@ -0,0 +1 @@
|
|||
Learn how to install Libreboot free/opensource BIOS/UEFI boot firmware on various ARM64-based Chromebook laptops.
|
||||
|
|
@ -1,5 +1,5 @@
|
|||
---
|
||||
title: Intel D945GCLF desktop board
|
||||
title: Install Libreboot on Intel D945GCLF and/or D945GCLF2
|
||||
x-toc-enable: true
|
||||
...
|
||||
|
||||
|
|
@ -18,18 +18,18 @@ x-toc-enable: true
|
|||
| **Graphics** | ? |
|
||||
| **Display** | None. |
|
||||
| **Memory** | Up to 2GB |
|
||||
| **Architecture** | x86_64 |
|
||||
| **Architecture** | x86\_64 |
|
||||
| **Original boot firmware** | Intel BIOS |
|
||||
| **Intel ME/AMD PSP** | Not present. |
|
||||
| **Flash chip** | SOIC-8 512KiB |
|
||||
|
||||
```
|
||||
W+: Works without blobs;
|
||||
W+: Works without vendor firmware;
|
||||
N: Doesn't work;
|
||||
W*: Works with blobs;
|
||||
W*: Works with vendor firmware;
|
||||
U: Untested;
|
||||
P+: Partially works;
|
||||
P*: Partially works with blobs
|
||||
P*: Partially works with vendor firmware
|
||||
```
|
||||
|
||||
| ***Features*** | | Notes |
|
||||
|
|
@ -47,13 +47,22 @@ P*: Partially works with blobs
|
|||
| **SeaBIOS** | Works |
|
||||
| **SeaBIOS with GRUB** | Doesn't work |
|
||||
</div>
|
||||
|
||||
Open source BIOS/UEFI firmware
|
||||
------------------------------
|
||||
|
||||
This document will teach you how to install Libreboot, on your
|
||||
Intel D945GCLF and/or D945GCLF2 desktop motherboard.
|
||||
Libreboot is a [Free Software](https://writefreesoftware.org/learn) project
|
||||
that replaces proprietary BIOS/UEFI firmware.
|
||||
|
||||
If you just want flashing instructions, go to
|
||||
[../install/d945gclf.md](../install/d945gclf.md)
|
||||
|
||||
D945GCLF2D also reported working by a user.
|
||||
|
||||
Introduction
|
||||
============
|
||||
------------
|
||||
|
||||
This board is a mini-itx desktop board for 2008. It uses an atom 230,
|
||||
which is a singe core CPU but it is hyperthreaded so it appears to have
|
||||
|
|
@ -76,8 +85,7 @@ hyperthreaded). Since the board is almost identical (and coreboot code
|
|||
seem to indicate that it works, since MAX\_CPU=4 is set), it is believed
|
||||
that it should also work but this is untested.
|
||||
|
||||
Remarks about vendor bios:
|
||||
--------------------------
|
||||
### Remarks about vendor bios:
|
||||
|
||||
- Without coreboot/libreboot this board is completely useless, since the
|
||||
vendor bios is very bad. It cannot boot from any HDD whether it is
|
||||
|
|
@ -96,15 +104,14 @@ And SPI SOIC8 flash chip\
|
|||
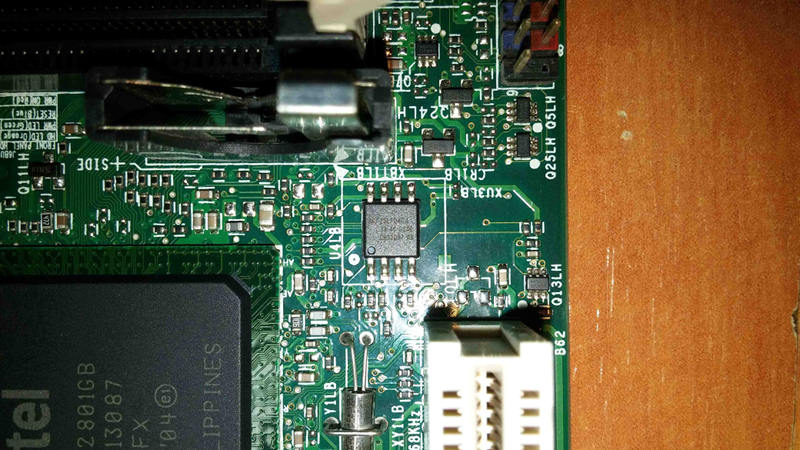{width="50%" height="50%"}
|
||||
|
||||
Flashing instructions {#clip}
|
||||
=====================
|
||||
-----------------------------
|
||||
|
||||
Refer to [spi.md](spi.md) for how to re-flash externally.
|
||||
|
||||
Here is an image of the flash chip:\
|
||||
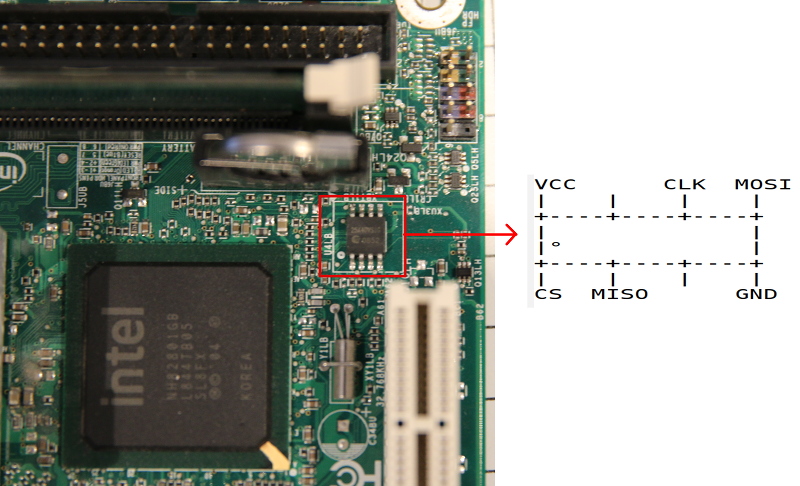
|
||||
|
||||
How to replace thermal paste and fan
|
||||
------------------------------------
|
||||
### How to replace thermal paste and fan
|
||||
|
||||
This board comes with very crappy disposable loud fan, that one has no
|
||||
bearings, which can not be repaired or oiled properly, do not waste your
|
||||
|
|
|
|||
|
|
@ -0,0 +1 @@
|
|||
Learn how to install Libreboot free/opensource BIOS/UEFI boot firmware on your Intel D945GCLF motherboard.
|
||||
|
|
@ -0,0 +1,136 @@
|
|||
---
|
||||
title: Disabling Intel Boot Guard on MEv11 for Libreboot installation
|
||||
x-toc-enable: true
|
||||
...
|
||||
|
||||
Deguard enables open source BIOS/UEFI firmware
|
||||
-------------------------------------------
|
||||
|
||||
On *some* (not all) motherboards, the vendor chooses to fuse a key during
|
||||
manufacturing, which ensures that you can *only* boot firmware cryptographically
|
||||
signed and verified by *them*. This is a form of DRM that otherwise prevents
|
||||
use of coreboot-based firmware, such as Libreboot. We are *against* DRM in the
|
||||
Libreboot project. *Intel* markets the Boot Guard as a security feature, but
|
||||
we regard it simply as an *attack*
|
||||
on [Free Software](https://writefreesoftware.org/learn).
|
||||
|
||||
This document will teach you about *deguard*, which is a utility that modifies
|
||||
the Intel ME (which implements Boot Guard) in such a way as to *disable* the
|
||||
Intel Boot Guard, by exploiting a known security vulnerability on MEv11. The
|
||||
Libreboot project *uses deguard* for *several* coreboot ports, such as
|
||||
the [Lenovo ThinkPad T480 with Libreboot](t480.md) or
|
||||
the [Dell OptiPlex 3050 Micro with Libreboot](dell3050.md).
|
||||
|
||||
This covers Intel Skylake, Kaby Lake and Kaby Lake Refresh / Coffeelake
|
||||
machines; note that Coffeelake includes KabyLake Refresh and may have MEv12.
|
||||
This page concerns only those platforms that have Intel MEv11, not MEv12. The
|
||||
facts on this page are applicable to both *mobile* and *desktop* platforms.
|
||||
|
||||
The Intel Boot Guard is a "security" mechanism implemented by intel, but not all
|
||||
vendors enable it. If enabled, the bootblock in the flash is protected at boot
|
||||
time by cryptographic signature verification; this means only the vendor can
|
||||
update the flash.
|
||||
|
||||
On systems with MEv11, a bug exists in older versions (of MEv11) that allows
|
||||
for unsigned code execution, at a very early stage in the boot process, to the
|
||||
point that almost all of the ME firmware in flash can be fully replaced. The
|
||||
ME is also what implements Boot Guard, and the hack is possible *before* Boot
|
||||
Guard is enforced, allowing for it to be disabled. This does *not* unfuse the
|
||||
keys set by the manufacturer, but rather, it bypasses all checks against them.
|
||||
|
||||
See: [CVE-2017-5705](https://www.intel.com/content/www/us/en/security-center/advisory/intel-sa-00086.html)
|
||||
|
||||
Deguard utility
|
||||
---------------
|
||||
|
||||
Mate Kukri, who authored the ThinkPad T480/T480 and OptiPlex 3050 Micro ports,
|
||||
wrote a tool called *deguard*, which Libreboot uses on these boards. This tool
|
||||
reconfigures the ME, exploiting it so as to disable the Boot Guard.
|
||||
|
||||
You can find it hosted by the coreboot project:
|
||||
|
||||
<https://review.coreboot.org/deguard> (git repository)
|
||||
|
||||
and Libreboot provides a mirror of this repository:
|
||||
|
||||
<https://codeberg.org/libreboot/deguard>
|
||||
|
||||
More information is available there.
|
||||
|
||||
How it works
|
||||
------------
|
||||
|
||||
This is done by externally flashing an older version. Libreboot's build system
|
||||
automatically downloads this older version, runs `me_cleaner` on it, and applies
|
||||
the deguard hack; this includes machine-specific ME configuration, which is
|
||||
added per machine by extracting it from a dump of the original flash. The
|
||||
resulting configuration (for the MFS partition in the ME) is then inserted into
|
||||
the generic ME image.
|
||||
|
||||
Note that the deguard utility can *also* be used on MEv11 setups that *don't*
|
||||
have Boot Guard, if you simply want to auto-download and neuter a generic ME
|
||||
image, and then provide machine configuration. It is essentially doing the same
|
||||
thing that Intel's own *FITC* utility does (Intel Flash Image Tool), which is
|
||||
normally only available to vendors; the *deguard* utility written by Mate Kukri
|
||||
is available under a free software license, and included by default in Libreboot
|
||||
releases. It can be used for *any* MEv11-based system.
|
||||
|
||||
How to use deguard
|
||||
------------------
|
||||
|
||||
To download deguard in lbmk (Libreboot's build system), do this:
|
||||
|
||||
./mk -f deguard
|
||||
|
||||
Then go in `src/deguard/` and the `README.md` file in there tells you more
|
||||
information about how it works, and how to use it. You do not need to run
|
||||
this tool yourself, unless you're adding a new board, because Libreboot is
|
||||
programmed to use it automatically, during the build process (or during
|
||||
insertion of vendor files after the fact, on release images).
|
||||
|
||||
With deguard, the machine is operating in a state as though the Boot Guard keys
|
||||
were never fused, even if they were. [Previous work](https://trmm.net/TOCTOU/)
|
||||
has been done by others, related to the Boot Guard, but nothing quite so
|
||||
thorough and easy to use as deguard existed previously!
|
||||
|
||||
T480/T480s MFS data
|
||||
-------------------
|
||||
|
||||
As of Libreboot 20241206, the upstream deguard project did not contain an MFS
|
||||
config for Lenovo ThinkPad T480 and T480s, because Libreboot added them in an
|
||||
out-of-tree patch (under Mate Kukri's direct guidance).
|
||||
|
||||
Therefore, if you're using deguard on a standalone/custom coreboot setup without
|
||||
using Libreboot/lbmk, please do ensure that they are there. The tool itself
|
||||
provides a README, or you could simply import the config data from lbmk if
|
||||
you wish.
|
||||
|
||||
How does deguard work?
|
||||
----------------------
|
||||
|
||||
Mate Kukri was able to figure this out and implement deguard, using existing
|
||||
work done by PT Research and Youness El Alaoui, exploiting the Intel SA 00086
|
||||
bug which you can read more about here:
|
||||
|
||||
<https://www.intel.com/content/www/us/en/security-center/advisory/intel-sa-00086.html>
|
||||
|
||||
<https://www.intel.com/content/www/us/en/support/articles/000025619/software.html>
|
||||
|
||||
Note that *Intel* refers to this as a means of a so-called *attacker* running
|
||||
so-called *malicious* code; while this may also be possible in the strictest
|
||||
sense, flash write protection is possible on these machines, which you can
|
||||
read about on the [GRUB hardening](../linux/grub_hardening.md) page. Intel made
|
||||
the Boot Guard without giving users control of it, so people have worked for
|
||||
years to try to hack around it, as a matter of user freedom. So remember: when
|
||||
Intel is talking about security, they mean *their* security, not yours. To them,
|
||||
you are simply flashing malicious code. But they are the ones with malice.
|
||||
|
||||
Thanks
|
||||
------
|
||||
|
||||
Mate Kukri and others who work on such hacks are heroes, and they have done a
|
||||
great service to the Libreboot project.
|
||||
|
||||
Many more machines are now possible to port to coreboot, thanks to this hack.
|
||||
|
||||
The Libreboot project owes Mate Kukri a debt of gratitude, many times over.
|
||||
|
|
@ -0,0 +1 @@
|
|||
Libreboot can disable the Intel Boot Guard, on any Intel 6th, 7th or 8th gen platform with Intel Management Engine version 11.x present, using deguard.
|
||||
|
|
@ -1,10 +1,12 @@
|
|||
---
|
||||
title: Dell OptiPlex 3050 Micro
|
||||
title: Install Libreboot on Dell OptiPlex 3050 Micro
|
||||
x-toc-enable: true
|
||||
...
|
||||
|
||||
**[PLEASE READ THESE INSTRUCTIONS BEFORE INSTALLING](../../news/safety.md),
|
||||
OR YOU MIGHT BRICK YOUR MACHINE: [SAFETY PRECAUTIONS](../../news/safety.md)**
|
||||
**[PLEASE READ THESE INSTRUCTIONS BEFORE INSTALLING](ivy_has_common.md), OR
|
||||
YOU MAY BRICK YOUR MACHINE!! - Please click the link and follow the instructions
|
||||
there, before flashing. For posterity,
|
||||
[here is the link again](ivy_has_common.md).**
|
||||
|
||||
<div class="specs">
|
||||
<center>
|
||||
|
|
@ -18,101 +20,101 @@ OR YOU MIGHT BRICK YOUR MACHINE: [SAFETY PRECAUTIONS](../../news/safety.md)**
|
|||
| **Variants** | OptiPlex 3050 Micro |
|
||||
| **Released** | 2017 |
|
||||
| **Chipset** | Intel Kaby Lake |
|
||||
| **CPU** | Intel Kaby Lake |
|
||||
| **CPU** | Intel Skylake/Kaby Lake |
|
||||
| **Graphics** | Intel HD graphics |
|
||||
| **Memory** | DDR4 SODIMMs (max 32GB, 2x16GB) |
|
||||
| **Architecture** | x86\_64 |
|
||||
| **Original boot firmware** | Dell UEFI firmware |
|
||||
| **Intel ME/AMD PSP** | Present. Can be disabled with me\_cleaner. |
|
||||
| **Flash chip** | SOIC-16 and/or SOIC-8 12MiB (96Mbit) |
|
||||
| **Flash chip** | SOIC-8 16MiB (128Mbit) |
|
||||
|
||||
|
||||
```
|
||||
W+: Works without blobs;
|
||||
W+: Works without vendor firmware;
|
||||
N: Doesn't work;
|
||||
W*: Works with blobs;
|
||||
W*: Works with vendor firmware;
|
||||
U: Untested;
|
||||
P+: Partially works;
|
||||
P*: Partially works with blobs
|
||||
P*: Partially works with vendor firmware
|
||||
?: UNKNOWN AT THIS TIME
|
||||
```
|
||||
|
||||
| ***Features*** | |
|
||||
|---------------------------------------------------|----|
|
||||
| **Internal flashing with original boot firmware** | W+ |
|
||||
| **Internal flashing with original boot firmware** | W* |
|
||||
| **Display (if Intel GPU)** | W+ |
|
||||
| **Audio** | W+ |
|
||||
| **RAM Init** | W+ |
|
||||
| **RAM Init** | W* |
|
||||
|
||||
| ***Payloads supported*** | |
|
||||
|----------------------------|-----------|
|
||||
| **GRUB (libgfxinit only)** | Works |
|
||||
| **SeaBIOS** | Broken |
|
||||
| **SeaBIOS** | Works |
|
||||
</div>
|
||||
Introduction
|
||||
============
|
||||
|
||||
Open source BIOS/UEFI firmware
|
||||
-------------------------
|
||||
|
||||
This document will teach you how to install Libreboot, on your
|
||||
Dell OptiPlex 3050 Micro desktop motherboard.
|
||||
Libreboot is a [Free Software](https://writefreesoftware.org/learn) project
|
||||
that replaces proprietary BIOS/UEFI firmware.
|
||||
|
||||
**Unavailable in Libreboot 20240612 or earlier. You must [compile from
|
||||
source](../build/), or use a version newer than Libreboot 20240612.**
|
||||
|
||||
### Buy pre-installed
|
||||
|
||||
**Dell OptiPlex 3050 Micro is available to purchase with Libreboot preinstalled.
|
||||
See: <https://minifree.org/product/libreboot-3050-micro/>**
|
||||
|
||||
Official information about the computer can be found here:
|
||||
<https://www.dell.com/support/manuals/en-uk/optiplex-3050-micro/optiplex_3050-mff_om/processor-specifications?guid=guid-8ca53ab2-a85d-42d5-9106-5214220306aa&lang=en-us>
|
||||
|
||||
Build ROM image from source
|
||||
---------------------------
|
||||
### Warning regarding NVMe SSDs
|
||||
|
||||
Please use at least Libreboot
|
||||
20241206 *[revision 3](../../news/libreboot20241206.Revisions.md#revision-3-11-december-2024)*
|
||||
or higher. This is because older revisions contained a bug, where the NVMe
|
||||
SSD would be *replugged* under Linux, randomly, leading to data loss.
|
||||
|
||||
This is fixed in 20241206 rev3 or higher, by disabling PCI-E hotplug on the
|
||||
NVMe SSD slot.
|
||||
|
||||
See: [Libreboot 20241206 release](../../news/libreboot20241206.md)
|
||||
|
||||
### Build ROM image from source
|
||||
|
||||
The build target, when building from source, is thus:
|
||||
|
||||
./mk -b coreboot dell3050micro_fsp_16mb
|
||||
./mk -b coreboot dell3050micro_vfsp_16mb
|
||||
|
||||
Mate Kukri's *deguard* utility disables the Intel Boot Guard on this
|
||||
machine. Libreboot uses this by default, along with `me_cleaner` to provide
|
||||
a neutered ME setup; unlike on other platforms, arbitrary code execution is also
|
||||
possible inside the ME on this mainboard, giving it much higher potential for
|
||||
possible inside the ME on this motherboard, giving it much higher potential for
|
||||
software freedom in the future.
|
||||
|
||||
Issues
|
||||
======
|
||||
------
|
||||
|
||||
Before flashing, you must know that this board is still a work-in-progress. It
|
||||
is using this patchset from the author, Mate Kukri:
|
||||
|
||||
<https://review.coreboot.org/c/coreboot/+/82053> (libreboot uses patch set 14)
|
||||
|
||||
Issues, as per Libreboot's testing, are as follows:
|
||||
|
||||
* Although USB ports seem to work, the Gerrit page linked above says that the
|
||||
config is incorrect; need to investigate.
|
||||
* HDA Verb: Libreboot patches the board to support this, which fixes the
|
||||
headphone jack among other things.
|
||||
* VBT: Libreboot patches the board to support this, though it's largely
|
||||
optional on Linux/BSD.
|
||||
* ACPI-based shutdown seems to falter a lot; sometimes the board will not turn
|
||||
off after shut down, so you have hold the button down. Also, the button does
|
||||
not seem to signal the OS that a shutdown must occur.
|
||||
* PWM fan controls broken, so the system always run in a low-rpm state, even
|
||||
under stress conditions, which could lead to overheating under stress.
|
||||
|
||||
To mitigate the PWM bug, simply cut the blue wire on the fan connector, and
|
||||
cut the red wire but jump the cut (on red) with a 10ohm resistor or so; cutting
|
||||
the blue one bypasses PWM, so the fan runs at full speed (very loud), and the
|
||||
red wire powers it, so the resistor on the red wire will slow the fan down, but
|
||||
leave it running faster than on idle. You can also cap the CPU speed however you
|
||||
wish, via the `intel_pstate` driver.
|
||||
|
||||
If you're using a 10ohm resistor on the fan power, make sure it's at least a 2W
|
||||
one.
|
||||
This machine basically works flawlessly, as of the Libreboot 20241206 release.
|
||||
All the initial bugs were fixed, e.g. PWM fan control works now. A very nice
|
||||
machine, and inexpensive, plus very easy to set up for the average user. The
|
||||
ideal Libreboot desktop.
|
||||
|
||||
Note that HDMI audio *does* work, but you have to select it in your audio
|
||||
server e.g. pipewire. The `pavucontrol` utility in Linux (with pipewire) lets
|
||||
you have a lot of control over audio I/O. Libreboot patches the board to add
|
||||
a verb, so headphones should work.
|
||||
|
||||
Installation
|
||||
============
|
||||
Selection of audio devices and outputs is a bit idiosyncratic on this board.
|
||||
Just play with pavucontrol for your setup and it should work fine.
|
||||
|
||||
Insert binary files
|
||||
-------------------
|
||||
Installation
|
||||
------------
|
||||
|
||||
### Insert binary files
|
||||
|
||||
If you're using a release ROM, please ensure that you've inserted extra firmware
|
||||
required refer to the [guide](../install/ivy_has_common.md) for that. (failure
|
||||
|
|
@ -122,17 +124,28 @@ Libreboot's build system automatically downloads and processes these files if
|
|||
you build Libreboot from source, but the same logic that it uses must be re-run
|
||||
if you're using a release image.
|
||||
|
||||
MAC address
|
||||
-----------
|
||||
Of particular interest, this board uses the [deguard](deguard.md) software,
|
||||
to disable Intel Boot Guard. This means also that the ME firmware no longer
|
||||
has functional cryptographic signature checking for most of it; you can
|
||||
theoretically run whatever you want on the ME coprocessor.
|
||||
|
||||
This has a realtek NIC inside, instead of Intel, so the MAC address will not
|
||||
Libre ME doesn't exist yet, but it's now possible. Example use-case for a
|
||||
libre ME could include, for example, running an out-of-bound packet filter
|
||||
on a secure network (with flash write protection, making it invincible to any
|
||||
OS-based software attacks).
|
||||
|
||||
### MAC address
|
||||
|
||||
This has a Realtek NIC inside, instead of Intel, so the MAC address will not
|
||||
change. This means: there is no GbE region in the flash.
|
||||
|
||||
You can still use something like GNU MAC Changer to change your MAC address
|
||||
You can still use something like `macchanger` to change your MAC address
|
||||
from Linux if you want to.
|
||||
|
||||
Flash a ROM image (software)
|
||||
-----------------
|
||||
This is great, because that's one less complexity to deal with during
|
||||
installation.
|
||||
|
||||
### Flash a ROM image (software)
|
||||
|
||||
If you're already running Libreboot, and you don't have flash protection
|
||||
turned on, [internal flashing](../install/) is possible.
|
||||
|
|
@ -147,19 +160,81 @@ variables to flash during shutdown sequence, so you should *pull the plug* to
|
|||
shut it down (remove the power by pulling the plug) after flashprog
|
||||
says `VERIFIED`.
|
||||
|
||||
Flash a ROM image (hardware)
|
||||
-----------------
|
||||
### Flash a ROM image (hardware)
|
||||
|
||||
For general information, please refer to [25xx NOR flash
|
||||
instructions](../install/spi.md) - that page refers to use of socketed flash.
|
||||
|
||||
The side cover comes off easily, and you can find the flash ICs next to the RAM.
|
||||
Simply remove the screw at the back. The top panel then slides forward, and you
|
||||
can remove the SSD caddy; from then on, the flash is accossible.
|
||||
can remove the SSD caddy; from then on, the flash is accessible.
|
||||
|
||||
Observe the following photo of the flash (SOIC-8):
|
||||
|
||||
<img tabindex=1 alt="Dell OptiPlex 3050 Micro flash IC" class="p" src="https://av.libreboot.org/3050micro/flash.jpg" /><span class="f"><img src="https://av.libreboot.org/3050micro/flash.jpg" /></span>
|
||||
|
||||
You can otherwise flash internally, including from factory firmware(if the
|
||||
You can otherwise flash internally, including from factory firmware (if the
|
||||
service jumper is set).
|
||||
|
||||
Errata
|
||||
------
|
||||
|
||||
### Power-on after power failure
|
||||
|
||||
Older Libreboot revisions made this machine always turn on, when plugging in
|
||||
a power supply (charger brick), if a previous power loss was observed. This is
|
||||
because coreboot sets a special register in the PMC that configures such
|
||||
behaviour, but it was hardcoded to always-on. This is undesirable for most
|
||||
people, so Libreboot 20241206 *revision 8* and newer releases contain the
|
||||
following modification:
|
||||
|
||||
<https://browse.libreboot.org/lbmk.git/commit/?id=09a01477df67e3ddc36e11123c537332d7813c50>
|
||||
|
||||
If you wish to modify this behaviour again, you could modify the patch
|
||||
referenced there; the actual location of the `.patch` file may change over
|
||||
time, so you can basically just modify the coreboot source file
|
||||
at `src/soc/intel/common/block/pmc/pmclib.c` (for the coreboot tree
|
||||
under `src/coreboot/` in lbmk, pertaining to your board, which can be determined
|
||||
by reading the `tree` variable in your board's `target.cfg` file within lbmk).
|
||||
|
||||
Use the patch as reference, to modify the coreboot behaviour as you wish, and
|
||||
re-compile [from source](../build/).
|
||||
|
||||
### TPM disabled
|
||||
|
||||
The TPM is disabled on this device, to prevent hanging/boot delay in SeaBIOS,
|
||||
due to buggy TPM drivers there.
|
||||
|
||||
### Legacy 8254 timer
|
||||
|
||||
Legacy 8254 timer enabled in coreboot, to prevent SeaBIOS from hanging.
|
||||
|
||||
### HyperThreading on 3050 Micro
|
||||
|
||||
NOTE: The 3050 Micro is available in different CPU configurations.
|
||||
Before considering to enable HyperThreading support, make sure it is
|
||||
supported by the CPU of your 3050 Micro.
|
||||
|
||||
Also called SMT. This is a feature where you get 2 threads on a single core.
|
||||
It can improve performance in some workloads, but is actually a performance
|
||||
liability in others, depending on your OS kernel/scheduler and the actual
|
||||
workload.
|
||||
|
||||
It is a security liability, due to the Spectre/Meltdown attacks, so we
|
||||
recommend turning it off, at the very least from your running operating system.
|
||||
On *this* platform, you can easily turn it off from coreboot.
|
||||
|
||||
**Libreboot disables HyperThreading by default**, from Libreboot 20241206 rev8
|
||||
onward, on this board. To turn it back on, please [build from source](../build/)
|
||||
and before running the build command, do this:
|
||||
|
||||
./mk -m coreboot dell3050micro_vfsp_16mb
|
||||
|
||||
In the menu that appears, go *Chipset -> Enable Hyper-Threading* and turn it on.
|
||||
Then exit from the menu, saving the config where prompted. You will see this
|
||||
menu twice, because there are *two* configs for each of these boards.
|
||||
|
||||
SMT is rarely of benefit in practise, but can be useful in some circumstances.
|
||||
For example, if you're compiling a large codebase from source that takes hours,
|
||||
SMT increases the building speed by about 15 percent; for example, a 3 hour
|
||||
build job might take about 2 hours and 40 minutes instead.
|
||||
|
|
|
|||
|
|
@ -0,0 +1 @@
|
|||
Dell OptiPlex 3050 installation. Libreboot is a free/opensource BIOS/UEFI boot firmware distribution based on coreboot with payloads like GNU GRUB boot loader.
|
||||
|
|
@ -1,13 +1,15 @@
|
|||
---
|
||||
title: Dell OptiPlex 7010/9010 SFF
|
||||
title: Install Libreboot on Dell OptiPlex 7010/9010 SFF
|
||||
x-toc-enable: true
|
||||
...
|
||||
|
||||
**This is only for the SFF variant. The MT variant is also supported, but for
|
||||
the MT variant, you must flash the [T1650 ROM image](t1650.md) instead.**
|
||||
|
||||
**[PLEASE READ THESE INSTRUCTIONS BEFORE INSTALLING](../../news/safety.md),
|
||||
OR YOU MIGHT BRICK YOUR MACHINE: [SAFETY PRECAUTIONS](../../news/safety.md)**
|
||||
**[PLEASE READ THESE INSTRUCTIONS BEFORE INSTALLING](ivy_has_common.md), OR
|
||||
YOU MAY BRICK YOUR MACHINE!! - Please click the link and follow the instructions
|
||||
there, before flashing. For posterity,
|
||||
[here is the link again](ivy_has_common.md).**
|
||||
|
||||
<div class="specs">
|
||||
<center>
|
||||
|
|
@ -33,12 +35,12 @@ OR YOU MIGHT BRICK YOUR MACHINE: [SAFETY PRECAUTIONS](../../news/safety.md)**
|
|||
|
||||
|
||||
```
|
||||
W+: Works without blobs;
|
||||
W+: Works without vendor firmware;
|
||||
N: Doesn't work;
|
||||
W*: Works with blobs;
|
||||
W*: Works with vendor firmware;
|
||||
U: Untested;
|
||||
P+: Partially works;
|
||||
P*: Partially works with blobs
|
||||
P*: Partially works with vendor firmware
|
||||
?: UNKNOWN AT THIS TIME
|
||||
```
|
||||
|
||||
|
|
@ -46,7 +48,7 @@ P*: Partially works with blobs
|
|||
|---------------------------------------------------|----|
|
||||
| **Internal flashing with original boot firmware** | W+ |
|
||||
| **Display (if Intel GPU)** | W+ |
|
||||
| **Display (discrete CPU, SeaBIOS payload only)** | W* |
|
||||
| **Display (discrete GPU, SeaBIOS payload only)** | W* |
|
||||
| **Audio** | W+ |
|
||||
| **RAM Init** | W+ |
|
||||
|
||||
|
|
@ -56,8 +58,14 @@ P*: Partially works with blobs
|
|||
| **SeaBIOS** | Works |
|
||||
| **SeaBIOS with GRUB** | Works |
|
||||
</div>
|
||||
Introduction
|
||||
============
|
||||
|
||||
Open source BIOS/UEFI firmware
|
||||
------------------------------
|
||||
|
||||
This document will teach you how to install Libreboot, on your
|
||||
Dell OptiPlex 7010 SFF and/or OptiPlex 9010 SFF desktop motherboard.
|
||||
Libreboot is a [Free Software](https://writefreesoftware.org/learn) project
|
||||
that replaces proprietary BIOS/UEFI firmware.
|
||||
|
||||
**Unavailable in Libreboot 20240612 or earlier. You must [compile from
|
||||
source](../build/), or use a version newer than Libreboot 20240612.**
|
||||
|
|
@ -65,20 +73,22 @@ source](../build/), or use a version newer than Libreboot 20240612.**
|
|||
Official information about the computer can be found here:
|
||||
<https://www.dell.com/support/manuals/en-uk/optiplex-7010-plus-small-ff/opti_7010_sff_plus_om/specifications-of-optiplex-small-form-factor-plus-7010?guid=guid-7c9f07ce-626e-44ca-be3a-a1fb036413f9&lang=en-us>
|
||||
|
||||
Build ROM image from source
|
||||
---------------------------
|
||||
### Build ROM image from source
|
||||
|
||||
The build target, when building from source, is thus:
|
||||
|
||||
./mk -b coreboot dell7010sff_12mb
|
||||
|
||||
NOTE: The same 7010 SFF image also works on 9010 SFF. It's the same mainboard.
|
||||
NOTE: The same 7010 SFF image also works on 9010 SFF. It's the same motherboard.
|
||||
|
||||
Installation
|
||||
============
|
||||
Alternatively, you can use one of Libreboot's pre-compiled release images.
|
||||
|
||||
Insert binary files
|
||||
-------------------
|
||||
Install Libreboot
|
||||
-----------------
|
||||
|
||||
Libreboot can be installed via internal and/or external flashing methods.
|
||||
|
||||
### Insert vendor files
|
||||
|
||||
If you're using a release ROM, please ensure that you've inserted extra firmware
|
||||
required refer to the [guide](../install/ivy_has_common.md) for that. (failure
|
||||
|
|
@ -88,15 +98,13 @@ Libreboot's build system automatically downloads and processes these files if
|
|||
you build Libreboot from source, but the same logic that it uses must be re-run
|
||||
if you're using a release image.
|
||||
|
||||
Set MAC address
|
||||
---------------
|
||||
### Set MAC address
|
||||
|
||||
This platform uses an Intel Flash Descriptor, and defines an Intel GbE NVM
|
||||
region. As such, release/build ROMs will contain the same MAC address. To
|
||||
change the MAC address, please read [nvmutil documentation](../install/nvmutil.md).
|
||||
|
||||
WARNING about CPU/GPU compatibility
|
||||
-------------------------------
|
||||
### WARNING about CPU/GPU compatibility
|
||||
|
||||
If you want to use onboard graphics, you must have a CPU that has a GPU built
|
||||
into it. You can find a list here:
|
||||
|
|
@ -110,8 +118,7 @@ used, SeaBIOS executes its VGA ROM which provides video init, instead of
|
|||
coreboot's native Intel video init. GRUB piggybacks off of what SeaBIOS did,
|
||||
so the GRUB payload will also work.
|
||||
|
||||
Flash a ROM image (software)
|
||||
-----------------
|
||||
### Flash a ROM image (software)
|
||||
|
||||
If you're already running Libreboot, and you don't have flash protection
|
||||
turned on, [internal flashing](../install/) is possible.
|
||||
|
|
@ -127,8 +134,7 @@ variables to flash during shutdown sequence, so you should *pull the plug* to
|
|||
shut it down (remove the power by pulling the plug) after flashprog
|
||||
says `VERIFIED`.
|
||||
|
||||
Flash a ROM image (hardware)
|
||||
-----------------
|
||||
### Flash a ROM image (hardware)
|
||||
|
||||
For general information, please refer to [25xx NOR flash
|
||||
instructions](../install/spi.md) - that page refers to use of socketed flash.
|
||||
|
|
|
|||
|
|
@ -0,0 +1 @@
|
|||
Learn how to install Libreboot free/opensource BIOS/UEFI boot firmware on your Dell OptiPlex 7010 SFF.
|
||||
|
|
@ -0,0 +1,166 @@
|
|||
---
|
||||
title: Install Libreboot on Dell OptiPlex 780 MT/USFF
|
||||
x-toc-enable: true
|
||||
...
|
||||
|
||||
Libreboot is compatible with the Dell OptiPlex 780, of variants: MT and USFF.
|
||||
SFF and DT may be supported in a future revision. These instructions are
|
||||
identical both the MT and USFF variants.
|
||||
|
||||
<div class="specs">
|
||||
<center>
|
||||
Dell OptiPlex 780
|
||||
</center>
|
||||
|
||||
| ***Specifications*** | |
|
||||
|----------------------------|------------------------------------------------|
|
||||
| **Manufacturer** | Dell |
|
||||
| **Name** | OptiPlex 780 |
|
||||
| **Variants** | OptiPlex 780 MT, OptiPlex 780 USFF |
|
||||
| **Released** | 2009 |
|
||||
| **Chipset** | Intel X4X |
|
||||
| **CPU** | Core 2 Duo (e.g. E8400) |
|
||||
| **Graphics** | Discrete graphics card, or Intel HD Graphics model |
|
||||
| **Memory** | DDR3 DIMMs (max 16GB on MT 4x4GB, 8GB USFF 2x4GB) |
|
||||
| **Architecture** | x86\_64 |
|
||||
| **Original boot firmware** | Dell UEFI firmware |
|
||||
| **Intel ME/AMD PSP** | Present. Entire ME firmware can be removed. |
|
||||
| **Flash chip** | SOIC-16 and/or SOIC-8 8MiB (64Mbit) |
|
||||
|
||||
|
||||
```
|
||||
W+: Works without vendor firmware;
|
||||
N: Doesn't work;
|
||||
W*: Works with vendor firmware;
|
||||
U: Untested;
|
||||
P+: Partially works;
|
||||
P*: Partially works with vendor firmware
|
||||
?: UNKNOWN AT THIS TIME
|
||||
```
|
||||
|
||||
| ***Features*** | |
|
||||
|---------------------------------------------------|----|
|
||||
| **Internal flashing with original boot firmware** | W+ |
|
||||
| **Display (if Intel GPU)** | W+ |
|
||||
| **Display (discrete GPU, SeaBIOS payload only)** | W* |
|
||||
| **Audio** | W+ |
|
||||
| **RAM Init** | W+ |
|
||||
|
||||
| ***Payloads supported*** | |
|
||||
|----------------------------|-----------|
|
||||
| **GRUB (libgfxinit only)** | Works |
|
||||
| **SeaBIOS** | Works |
|
||||
| **SeaBIOS with GRUB** | Works |
|
||||
</div>
|
||||
|
||||
Open source BIOS/UEFI firmware
|
||||
-------------------------
|
||||
|
||||
This document will teach you how to install Libreboot, on your
|
||||
Dell OptiPlex 780 desktop motherboard.
|
||||
Libreboot is a [Free Software](https://writefreesoftware.org/learn) project
|
||||
that replaces proprietary BIOS/UEFI firmware.
|
||||
|
||||
**Unavailable in Libreboot 20240612 or earlier. You must [compile from
|
||||
source](../build/), or use a version newer than Libreboot 20240612.**
|
||||
|
||||
Official information about the computer can be found here:
|
||||
<https://www.dell.com/support/manuals/en-uk/optiplex-7010-plus-small-ff/opti_7010_sff_plus_om/specifications-of-optiplex-small-form-factor-plus-7010?guid=guid-7c9f07ce-626e-44ca-be3a-a1fb036413f9&lang=en-us>
|
||||
|
||||
### Build ROM image from source
|
||||
|
||||
The build target, when building from source, is thus:
|
||||
|
||||
./mk -b coreboot dell780mt_truncate_8mb
|
||||
./mk -b coreboot dell780mt_8mb
|
||||
./mk -b coreboot dell780usff_truncate_8mb
|
||||
./mk -b coreboot dell780usff_8mb
|
||||
|
||||
The `_truncate` image is needed if you're flashing Libreboot internally from
|
||||
the original Dell firmware. Otherwise, you only need the regular images that
|
||||
lack `_truncate` in the file name.
|
||||
|
||||
Alternatively, you can use release images instead of compiling from source.
|
||||
|
||||
### 100% FREE / OPEN SOURCE!
|
||||
|
||||
This motherboard is entirely free software in the main boot flash. It is using
|
||||
the Intel X4X / ICH10 platform, same as on the already supported
|
||||
Gigabyte GA-G41M-ES2L motherboard.
|
||||
|
||||
Install Libreboot
|
||||
-----------------
|
||||
|
||||
These next sections will teach you how to install Libreboot, on your
|
||||
Dell OptiPlex 780 motherboard.
|
||||
|
||||
### Set MAC address
|
||||
|
||||
This platform uses an Intel Flash Descriptor, and defines an Intel GbE NVM
|
||||
region. As such, release/build ROMs will contain the same MAC address. To
|
||||
change the MAC address, please read [nvmutil documentation](../install/nvmutil.md).
|
||||
|
||||
### WARNING about CPU/GPU compatibility
|
||||
|
||||
Coreboot has libre initialisation code for Intel graphics, but libre
|
||||
initialisation code is not available for most graphics cards. This machine can
|
||||
take any graphics card that fits in the PCI-E slot. When a graphics card is
|
||||
used, SeaBIOS executes its VGA ROM which provides video init, instead of
|
||||
coreboot's native Intel video init. GRUB piggybacks off of what SeaBIOS did,
|
||||
so the GRUB payload will also work.
|
||||
|
||||
### Flash a ROM image (software)
|
||||
|
||||
**Always make sure to dump a copy of the current flash first. ALSO: [make
|
||||
sure /dev/mem protection is disabled](devmem.md) for the flashing to work!**
|
||||
|
||||
If you're already running Libreboot, and you don't have flash protection
|
||||
turned on, [internal flashing](../install/) is possible.
|
||||
|
||||
If you have factory firmware (Dell), you can short the service jumper. It's a
|
||||
2-pin header located somewhere on the board (no photos available yet).
|
||||
|
||||
With the service jumper set, all flash protections are disabled on the first
|
||||
6MB of the flash; the latter 2MB part is restricted. Because we are using an
|
||||
Intel Flash Descriptor on this board, the flash will be divided into these
|
||||
parts:
|
||||
|
||||
* Intel Flash Descriptor (basic machine configuration)
|
||||
* Intel Gigabit Ethernet region (e.g. MAC address configuration)
|
||||
* BIOS region (contains coreboot)
|
||||
|
||||
Before you can use the flash commands, please note that the `_truncate` images
|
||||
are 6MB in size, but they must be padded to 8MB. Normally a blank part of flash
|
||||
should ideally be all 0xFF, but here we do:
|
||||
|
||||
dd if=/dev/zero of=2mb.bin bs=2M count=1
|
||||
cat libreboot6mb.rom 2mb.bin > libreboot.rom
|
||||
|
||||
If you're not using the truncate images, you can ignore the above steps.
|
||||
|
||||
The Flash Descriptor can be thought of more like a *partition table* for the
|
||||
flash, at least in our use-case scenario. The `_truncate` images configure
|
||||
the flash such that only the first 6MB is used, with the BIOS region ending
|
||||
at that limit; the upper 2MB is specified as the platform data region, in
|
||||
Libreboot's configuration. To flash it, do this:
|
||||
|
||||
./flashprog -p internal --ifd -i fd -w libreboot.rom
|
||||
./flashprog -p internal --ifd -i gbe -w libreboot.rom
|
||||
./flashprog -p internal --ifd -i bios -w libreboot.rom
|
||||
|
||||
It's very important to do this in the *exact* order as above, because
|
||||
the `--ifd` option references the *flashed* IFD, not the one in your image,
|
||||
so you must flash the IFD first.
|
||||
|
||||
If you already have Libreboot running, and you don't have flash protection
|
||||
enabled, you can omit `--ifd -i REGION` from the flashprog command, and flash
|
||||
the full image; the one without `_truncate` in the file name uses all of the
|
||||
flash, with the BIOS region ending at the 8MB limit, so the BIOS region is
|
||||
therefore 2MB larger on those images.
|
||||
|
||||
### Flash a ROM image (hardware)
|
||||
|
||||
For general information, please refer to [25xx NOR flash
|
||||
instructions](../install/spi.md) - that page refers to use of socketed flash.
|
||||
|
||||
No photos yet available.
|
||||
|
|
@ -0,0 +1 @@
|
|||
Learn how to install Libreboot free/opensource BIOS/UEFI boot firmware on your Dell OptiPlex 780.
|
||||
|
|
@ -1,13 +1,15 @@
|
|||
---
|
||||
title: Dell OptiPlex 9020 SFF/MT (and 7020), and XE2 MT/SFF
|
||||
title: Install Libreboot on Dell OptiPlex 9020 SFF/MT (or 7020), or XE2 MT/SFF
|
||||
x-toc-enable: true
|
||||
...
|
||||
|
||||
**NOTE: Dell XE2 MT/SFF are also known to work, using the 9020 images. Same
|
||||
motherboards as the 9020 and 7020.**
|
||||
|
||||
**[PLEASE READ THESE INSTRUCTIONS BEFORE INSTALLING](../../news/safety.md),
|
||||
OR YOU MIGHT BRICK YOUR MACHINE: [SAFETY PRECAUTIONS](../../news/safety.md)**
|
||||
**[PLEASE READ THESE INSTRUCTIONS BEFORE INSTALLING](ivy_has_common.md), OR
|
||||
YOU MAY BRICK YOUR MACHINE!! - Please click the link and follow the instructions
|
||||
there, before flashing. For posterity,
|
||||
[here is the link again](ivy_has_common.md).**
|
||||
|
||||
<div class="specs">
|
||||
<center>
|
||||
|
|
@ -37,12 +39,12 @@ OR YOU MIGHT BRICK YOUR MACHINE: [SAFETY PRECAUTIONS](../../news/safety.md)**
|
|||
|
||||
|
||||
```
|
||||
W+: Works without blobs;
|
||||
W+: Works without vendor firmware;
|
||||
N: Doesn't work;
|
||||
W*: Works with blobs;
|
||||
W*: Works with vendor firmware;
|
||||
U: Untested;
|
||||
P+: Partially works;
|
||||
P*: Partially works with blobs
|
||||
P*: Partially works with vendor firmware
|
||||
?: UNKNOWN AT THIS TIME
|
||||
```
|
||||
|
||||
|
|
@ -50,7 +52,7 @@ P*: Partially works with blobs
|
|||
|---------------------------------------------------|----|
|
||||
| **Internal flashing with original boot firmware** | W+ |
|
||||
| **Display (if Intel GPU)** | W+ |
|
||||
| **Display (discrete CPU, SeaBIOS payload only)** | W* |
|
||||
| **Display (discrete GPU, SeaBIOS payload only)** | W* |
|
||||
| **Audio** | W+ |
|
||||
| **RAM Init** | W+ |
|
||||
|
||||
|
|
@ -60,8 +62,14 @@ P*: Partially works with blobs
|
|||
| **SeaBIOS** | Works |
|
||||
| **SeaBIOS with GRUB** | Works |
|
||||
</div>
|
||||
Introduction
|
||||
============
|
||||
|
||||
Open source BIOS/UEFI firmware
|
||||
------------------------------
|
||||
|
||||
This document will teach you how to install Libreboot, on your
|
||||
Dell OptiPlex 9020/7020 SFF/MT or XE2 SFF/MT desktop motherboard.
|
||||
Libreboot is a [Free Software](https://writefreesoftware.org/learn) project
|
||||
that replaces proprietary BIOS/UEFI firmware.
|
||||
|
||||
**Unavailable in Libreboot 20240126 or earlier. You must [compile from
|
||||
source](../build/), or use a version newer than Libreboot 20240126**
|
||||
|
|
@ -69,19 +77,46 @@ source](../build/), or use a version newer than Libreboot 20240126**
|
|||
Official information about this machine can be found here:
|
||||
<https://i.dell.com/sites/doccontent/shared-content/data-sheets/en/Documents/optiplex-9020-micro-technical-spec-sheet.pdf>
|
||||
|
||||
ECC memory support
|
||||
------------------
|
||||
|
||||
The 9020 MT/SFF do not have ECC memory support. However:
|
||||
|
||||
### Dell Precision T1700
|
||||
|
||||
The T1700 is a version of the same motherboard, but with ECC support. You
|
||||
can flash the 9020 MT image on this board, and it will boot.
|
||||
|
||||
Please note however that the native raminit (libre raminit) provided by
|
||||
Libreboot does not yet support ECC. You *may* be able to use ECC modules,
|
||||
but you won't actually have functioning ECC.
|
||||
|
||||
ECC support currently requires `mrc.bin`, which is vendor firmware for raminit.
|
||||
Libreboot removed this some time ago, instead favouring only the libre raminit.
|
||||
Patches are welcome, otherwise you can use an older revision of Libreboot
|
||||
with `mrc.bin` if you need ECC; it's unknown whether both the Haswell and
|
||||
Broadwell MRC (the latter works on 9020 MT) both support ECC, so you'll just
|
||||
have to try either. Otherwise, you might simply compile your own custom
|
||||
coreboot configuration for this setup.
|
||||
|
||||
Libreboot's [binary blob reduction policy](../../news/policy.md) is very clear:
|
||||
if a blob *can* be avoided, it must be avoided. Therefore, `mrc.bin` is avoided
|
||||
since the libre raminit works pretty well these days (ECC notwithstanding).
|
||||
|
||||
Buy Libreboot preinstalled
|
||||
======================
|
||||
--------------------------
|
||||
|
||||
You can buy this machine professionally serviced, with Libreboot preinstalled
|
||||
and your choice of Linux/BSD system. Many upgrades are also available. See:
|
||||
|
||||
<https://minifree.org/product/libreboot-9020/>
|
||||
**Minifree now sells the Libreboot 3050 Micro, instead of the Libreboot
|
||||
9020 SFF. See: <https://minifree.org/product/libreboot-3050-micro/>**
|
||||
|
||||
Sales are conducted to provide funding for the Libreboot project. Leah Rowe
|
||||
who runs Minifree, is also Libreboot's founder and lead developer.
|
||||
|
||||
Patch
|
||||
=====
|
||||
-----
|
||||
|
||||
Mate Kukri is the author of the original coreboot port. Thanks go to Kukri.
|
||||
Kukri's patch is here:
|
||||
|
|
@ -91,16 +126,14 @@ Kukri's patch is here:
|
|||
This patch, at this revision (patchset 31), is what Libreboot uses for this
|
||||
port.
|
||||
|
||||
QUBES: how to get it working
|
||||
-------------------
|
||||
### QUBES: how to get it working
|
||||
|
||||
Qubes requires IOMMU to be turned on. Please now read the next section.
|
||||
Qubes *WILL* work, if you configure Libreboot as directed below, but otherwise
|
||||
it will fail by default. This is because Libreboot *disables the IOMMU by
|
||||
default*, on this board.
|
||||
|
||||
Graphics cards and IOMMU
|
||||
--------------
|
||||
### Graphics cards and IOMMU
|
||||
|
||||
IOMMU is buggy for some reason (we don't know why yet), when you plug in
|
||||
a graphics card. The graphics card simply won't work. On some of them,
|
||||
|
|
@ -128,8 +161,7 @@ IOMMU, and only if vt-d is present. This is still the behaviour in Libreboot,
|
|||
but Libreboot adds an additional check: if `iommu` is not set in nvram, it
|
||||
defaults to on, but if it's set to disabled, then IOMMU is not initialised.
|
||||
|
||||
Enable IOMMU
|
||||
------------
|
||||
### Enable IOMMU
|
||||
|
||||
IOMMU is *disabled by default*, universally, on this board. You can turn it on,
|
||||
by modifying the ROM image prior to flashing, or modifying it prior to
|
||||
|
|
@ -148,7 +180,7 @@ Then flash the ROM image. You can find nvramtool
|
|||
under `src/coreboot/default/util/nvramtool`. Do this in lbmk if you don't
|
||||
already havse `src/coreboot/default/`:
|
||||
|
||||
./update trees -f coreboot default
|
||||
./mk -f coreboot default
|
||||
|
||||
Then do this:
|
||||
|
||||
|
|
@ -175,8 +207,7 @@ with IOMMU enabled:
|
|||
|
||||
Make sure to configure your image accordingly.
|
||||
|
||||
7020 compatibility
|
||||
------------------
|
||||
### 7020 compatibility
|
||||
|
||||
7020/9020 MT each have the same motherboard. Flash the 9020 ROM from Libreboot
|
||||
on your 7020, and it will work.
|
||||
|
|
@ -184,8 +215,7 @@ on your 7020, and it will work.
|
|||
Ditto 7020/9020 SFF, it's the same motherboard. However, Libreboot provides
|
||||
separate targets for MT and SFF.
|
||||
|
||||
Build ROM image from source
|
||||
---------------------------
|
||||
### Build ROM image from source
|
||||
|
||||
For the MT variant (7020 MT and 9020 MT):
|
||||
|
||||
|
|
@ -199,10 +229,9 @@ It is important that you choose the right one. The MT variant is the full
|
|||
MTX tower.
|
||||
|
||||
Installation
|
||||
============
|
||||
------------
|
||||
|
||||
Insert binary files
|
||||
-------------------
|
||||
### Insert binary files
|
||||
|
||||
If you're using a release ROM, please ensure that you've inserted extra firmware
|
||||
required refer to the [guide](../install/ivy_has_common.md) for that. (failure
|
||||
|
|
@ -212,15 +241,13 @@ Libreboot's build system automatically downloads and processes these files if
|
|||
you build Libreboot from source, but the same logic that it uses must be re-run
|
||||
if you're using a release image.
|
||||
|
||||
Set MAC address
|
||||
---------------
|
||||
### Set MAC address
|
||||
|
||||
This platform uses an Intel Flash Descriptor, and defines an Intel GbE NVM
|
||||
region. As such, release/build ROMs will contain the same MAC address. To
|
||||
change the MAC address, please read [nvmutil documentation](../install/nvmutil.md).
|
||||
|
||||
Flash a ROM image (software)
|
||||
-----------------
|
||||
### Flash a ROM image (software)
|
||||
|
||||
If you're already running Libreboot, and you don't have flash protection
|
||||
turned on, [internal flashing](../install/) is possible.
|
||||
|
|
@ -240,8 +267,7 @@ the original Dell BIOS, remove power from the computer instead of
|
|||
shutting it down normally. It's recommended to use a live USB instead
|
||||
of the internal drive to prevent potential filesystem corruption.**
|
||||
|
||||
Flash a ROM image (hardware)
|
||||
-----------------
|
||||
### Flash a ROM image (hardware)
|
||||
|
||||
**REMOVE all power sources and connectors from the machine, before doing this.
|
||||
This is to prevent short circuiting and power surges while flashing.**
|
||||
|
|
|
|||
|
|
@ -0,0 +1 @@
|
|||
Learn how to install Libreboot free/opensource BIOS/UEFI boot firmware on your Dell OptiPlex 9020 MT and SFF, also XE2 SFF and MT.
|
||||
|
|
@ -17,7 +17,7 @@ Basically, what you need to do is:
|
|||
laptop came with, if you bought it on ebay for example). Arctic MX-6 is good.
|
||||
* Check that the fan works reliably
|
||||
|
||||
Also: the `intel_pstate` driver can be used to artifically cap CPU speed. See:
|
||||
Also: the `intel_pstate` driver can be used to artificially cap CPU speed. See:
|
||||
|
||||
<https://www.kernel.org/doc/html/v4.12/admin-guide/pm/intel_pstate.html>
|
||||
|
||||
|
|
|
|||
|
|
@ -0,0 +1 @@
|
|||
Thermal protection has a few idiosyncrasies, on the various motherboards supported by Libreboot. This guide will explain what they are.
|
||||
|
|
@ -1,5 +1,5 @@
|
|||
---
|
||||
title: Disabling /dev/mem protections
|
||||
title: Disabling /dev/mem protections on Linux and BSD
|
||||
x-toc-enable: true
|
||||
...
|
||||
|
||||
|
|
@ -12,7 +12,7 @@ access once you no longer need it, as this is a useful security layer against
|
|||
any wrongful operations that you may later inadvertently run as root.
|
||||
|
||||
Also disable SecureBoot
|
||||
=======================
|
||||
-----------------------
|
||||
|
||||
If you're using a UEFI setup, it's probably because you're using
|
||||
a latter Intel platform and want to flash Libreboot internally, from
|
||||
|
|
@ -22,19 +22,23 @@ If the factory firmware implements UEFI, and this is how you boot when
|
|||
using the factory firmware, please ensure that *SecureBoot* is disabled,
|
||||
because it will interfere with lower memory accesses if left enabled.
|
||||
|
||||
If you can, boot in BIOS/CSM mode just to be sure, again with SecureBoot
|
||||
disabled.
|
||||
|
||||
FLASH ERRORS (and workarounds)
|
||||
=======================
|
||||
------------------------------
|
||||
|
||||
**NOTE: Libreboot standardises on [flashprog](https://flashprog.org/wiki/Flashprog)
|
||||
now, as of 27 January 2024, which is a fork of flashrom.**
|
||||
now, as of 27 January 2024, which is a fork of flashrom.
|
||||
The reason why was explained, in
|
||||
the [Libreboot 20240225 release](../../news/libreboot20240225.md#flashprog-now-used-instead-of-flashrom)**
|
||||
|
||||
This section relates to installing libreboot on supported targets.
|
||||
|
||||
Right out of the gate, some users may experience errors with flashprog when
|
||||
using the internal programmer. They are:
|
||||
|
||||
/dev/mem access error
|
||||
---------------------
|
||||
### /dev/mem access error
|
||||
|
||||
NOTE: if running `flashprog -p internal` for software based flashing, and you
|
||||
get an error related to `/dev/mem` access, you should reboot with
|
||||
|
|
@ -46,8 +50,7 @@ is `kernel.securelevel=-1`; see [NetBSD securelevel
|
|||
manual](https://wiki.netbsd.org/tutorials/kernel_secure_levels/)
|
||||
and [OpenBSD securelevel manual](https://man.openbsd.org/securelevel).
|
||||
|
||||
ERROR: Could not get I/O privileges
|
||||
------------------------------------
|
||||
### ERROR: Could not get I/O privileges
|
||||
|
||||
Error message: `ERROR: Could not get I/O privileges (Function not implemented)`
|
||||
|
||||
|
|
|
|||
|
|
@ -0,0 +1 @@
|
|||
Libreboot installation relies heavily on port IO and access to lower memory, which is usually restricted. Learn how to enable access on Linux and BSD.
|
||||
|
|
@ -1,5 +1,5 @@
|
|||
---
|
||||
title: Gigabyte GA-G41M-ES2L desktop board
|
||||
title: Install Libreboot on Gigabyte GA-G41M-ES2L
|
||||
...
|
||||
|
||||
<div class="specs">
|
||||
|
|
@ -24,12 +24,12 @@ GA-G41M-ES2L
|
|||
| **Flash chip** | 2x8Mbit |
|
||||
|
||||
```
|
||||
W+: Works without blobs;
|
||||
W+: Works without vendor firmware;
|
||||
N: Doesn't work;
|
||||
W*: Works with blobs;
|
||||
W*: Works with vendor firmware;
|
||||
U: Untested;
|
||||
P+: Partially works;
|
||||
P*: Partially works with blobs
|
||||
P*: Partially works with vendor firmware
|
||||
```
|
||||
|
||||
| ***Features*** | |
|
||||
|
|
@ -48,8 +48,13 @@ P*: Partially works with blobs
|
|||
| **SeaBIOS with GRUB** | Works |
|
||||
</div>
|
||||
|
||||
Introduction
|
||||
============
|
||||
Open source BIOS/UEFI firmware
|
||||
------------------------------
|
||||
|
||||
This document will teach you how to install Libreboot, on your
|
||||
Gigabyte GA-G41M-ES2L desktop motherboard.
|
||||
Libreboot is a [Free Software](https://writefreesoftware.org/learn) project
|
||||
that replaces proprietary BIOS/UEFI firmware.
|
||||
|
||||
This is a desktop board using intel hardware (circa \~2009, ICH7
|
||||
southbridge, similar performance-wise to the ThinkPad X200. It can make
|
||||
|
|
@ -89,7 +94,7 @@ You can learn more about using the build system, lbmk, here:\
|
|||
[libreboot build instructions](../build/)
|
||||
|
||||
RAM
|
||||
===
|
||||
---
|
||||
|
||||
**This board is very picky with RAM. If it doesn't boot, try an EHCI debug
|
||||
dongle, serial usb adapter and null modem cable, or spkmodem, to get a
|
||||
|
|
@ -105,7 +110,7 @@ Many other modules will probably work just fine, but raminit is very picky on
|
|||
this board. Your mileage *will* fluctuate, wildly.
|
||||
|
||||
MAC ADDRESS
|
||||
===========
|
||||
-----------
|
||||
|
||||
NOTE: due to a bug in the hardware, the MAC address is hardcoded in
|
||||
coreboot. Therefore, you must set your own MAC address in your
|
||||
|
|
@ -116,14 +121,14 @@ distro, to set a valid MAC address. By doing this, your NIC should
|
|||
work nicely.
|
||||
|
||||
Flash chip size {#flashchips}
|
||||
===============
|
||||
---------------------
|
||||
|
||||
Use this to find out:
|
||||
|
||||
flashprog -p internal
|
||||
|
||||
Flashing instructions {#clip}
|
||||
=====================
|
||||
--------------------------
|
||||
|
||||
Refer to [spi.md](spi.md) for how to set up an SPI programmer for
|
||||
external flashing. *You can only externally reprogram one of the chips
|
||||
|
|
@ -164,5 +169,8 @@ NOTE: If you don't flash both chips, the recovery program from the default
|
|||
factory BIOS will kick in and your board will be soft bricked. Make sure that
|
||||
you flash both chips!
|
||||
|
||||
NOTE: Libreboot standardises on [flashprog](https://flashprog.org/wiki/Flashprog)
|
||||
**NOTE: Libreboot standardises on [flashprog](https://flashprog.org/wiki/Flashprog)
|
||||
now, as of 27 January 2024, which is a fork of flashrom.
|
||||
The reason why was explained, in
|
||||
the [Libreboot 20240225 release](../../news/libreboot20240225.md#flashprog-now-used-instead-of-flashrom)**
|
||||
|
||||
|
|
|
|||
|
|
@ -0,0 +1 @@
|
|||
Learn how to install Libreboot free/opensource BIOS/UEFI boot firmware on your Gigabyte GA-G41M-ES2L motherboard.
|
||||
|
|
@ -1,10 +1,12 @@
|
|||
---
|
||||
title: HP EliteBook 2170p
|
||||
title: Install Libreboot on HP EliteBook 2170p
|
||||
x-toc-enable: true
|
||||
...
|
||||
|
||||
**[PLEASE READ THESE INSTRUCTIONS BEFORE INSTALLING](../../news/safety.md),
|
||||
OR YOU MIGHT BRICK YOUR MACHINE: [SAFETY PRECAUTIONS](../../news/safety.md)**
|
||||
**[PLEASE READ THESE INSTRUCTIONS BEFORE INSTALLING](ivy_has_common.md), OR
|
||||
YOU MAY BRICK YOUR MACHINE!! - Please click the link and follow the instructions
|
||||
there, before flashing. For posterity,
|
||||
[here is the link again](ivy_has_common.md).**
|
||||
|
||||
<div class="specs">
|
||||
<center>
|
||||
|
|
@ -22,20 +24,20 @@ OR YOU MIGHT BRICK YOUR MACHINE: [SAFETY PRECAUTIONS](../../news/safety.md)**
|
|||
| **Graphics** | Intel HD Graphics 4000 |
|
||||
| **Display** | 1366x768 11.6" TFT |
|
||||
| **Memory** | Two slots, max 8GB/slot (2x16GB), DDR3/sodimm |
|
||||
| **Architecture** | x86_64 |
|
||||
| **Architecture** | x86\_64 |
|
||||
| **EC** | SMSC KBC1126, proprietary (in main boot flash) |
|
||||
| **Original boot firmware** | HP UEFI firmware |
|
||||
| **Intel ME/AMD PSP** | Present. Can be disabled with me_cleaner. |
|
||||
| **Intel ME/AMD PSP** | Present. Can be disabled with me\_cleaner. |
|
||||
| **Flash chip** | SOIC-8 16MiB (128Mbit), in a socket |
|
||||
|
||||
|
||||
```
|
||||
W+: Works without blobs;
|
||||
W+: Works without vendor firmware;
|
||||
N: Doesn't work;
|
||||
W*: Works with blobs;
|
||||
W*: Works with vendor firmware;
|
||||
U: Untested;
|
||||
P+: Partially works;
|
||||
P*: Partially works with blobs
|
||||
P*: Partially works with vendor firmware
|
||||
```
|
||||
|
||||
| ***Features*** | |
|
||||
|
|
@ -53,8 +55,14 @@ P*: Partially works with blobs
|
|||
| **SeaBIOS** | Works |
|
||||
| **SeaBIOS with GRUB** | Works |
|
||||
</div>
|
||||
Introduction
|
||||
============
|
||||
|
||||
Open source BIOS/UEFI firmware
|
||||
------------------------------
|
||||
|
||||
This document will teach you how to install Libreboot, on your
|
||||
HP EliteBook 2170p laptop motherboard.
|
||||
Libreboot is a [Free Software](https://writefreesoftware.org/learn) project
|
||||
that replaces proprietary BIOS/UEFI firmware.
|
||||
|
||||
This is a portable, 11.6" Ivy Bridge platform from HP. More information is
|
||||
available on the [coreboot
|
||||
|
|
@ -67,38 +75,33 @@ in the latest GRUB revisions, and Libreboot's version of GRUB contains this fix.
|
|||
**Unavailable in Libreboot 20230625 or earlier. You must [compile from
|
||||
source](../build/), or use at least Libreboot 20231021.**
|
||||
|
||||
Build ROM image from source
|
||||
---------------------------
|
||||
### Build ROM image from source
|
||||
|
||||
The build target, when building from source, is thus:
|
||||
|
||||
./mk -b coreboot hp2170p_16mb
|
||||
|
||||
Installation
|
||||
============
|
||||
Install Libreboot
|
||||
-----------------
|
||||
|
||||
Insert binary files
|
||||
-------------------
|
||||
### Insert binary files
|
||||
|
||||
If you're using a release ROM, please ensure that you've inserted extra firmware
|
||||
required refer to the [guide](../install/ivy_has_common.md) for that. (failure
|
||||
to adhere to this advice will result in a bricked machine)
|
||||
|
||||
Set MAC address
|
||||
---------------
|
||||
### Set MAC address
|
||||
|
||||
This platform uses an Intel Flash Descriptor, and defines an Intel GbE NVM
|
||||
region. As such, release/build ROMs will contain the same MAC address. To
|
||||
change the MAC address, please read [nvmutil documentation](../install/nvmutil.md).
|
||||
|
||||
Flash a ROM image (software)
|
||||
-----------------
|
||||
### Flash a ROM image (software)
|
||||
|
||||
If you're already running Libreboot, and you don't have flash protection
|
||||
turned on, [internal flashing](../install/) is possible.
|
||||
|
||||
Flash a ROM image (hardware)
|
||||
-----------------
|
||||
### Flash a ROM image (hardware)
|
||||
|
||||
**REMOVE all power sources like battery, charger and so on, before doing this.
|
||||
This is to prevent short circuiting and power surges while flashing; although
|
||||
|
|
|
|||
|
|
@ -0,0 +1 @@
|
|||
Learn how to install Libreboot free/opensource BIOS/UEFI boot firmware on your HP EliteBook 2170p.
|
||||
|
|
@ -1,10 +1,12 @@
|
|||
---
|
||||
title: HP EliteBook 2560p
|
||||
title: Install Libreboot on HP EliteBook 2560p
|
||||
x-toc-enable: true
|
||||
...
|
||||
|
||||
**[PLEASE READ THESE INSTRUCTIONS BEFORE INSTALLING](../../news/safety.md),
|
||||
OR YOU MIGHT BRICK YOUR MACHINE: [SAFETY PRECAUTIONS](../../news/safety.md)**
|
||||
**[PLEASE READ THESE INSTRUCTIONS BEFORE INSTALLING](ivy_has_common.md), OR
|
||||
YOU MAY BRICK YOUR MACHINE!! - Please click the link and follow the instructions
|
||||
there, before flashing. For posterity,
|
||||
[here is the link again](ivy_has_common.md).**
|
||||
|
||||
<div class="specs">
|
||||
<center>
|
||||
|
|
@ -34,16 +36,20 @@ OR YOU MIGHT BRICK YOUR MACHINE: [SAFETY PRECAUTIONS](../../news/safety.md)**
|
|||
| **SeaBIOS with GRUB** | Works |
|
||||
</div>
|
||||
|
||||
Open source BIOS/UEFI firmware
|
||||
-------------------------
|
||||
|
||||
Brief board info
|
||||
================
|
||||
This document will teach you how to install Libreboot, on your
|
||||
HP EliteBook 2560p laptop motherboard.
|
||||
Libreboot is a [Free Software](https://writefreesoftware.org/learn) project
|
||||
that replaces proprietary BIOS/UEFI firmware.
|
||||
|
||||
HP EliteBook 2560p is a 12.5" laptop you can read more about here:
|
||||
|
||||
<https://support.hp.com/us-en/product/hp-elitebook-2560p-notebook-pc/5071201>
|
||||
|
||||
Installation of Libreboot
|
||||
=========================
|
||||
-------------------------
|
||||
|
||||
Coreboot also has some information:
|
||||
|
||||
|
|
|
|||
|
|
@ -0,0 +1 @@
|
|||
Learn how to install Libreboot free/opensource BIOS/UEFI boot firmware on your HP EliteBook 2560p.
|
||||
|
|
@ -1,10 +1,12 @@
|
|||
---
|
||||
title: HP EliteBook 2570p
|
||||
title: Install Libreboot on HP EliteBook 2570p
|
||||
x-toc-enable: true
|
||||
...
|
||||
|
||||
**[PLEASE READ THESE INSTRUCTIONS BEFORE INSTALLING](../../news/safety.md),
|
||||
OR YOU MIGHT BRICK YOUR MACHINE: [SAFETY PRECAUTIONS](../../news/safety.md)**
|
||||
**[PLEASE READ THESE INSTRUCTIONS BEFORE INSTALLING](ivy_has_common.md), OR
|
||||
YOU MAY BRICK YOUR MACHINE!! - Please click the link and follow the instructions
|
||||
there, before flashing. For posterity,
|
||||
[here is the link again](ivy_has_common.md).**
|
||||
|
||||
<div class="specs">
|
||||
<center>
|
||||
|
|
@ -34,15 +36,23 @@ HP EliteBook 2570p
|
|||
| **SeaBIOS with GRUB** | Works |
|
||||
</div>
|
||||
|
||||
Open source BIOS/UEFI firmware
|
||||
------------------------------
|
||||
|
||||
This document will teach you how to install Libreboot, on your
|
||||
HP EliteBook 2570p laptop motherboard.
|
||||
Libreboot is a [Free Software](https://writefreesoftware.org/learn) project
|
||||
that replaces proprietary BIOS/UEFI firmware.
|
||||
|
||||
Brief board info
|
||||
================
|
||||
----------------
|
||||
|
||||
Vendor info here:
|
||||
|
||||
<https://support.hp.com/us-en/document/c03412731>
|
||||
|
||||
Installation of Libreboot
|
||||
=========================
|
||||
-------------------------
|
||||
|
||||
Coreboot also has some information:
|
||||
|
||||
|
|
|
|||
|
|
@ -0,0 +1 @@
|
|||
Learn how to install Libreboot free/opensource BIOS/UEFI boot firmware on your HP EliteBook 2570p.
|
||||
|
|
@ -1,10 +1,12 @@
|
|||
---
|
||||
title: HP Elite 8200 SFF/MT and 6200 Pro Business
|
||||
title: Install Libreboot on HP Elite 8200 SFF/MT and 6200 Pro Business
|
||||
x-toc-enable: true
|
||||
...
|
||||
|
||||
**[PLEASE READ THESE INSTRUCTIONS BEFORE INSTALLING](../../news/safety.md),
|
||||
OR YOU MIGHT BRICK YOUR MACHINE: [SAFETY PRECAUTIONS](../../news/safety.md)**
|
||||
**[PLEASE READ THESE INSTRUCTIONS BEFORE INSTALLING](ivy_has_common.md), OR
|
||||
YOU MAY BRICK YOUR MACHINE!! - Please click the link and follow the instructions
|
||||
there, before flashing. For posterity,
|
||||
[here is the link again](ivy_has_common.md).**
|
||||
|
||||
<div class="specs">
|
||||
<center>
|
||||
|
|
@ -21,17 +23,17 @@ OR YOU MIGHT BRICK YOUR MACHINE: [SAFETY PRECAUTIONS](../../news/safety.md)**
|
|||
| **CPU** | Intel Sandy/Ivy Bridge |
|
||||
| **Graphics** | Intel HD Graphics or PCI-e low profile card |
|
||||
| **Memory** | Up to 32GB (4x8GB) |
|
||||
| **Architecture** | x86_64 |
|
||||
| **Architecture** | x86\_64 |
|
||||
| **Intel ME/AMD PSP** | Present, neutered |
|
||||
| **Flash chip** | SOIC-8 8MiB |
|
||||
|
||||
```
|
||||
W+: Works without blobs;
|
||||
W+: Works without vendor firmware;
|
||||
N: Doesn't work;
|
||||
W*: Works with blobs;
|
||||
W*: Works with vendor firmware;
|
||||
U: Untested;
|
||||
P+: Partially works;
|
||||
P*: Partially works with blobs
|
||||
P*: Partially works with vendor firmware
|
||||
```
|
||||
|
||||
| ***Features*** | |
|
||||
|
|
@ -49,22 +51,18 @@ P*: Partially works with blobs
|
|||
| **SeaBIOS with GRUB** | Works |
|
||||
</div>
|
||||
|
||||
Disable security before flashing
|
||||
================================
|
||||
Open source BIOS/UEFI firmware
|
||||
------------------------------
|
||||
|
||||
Before internal flashing, you must first disable `/dev/mem` protections. Make
|
||||
sure to re-enable them after you're finished.
|
||||
|
||||
See: [Disabling /dev/mem protection](../install/devmem.md)
|
||||
|
||||
Introduction
|
||||
============
|
||||
This document will teach you how to install Libreboot, on your
|
||||
HP Elite 8200 SFF desktop motherboard.
|
||||
Libreboot is a [Free Software](https://writefreesoftware.org/learn) project
|
||||
that replaces proprietary BIOS/UEFI firmware.
|
||||
|
||||
Libreboot has support for this, in the Git repository and release versions
|
||||
from 20230423 onwards.
|
||||
|
||||
Brief board info
|
||||
----------------
|
||||
### Brief board info
|
||||
|
||||
HP Elite 8200 SFF is a small-form-factor desktop of Intel Sandybridge platform
|
||||
which you can read more about here:
|
||||
|
|
@ -79,7 +77,15 @@ Here's the [Technical Reference Manual](https://web.archive.org/web/201601091432
|
|||
This system supports Ivy Bridge processors too. The original BIOS
|
||||
won't even POST with those, but with Libreboot they work fully.
|
||||
|
||||
Installation of Libreboot
|
||||
Disable security before flashing
|
||||
--------------------------------
|
||||
|
||||
Before internal flashing, you must first disable `/dev/mem` protections. Make
|
||||
sure to re-enable them after you're finished.
|
||||
|
||||
See: [Disabling /dev/mem protection](../install/devmem.md)
|
||||
|
||||
Install Libreboot
|
||||
-------------------------
|
||||
|
||||
You can actually just compile the Libreboot ROM for this, and flash the
|
||||
|
|
@ -146,8 +152,10 @@ between the pins until you can see the normal BIOS boot screen.
|
|||
|
||||

|
||||
|
||||
NOTE: Libreboot standardises on [flashprog](https://flashprog.org/wiki/Flashprog)
|
||||
**NOTE: Libreboot standardises on [flashprog](https://flashprog.org/wiki/Flashprog)
|
||||
now, as of 27 January 2024, which is a fork of flashrom.
|
||||
The reason why was explained, in
|
||||
the [Libreboot 20240225 release](../../news/libreboot20240225.md#flashprog-now-used-instead-of-flashrom)**
|
||||
|
||||
Now, run this command:
|
||||
|
||||
|
|
@ -266,7 +274,7 @@ the *ROM* by using the `-C` option in nvramtool. You can find this under the
|
|||
directory `src/coreboot/default/util/nvramtool` when downloading coreboot inside
|
||||
of lbmk by running the command:
|
||||
|
||||
./update trees -f coreboot default
|
||||
./mk -f coreboot default
|
||||
|
||||
Go in there and type `make` to build nvramtool. Simply run nvramtool without
|
||||
arguments, and it will show a list of options.
|
||||
|
|
|
|||
|
|
@ -0,0 +1 @@
|
|||
Learn how to install Libreboot free/opensource BIOS/UEFI boot firmware on your HP Elite 8200 SFF motherboard.
|
||||
|
|
@ -1,10 +1,12 @@
|
|||
---
|
||||
title: HP EliteBook 820 G2
|
||||
title: Install Libreboot on HP EliteBook 820 G2
|
||||
x-toc-enable: true
|
||||
...
|
||||
|
||||
**[PLEASE READ THESE INSTRUCTIONS BEFORE INSTALLING](../../news/safety.md),
|
||||
OR YOU MIGHT BRICK YOUR MACHINE: [SAFETY PRECAUTIONS](../../news/safety.md)**
|
||||
**[PLEASE READ THESE INSTRUCTIONS BEFORE INSTALLING](ivy_has_common.md), OR
|
||||
YOU MAY BRICK YOUR MACHINE!! - Please click the link and follow the instructions
|
||||
there, before flashing. For posterity,
|
||||
[here is the link again](ivy_has_common.md).**
|
||||
|
||||
<div class="specs">
|
||||
<center>
|
||||
|
|
@ -35,12 +37,12 @@ OR YOU MIGHT BRICK YOUR MACHINE: [SAFETY PRECAUTIONS](../../news/safety.md)**
|
|||
|
||||
|
||||
```
|
||||
W+: Works without blobs;
|
||||
W+: Works without vendor firmware;
|
||||
N: Doesn't work;
|
||||
W*: Works with blobs;
|
||||
W*: Works with vendor firmware;
|
||||
U: Untested;
|
||||
P+: Partially works;
|
||||
P*: Partially works with blobs
|
||||
P*: Partially works with vendor firmware
|
||||
```
|
||||
|
||||
| ***Features*** | |
|
||||
|
|
@ -59,30 +61,56 @@ P*: Partially works with blobs
|
|||
| **SeaBIOS with GRUB** | Works |
|
||||
</div>
|
||||
|
||||
Brief board info:
|
||||
Open source BIOS/UEFI firmware
|
||||
-------------------------
|
||||
|
||||
Full hardware specifications can be found on HP's own website:
|
||||
|
||||
<https://support.hp.com/gb-en/document/c04543492>
|
||||
|
||||
Introduction
|
||||
============
|
||||
This document will teach you how to install Libreboot, on your
|
||||
HP EliteBook 820 G2 laptop motherboard.
|
||||
Libreboot is a [Free Software](https://writefreesoftware.org/learn) project
|
||||
that replaces proprietary BIOS/UEFI firmware.
|
||||
|
||||
Please build this from source with lbmk:
|
||||
|
||||
./mk -b coreboot hp820g2_12mb
|
||||
|
||||
More information is available in the [build guide](../build/), including how
|
||||
to install build dependencies. Building from source is required, because there
|
||||
aren't any ROM images for this board, in regular Libreboot releases. The
|
||||
reason is that the vendor inject scripts don't currently work, because coreboot
|
||||
compresses the refcode when inserting it at build time, and the process of
|
||||
compression is not yet reproducible; it's not feasible to do so, and making
|
||||
it not be compressed in flash would not be ideal either, so this is simply
|
||||
a source-only port in Libreboot.
|
||||
to install build dependencies.
|
||||
|
||||
Alternatively, you can use pre-compiled release images.
|
||||
|
||||
Full hardware specifications can be found on HP's own website:
|
||||
|
||||
<https://support.hp.com/gb-en/document/c04543492>
|
||||
|
||||
Pre-compiled images now possible!
|
||||
--------------------------------
|
||||
|
||||
From Libreboot 20241206 **revision 8** onwards, pre-compiled ROM images *are*
|
||||
now available. Previous releases excluded images for this board, because vendor
|
||||
file insertion was not reproducible, so you would get checksum errors. This
|
||||
has been fixed with the following patch:
|
||||
|
||||
<https://browse.libreboot.org/lbmk.git/commit/?id=e8799310db26df89720e8476a701f1904932234b>
|
||||
|
||||
The refcode is inserted uncompressed, whereas upstream uses LZMA compression.
|
||||
We can't predict how the implementation will change in the future, and any
|
||||
behavioural changes would probably affect the checksum on insertion. Older
|
||||
releases also didn't handle `rmodtool` on refcode insertion, which is used
|
||||
to make the file relocatable in CBFS. See:
|
||||
|
||||
<https://doc.coreboot.org/lib/rmodules.html>
|
||||
|
||||
As of Libreboot 20241206 rev8, you can now use pre-compiled release images
|
||||
and [insert vendor files](ivy_has_common.md).
|
||||
|
||||
The lack of refcode compression costs about 110KB, because the refcode file is
|
||||
about 180KB uncompressed, but would be about 70KB compressed in flash. We
|
||||
insert it uncompressed, so it's 180KB in flash. This is a small sacrifice,
|
||||
considering that you still have about 10MB of unused flash space left, at least
|
||||
as of the 20241206 rev8 release.
|
||||
|
||||
HP Sure Start
|
||||
=============
|
||||
-------------
|
||||
|
||||
There is a 16MB flash and a 2MB flash. Read this page for info:
|
||||
<https://doc.coreboot.org/mainboard/hp/hp_sure_start.html>
|
||||
|
|
@ -113,7 +141,7 @@ the Libreboot installation, because it's also important when updating
|
|||
Libreboot later on.
|
||||
|
||||
Installation of Libreboot
|
||||
=========================
|
||||
-------------------------
|
||||
|
||||
Make sure to set the MAC address in the flash:
|
||||
[Modify MAC addresses with nvmutil](../install/nvmutil.md).
|
||||
|
|
@ -137,7 +165,7 @@ Flash it like this, instead:
|
|||
flashprog -p PROGRAMMER --ifd -i gbe -w libreboot16.rom --noverify-all
|
||||
flashprog -p PROGRAMMER --ifd -i bios -w libreboot16.rom --noverify-all
|
||||
flashprog -p PROGRAMMER --ifd -i me -w libreboot16.rom --noverify-all
|
||||
flashprog -p PROGRAMMER --ifd -i ifd -w libreboot16.rom --noverify-all
|
||||
flashprog -p PROGRAMMER --ifd -i fd -w libreboot16.rom --noverify-all
|
||||
```
|
||||
|
||||
Replace `PROGRAMMER` according to whichever flasher you're using. You could
|
||||
|
|
@ -158,7 +186,7 @@ the [external flashing guide](../install/spi.md) so that you can learn how
|
|||
to actually flash it.
|
||||
|
||||
TPM 2.0 potentially supported
|
||||
==============================
|
||||
-----------------------------
|
||||
|
||||
The onboard TPM is an SLB 9660, which supports TPM 1.2 but it is known to be
|
||||
compatible with TPM 2.0 via firmware upgrade. Although not yet tested, we have
|
||||
|
|
@ -170,7 +198,7 @@ Not yet used meaningfully by Libreboot itself, but the TPM can be used to
|
|||
implement things like measured boot.
|
||||
|
||||
References
|
||||
==========
|
||||
----------
|
||||
|
||||
See: <https://doc.coreboot.org/soc/intel/broadwell/blobs.html>
|
||||
|
||||
|
|
|
|||
|
|
@ -0,0 +1 @@
|
|||
Learn how to install Libreboot free/opensource BIOS/UEFI boot firmware on your HP EliteBook 820 G2.
|
||||
|
|
@ -1,10 +1,12 @@
|
|||
---
|
||||
title: HP Compaq Elite 8300 USDT
|
||||
title: Install Libreboot HP Compaq Elite 8300 USDT
|
||||
x-toc-enable: true
|
||||
...
|
||||
|
||||
**[PLEASE READ THESE INSTRUCTIONS BEFORE INSTALLING](../../news/safety.md),
|
||||
OR YOU MIGHT BRICK YOUR MACHINE: [SAFETY PRECAUTIONS](../../news/safety.md)**
|
||||
**[PLEASE READ THESE INSTRUCTIONS BEFORE INSTALLING](ivy_has_common.md), OR
|
||||
YOU MAY BRICK YOUR MACHINE!! - Please click the link and follow the instructions
|
||||
there, before flashing. For posterity,
|
||||
[here is the link again](ivy_has_common.md).**
|
||||
|
||||
<div class="specs">
|
||||
<center>
|
||||
|
|
@ -24,15 +26,12 @@ OR YOU MIGHT BRICK YOUR MACHINE: [SAFETY PRECAUTIONS](../../news/safety.md)**
|
|||
| **Intel ME/AMD PSP** | Present, neutered |
|
||||
| **Flash chip** | SOIC-16 16MiB |
|
||||
|
||||
Disable security before flashing
|
||||
================================
|
||||
Open source BIOS/UEFI firmware
|
||||
-------------------------
|
||||
|
||||
Before internal flashing, you must first disable `/dev/mem` protections. Make
|
||||
sure to re-enable them after you're finished.
|
||||
|
||||
See: [Disabling /dev/mem protection](../install/devmem.md)
|
||||
|
||||
# Introduction
|
||||
This document will teach you how to install Libreboot, on your
|
||||
HP Elite 8300 USDT desktop motherboard. Libreboot replaces proprietary
|
||||
BIOS/UEFI firmware.
|
||||
|
||||
This is a small but powerful desktop using Sandy or Ivy Bridge CPUs
|
||||
(of up to 65W TDP).
|
||||
|
|
@ -58,9 +57,21 @@ These features are tested and confirmed working:
|
|||
* Wake on LAN
|
||||
* Rebooting
|
||||
|
||||
# Installation
|
||||
Disable security before flashing
|
||||
--------------------------------
|
||||
|
||||
## Internal flashing
|
||||
Before internal flashing, you must first disable `/dev/mem` protections. Make
|
||||
sure to re-enable them after you're finished.
|
||||
|
||||
See: [Disabling /dev/mem protection](../install/devmem.md)
|
||||
|
||||
Install Libreboot
|
||||
-----------------
|
||||
|
||||
These next sections will teach you how to install Libreboot on your
|
||||
HP Elite 8300 USDT motherboard.
|
||||
|
||||
### Internal flashing
|
||||
|
||||
Internal flashing is possible. OEM BIOS versions 2.87 and 2.90 are confirmed
|
||||
compatible with this guide. BIOS 2.05 is confirmed **not** to work.
|
||||
|
|
@ -81,8 +92,10 @@ crystal (small metal cylinder) and the power cable for the optical drive.
|
|||
|
||||
Boot into an OS of your choice (that has flashprog support).
|
||||
|
||||
NOTE: Libreboot standardises on [flashprog](https://flashprog.org/wiki/Flashprog)
|
||||
**NOTE: Libreboot standardises on [flashprog](https://flashprog.org/wiki/Flashprog)
|
||||
now, as of 27 January 2024, which is a fork of flashrom.
|
||||
The reason why was explained, in
|
||||
the [Libreboot 20240225 release](../../news/libreboot20240225.md#flashprog-now-used-instead-of-flashrom)**
|
||||
|
||||
The BIOS should no longer impose any write-protections.
|
||||
You can now use `flashprog -p internal` freely.
|
||||
|
|
@ -111,7 +124,7 @@ You can now move the jumper back to its original place.
|
|||
By default, Libreboot applies no write-protection, so
|
||||
updating it can be done without the jumper anyway.
|
||||
|
||||
## External flashing
|
||||
### External flashing
|
||||
|
||||
Unbricking is possible by external flashing. You first need to remove
|
||||
the optical disk drive and 2.5" HDD/SSD and the metal bracket that
|
||||
|
|
|
|||
|
|
@ -0,0 +1 @@
|
|||
Learn how to install Libreboot free/opensource BIOS/UEFI boot firmware on your HP Elite 8300 USDT motherboard.
|
||||
|
|
@ -1,10 +1,12 @@
|
|||
---
|
||||
title: HP EliteBook 8460p
|
||||
title: Install Libreboot on HP EliteBook 8460p
|
||||
x-toc-enable: true
|
||||
...
|
||||
|
||||
**[PLEASE READ THESE INSTRUCTIONS BEFORE INSTALLING](../../news/safety.md),
|
||||
OR YOU MIGHT BRICK YOUR MACHINE: [SAFETY PRECAUTIONS](../../news/safety.md)**
|
||||
**[PLEASE READ THESE INSTRUCTIONS BEFORE INSTALLING](ivy_has_common.md), OR
|
||||
YOU MAY BRICK YOUR MACHINE!! - Please click the link and follow the instructions
|
||||
there, before flashing. For posterity,
|
||||
[here is the link again](ivy_has_common.md).**
|
||||
|
||||
<div class="specs">
|
||||
<center>
|
||||
|
|
@ -31,12 +33,12 @@ OR YOU MIGHT BRICK YOUR MACHINE: [SAFETY PRECAUTIONS](../../news/safety.md)**
|
|||
|
||||
|
||||
```
|
||||
W+: Works without blobs;
|
||||
W+: Works without vendor firmware;
|
||||
N: Doesn't work;
|
||||
W*: Works with blobs;
|
||||
W*: Works with vendor firmware;
|
||||
U: Untested;
|
||||
P+: Partially works;
|
||||
P*: Partially works with blobs
|
||||
P*: Partially works with vendor firmware
|
||||
```
|
||||
|
||||
| ***Features*** | |
|
||||
|
|
@ -54,8 +56,14 @@ P*: Partially works with blobs
|
|||
| **SeaBIOS** | Works |
|
||||
| **SeaBIOS with GRUB** | Works |
|
||||
</div>
|
||||
Introduction
|
||||
============
|
||||
|
||||
Open source BIOS/UEFI firmware
|
||||
-------------------------
|
||||
|
||||
These next sections will teach you how to install Libreboot, on your
|
||||
HP EliteBook 8460p laptop motherboard.
|
||||
Libreboot is a [Free Software](https://writefreesoftware.org/learn) project
|
||||
that replaces proprietary BIOS/UEFI firmware.
|
||||
|
||||
**Unavailable in Libreboot 20231106 or earlier. You must [compile from
|
||||
source](../build/), or use a release newer than 20231106.**
|
||||
|
|
@ -64,38 +72,35 @@ This is a beastly 14" Sandy Bridge platform from HP.
|
|||
**NOTE: Until otherwise stated, only the Intel GPU variant is supported in
|
||||
Libreboot.**
|
||||
|
||||
Build ROM image from source
|
||||
---------------------------
|
||||
### Build ROM image from source
|
||||
|
||||
The build target, when building from source, is thus:
|
||||
|
||||
./mk -b coreboot hp8460pintel_8mb
|
||||
|
||||
Installation
|
||||
============
|
||||
Install Libreboot
|
||||
-----------------
|
||||
|
||||
Insert binary files
|
||||
-------------------
|
||||
**Please take care to insert the vendor files, if using release images.**
|
||||
|
||||
### Insert binary files
|
||||
|
||||
If you're using a release ROM, please ensure that you've inserted extra firmware
|
||||
required refer to the [guide](../install/ivy_has_common.md) for that. (failure
|
||||
to adhere to this advice will result in a bricked machine)
|
||||
|
||||
Set MAC address
|
||||
---------------
|
||||
### Set MAC address
|
||||
|
||||
This platform uses an Intel Flash Descriptor, and defines an Intel GbE NVM
|
||||
region. As such, release/build ROMs will contain the same MAC address. To
|
||||
change the MAC address, please read [nvmutil documentation](../install/nvmutil.md).
|
||||
change the MAC address, please read [nvmutil documentation](/nvmutil.md).
|
||||
|
||||
Flash a ROM image (software)
|
||||
-----------------
|
||||
### Flash a ROM image (software)
|
||||
|
||||
If you're already running Libreboot, and you don't have flash protection
|
||||
turned on, [internal flashing](../install/) is possible.
|
||||
|
||||
Flash a ROM image (hardware)
|
||||
-----------------
|
||||
### Flash a ROM image (hardware)
|
||||
|
||||
**REMOVE all power sources like battery, charger and so on, before doing this.
|
||||
This is to prevent short circuiting and power surges while flashing.**
|
||||
|
|
|
|||
|
|
@ -0,0 +1 @@
|
|||
Learn how to install Libreboot free/opensource BIOS/UEFI boot firmware on your HP EliteBook 8460p.
|
||||
|
|
@ -1,10 +1,12 @@
|
|||
---
|
||||
title: HP EliteBook 8470p
|
||||
title: Install Libreboot on HP EliteBook 8470p
|
||||
x-toc-enable: true
|
||||
...
|
||||
|
||||
**[PLEASE READ THESE INSTRUCTIONS BEFORE INSTALLING](../../news/safety.md),
|
||||
OR YOU MIGHT BRICK YOUR MACHINE: [SAFETY PRECAUTIONS](../../news/safety.md)**
|
||||
**[PLEASE READ THESE INSTRUCTIONS BEFORE INSTALLING](ivy_has_common.md), OR
|
||||
YOU MAY BRICK YOUR MACHINE!! - Please click the link and follow the instructions
|
||||
there, before flashing. For posterity,
|
||||
[here is the link again](ivy_has_common.md).**
|
||||
|
||||
<div class="specs">
|
||||
<center>
|
||||
|
|
@ -31,12 +33,12 @@ OR YOU MIGHT BRICK YOUR MACHINE: [SAFETY PRECAUTIONS](../../news/safety.md)**
|
|||
|
||||
|
||||
```
|
||||
W+: Works without blobs;
|
||||
W+: Works without vendor firmware;
|
||||
N: Doesn't work;
|
||||
W*: Works with blobs;
|
||||
W*: Works with vendor firmware;
|
||||
U: Untested;
|
||||
P+: Partially works;
|
||||
P*: Partially works with blobs
|
||||
P*: Partially works with vendor firmware
|
||||
```
|
||||
|
||||
| ***Features*** | |
|
||||
|
|
@ -54,11 +56,14 @@ P*: Partially works with blobs
|
|||
| **SeaBIOS** | Works |
|
||||
| **SeaBIOS with GRUB** | Works |
|
||||
</div>
|
||||
Introduction
|
||||
============
|
||||
|
||||
**Unavailable in Libreboot 20230625 or earlier. You must [compile from
|
||||
source](../build/), or use at least Libreboot 20231021.**
|
||||
Open source BIOS/UEFI firmware
|
||||
------------------------------
|
||||
|
||||
This document will teach you how to install Libreboot, on your
|
||||
HP EliteBook 8470p laptop motherboard.
|
||||
Libreboot is a [Free Software](https://writefreesoftware.org/learn) project
|
||||
that replaces proprietary BIOS/UEFI firmware.
|
||||
|
||||
Official information about the laptop can be found here:
|
||||
<https://support.hp.com/gb-en/document/c03374369>
|
||||
|
|
@ -67,38 +72,33 @@ This is a beastly 14" Ivy Bridge platform from HP.
|
|||
**NOTE: Until otherwise stated, only the Intel GPU variant is supported in
|
||||
Libreboot.**
|
||||
|
||||
Build ROM image from source
|
||||
---------------------------
|
||||
### Build ROM image from source
|
||||
|
||||
The build target, when building from source, is thus:
|
||||
|
||||
./mk -b coreboot hp8470pintel_16mb
|
||||
|
||||
Installation
|
||||
============
|
||||
------------
|
||||
|
||||
Insert binary files
|
||||
-------------------
|
||||
### Insert binary files
|
||||
|
||||
If you're using a release ROM, please ensure that you've inserted extra firmware
|
||||
required refer to the [guide](../install/ivy_has_common.md) for that. (failure
|
||||
to adhere to this advice will result in a bricked machine)
|
||||
|
||||
Set MAC address
|
||||
---------------
|
||||
### Set MAC address
|
||||
|
||||
This platform uses an Intel Flash Descriptor, and defines an Intel GbE NVM
|
||||
region. As such, release/build ROMs will contain the same MAC address. To
|
||||
change the MAC address, please read [nvmutil documentation](../install/nvmutil.md).
|
||||
|
||||
Flash a ROM image (software)
|
||||
-----------------
|
||||
### Flash a ROM image (software)
|
||||
|
||||
If you're already running Libreboot, and you don't have flash protection
|
||||
turned on, [internal flashing](../install/) is possible.
|
||||
|
||||
Flash a ROM image (hardware)
|
||||
-----------------
|
||||
### Flash a ROM image (hardware)
|
||||
|
||||
**REMOVE all power sources like battery, charger and so on, before doing this.
|
||||
This is to prevent short circuiting and power surges while flashing.**
|
||||
|
|
|
|||
|
|
@ -0,0 +1 @@
|
|||
Learn how to install Libreboot free/opensource BIOS/UEFI boot firmware on your HP EliteBook 8470p.
|
||||
|
|
@ -1,10 +1,12 @@
|
|||
---
|
||||
title: HP EliteBook 8560w
|
||||
title: Install Libreboot on HP EliteBook 8560w
|
||||
x-toc-enable: true
|
||||
...
|
||||
|
||||
**[PLEASE READ THESE INSTRUCTIONS BEFORE INSTALLING](../../news/safety.md),
|
||||
OR YOU MIGHT BRICK YOUR MACHINE: [SAFETY PRECAUTIONS](../../news/safety.md)**
|
||||
**[PLEASE READ THESE INSTRUCTIONS BEFORE INSTALLING](ivy_has_common.md), OR
|
||||
YOU MAY BRICK YOUR MACHINE!! - Please click the link and follow the instructions
|
||||
there, before flashing. For posterity,
|
||||
[here is the link again](ivy_has_common.md).**
|
||||
|
||||
<div class="specs">
|
||||
<center>
|
||||
|
|
@ -31,12 +33,12 @@ OR YOU MIGHT BRICK YOUR MACHINE: [SAFETY PRECAUTIONS](../../news/safety.md)**
|
|||
|
||||
|
||||
```
|
||||
W+: Works without blobs;
|
||||
W+: Works without vendor firmware;
|
||||
N: Doesn't work;
|
||||
W*: Works with blobs;
|
||||
W*: Works with vendor firmware;
|
||||
U: Untested;
|
||||
P+: Partially works;
|
||||
P*: Partially works with blobs
|
||||
P*: Partially works with vendor firmware
|
||||
```
|
||||
|
||||
| ***Features*** | |
|
||||
|
|
@ -54,8 +56,14 @@ P*: Partially works with blobs
|
|||
| **SeaBIOS** | Works |
|
||||
| **SeaBIOS with GRUB** | Works |
|
||||
</div>
|
||||
Introduction
|
||||
============
|
||||
|
||||
Open source BIOS/UEFI firmware
|
||||
-------------------------
|
||||
|
||||
These next sections will teach you how to install Libreboot, on your
|
||||
HP EliteBook 8560w laptop motherboard.
|
||||
Libreboot is a [Free Software](https://writefreesoftware.org/learn) project
|
||||
that replaces proprietary BIOS/UEFI firmware.
|
||||
|
||||
**Unavailable in Libreboot 20240126 or earlier. You must [compile from
|
||||
source](../build/), or use a release newer than 20240126.**
|
||||
|
|
@ -64,8 +72,7 @@ This is a beastly 15" Sandy Bridge mobile workstation from HP.
|
|||
|
||||
**Wi-Fi does not work. It shows correctly in lspci, but stays hard blocked.**
|
||||
|
||||
GPU
|
||||
---
|
||||
### GPU
|
||||
|
||||
This laptop has upgradeable GPU: it has a socketed MXM-A 3.0 card. So far,
|
||||
only Quadro 1000M and 2000M (which shipped with the laptop originally) have
|
||||
|
|
@ -89,38 +96,33 @@ If you have an eDP panel, you should be able to use newer cards than that.
|
|||
As long as the card has an onboard VBIOS, Libreboot will execute it and
|
||||
everything *should* work. **However, this is currently untested.**
|
||||
|
||||
Build ROM image from source
|
||||
---------------------------
|
||||
### Build ROM image from source
|
||||
|
||||
The build target, when building from source, is thus:
|
||||
|
||||
./mk -b coreboot hp8560w_8mb
|
||||
|
||||
Installation
|
||||
============
|
||||
------------
|
||||
|
||||
Insert binary files
|
||||
-------------------
|
||||
### Insert binary files
|
||||
|
||||
If you're using a release ROM, please ensure that you've inserted extra firmware
|
||||
required refer to the [guide](../install/ivy_has_common.md) for that. (failure
|
||||
to adhere to this advice will result in a bricked machine)
|
||||
|
||||
Set MAC address
|
||||
---------------
|
||||
### Set MAC address
|
||||
|
||||
This platform uses an Intel Flash Descriptor, and defines an Intel GbE NVM
|
||||
region. As such, release/build ROMs will contain the same MAC address. To
|
||||
change the MAC address, please read [nvmutil documentation](../install/nvmutil.md).
|
||||
|
||||
Flash a ROM image (software)
|
||||
-----------------
|
||||
### Flash a ROM image (software)
|
||||
|
||||
If you're already running Libreboot, and you don't have flash protection
|
||||
turned on, [internal flashing](../install/) is possible.
|
||||
|
||||
Flash a ROM image (hardware)
|
||||
-----------------
|
||||
### Flash a ROM image (hardware)
|
||||
|
||||
**REMOVE all power sources like battery, charger and so on, before doing this.
|
||||
This is to prevent short circuiting and power surges while flashing.**
|
||||
|
|
|
|||
|
|
@ -0,0 +1 @@
|
|||
Learn how to install Libreboot free/opensource BIOS/UEFI boot firmware on your HP EliteBook 8560w.
|
||||
|
|
@ -1,10 +1,12 @@
|
|||
---
|
||||
title: HP EliteBook Folio 9470m
|
||||
title: Install Libreboot on HP EliteBook Folio 9470m
|
||||
x-toc-enable: true
|
||||
...
|
||||
|
||||
**[PLEASE READ THESE INSTRUCTIONS BEFORE INSTALLING](../../news/safety.md),
|
||||
OR YOU MIGHT BRICK YOUR MACHINE: [SAFETY PRECAUTIONS](../../news/safety.md)**
|
||||
**[PLEASE READ THESE INSTRUCTIONS BEFORE INSTALLING](ivy_has_common.md), OR
|
||||
YOU MAY BRICK YOUR MACHINE!! - Please click the link and follow the instructions
|
||||
there, before flashing. For posterity,
|
||||
[here is the link again](ivy_has_common.md).**
|
||||
|
||||
<div class="specs">
|
||||
<center>
|
||||
|
|
@ -34,20 +36,28 @@ OR YOU MIGHT BRICK YOUR MACHINE: [SAFETY PRECAUTIONS](../../news/safety.md)**
|
|||
| **SeaBIOS with GRUB** | Works |
|
||||
</div>
|
||||
|
||||
Introduction
|
||||
============
|
||||
Open source BIOS/UEFI firmware
|
||||
------------------------------
|
||||
|
||||
These sections will teach you how to install Libreboot, on your
|
||||
HP EliteBook Folio 9470m laptop motherboard.
|
||||
Libreboot is a [Free Software](https://writefreesoftware.org/learn) project
|
||||
that replaces proprietary BIOS/UEFI firmware.
|
||||
|
||||
HP EliteBook Folio 9470m is a 14" ultrabook with a backlit keyboard.
|
||||
|
||||
Libreboot has support for this, in the Git repository and release versions
|
||||
from Libreboot 20230423 onwards.
|
||||
|
||||
Installation of Libreboot
|
||||
=========================
|
||||
Install Libreboot
|
||||
-----------------
|
||||
|
||||
You must first compile the Libreboot ROM
|
||||
|
||||
./mk -b coreboot hp9470m_16mb
|
||||
./mk -b coreboot hp9470m_16mb
|
||||
|
||||
**You can also use release images, instead of compiling, but please make
|
||||
sure to follow the notes below about vendorfile insertion, first!**
|
||||
|
||||
More information about building ROM images can be found in
|
||||
the [build guide](../build).
|
||||
|
|
@ -69,8 +79,7 @@ in the same guide linked above, or read the nvmutil manual:
|
|||
|
||||
[Modify MAC addresses with nvmutil](../install/nvmutil.md).
|
||||
|
||||
Disassembly
|
||||
-----------
|
||||
### Disassembly
|
||||
|
||||
Remove the battery.
|
||||
|
||||
|
|
@ -91,6 +100,8 @@ Some part of the board might turn on when programming. If programming fails,
|
|||
you might have to attach the laptop to a charger. Make sure the laptop
|
||||
powers off before running flashprog. No LEDs should be lit.
|
||||
|
||||
NOTE: Libreboot standardises on [flashprog](https://flashprog.org/wiki/Flashprog)
|
||||
**NOTE: Libreboot standardises on [flashprog](https://flashprog.org/wiki/Flashprog)
|
||||
now, as of 27 January 2024, which is a fork of flashrom.
|
||||
The reason why was explained, in
|
||||
the [Libreboot 20240225 release](../../news/libreboot20240225.md#flashprog-now-used-instead-of-flashrom)**
|
||||
|
||||
|
|
|
|||
|
|
@ -0,0 +1 @@
|
|||
HP EliteBook Folio 9470m added. Libreboot is a free/opensource BIOS/UEFI boot firmware distribution based on coreboot with payloads like GNU GRUB boot loader.
|
||||
|
|
@ -10,7 +10,8 @@ can modify the ifd file with coreboot's ifdtool. You can use nvmutil to modify
|
|||
the GbE NVM MAC address**
|
||||
|
||||
**If all you want to do is change the MAC address, you might use `nvmutil`
|
||||
instead. See: [nvmutil documentation](../install/nvmutil.md).**
|
||||
instead. See: [nvmutil documentation](../install/nvmutil.md), or use
|
||||
the [inject script](ivy_has_common.md).**
|
||||
|
||||
The documentation below is *still valid*, if you actually want to use ich9utils.
|
||||
You can find it in older Libreboot releases, up to Libreboot 20230625. The only
|
||||
|
|
@ -26,7 +27,7 @@ scrapped.
|
|||
Anyway, ich9utils documentation:
|
||||
|
||||
Introduction
|
||||
============
|
||||
------------
|
||||
|
||||
The `ich9utils` utility from Libreboot is used to manipulate Intel Flash
|
||||
Descriptors for ICH9M on laptops such as ThinkPad X200 or T400. Specifically,
|
||||
|
|
@ -74,7 +75,7 @@ More information about the ME can be found at
|
|||
Another project: <http://io.netgarage.org/me/>
|
||||
|
||||
ich9utils
|
||||
=========
|
||||
---------
|
||||
|
||||
You can find `ich9utils` on the [Git page](../../git.md) or you can download
|
||||
`lbmk` from the same page at an under revision (around Libreboot 20230625 or
|
||||
|
|
@ -84,7 +85,7 @@ Go in there and type `make` to get the binaries: `ich9deblob`, `ich9gen`
|
|||
and `ich9show`.
|
||||
|
||||
ICH9 show utility {#ich9show}
|
||||
================
|
||||
---------------------------
|
||||
|
||||
The *ich9show* utility outputs the entire contents of the descriptor and GbE
|
||||
regions in a given ROM image as supplied by the user. Output is in Markdown
|
||||
|
|
@ -92,7 +93,7 @@ format (Pandoc variant) so that it can be converted easily into various
|
|||
formats. It could even be piped *directly* into pandoc!
|
||||
|
||||
ICH9 gen utility {#ich9gen}
|
||||
================
|
||||
---------------------------
|
||||
|
||||
When you simply run `ich9gen` without any arguments, it generates
|
||||
descriptor+GbE images with a default MAC address in the GbE region. If you wish
|
||||
|
|
@ -184,8 +185,7 @@ Your libreboot.rom image is now ready to be flashed on the system. Refer
|
|||
back to [../install/\#flashprog](../install/#flashprog) for how to flash
|
||||
it.
|
||||
|
||||
Write-protecting the flash chip
|
||||
-------------------------------
|
||||
### Write-protecting the flash chip
|
||||
|
||||
The `ich9gen` utility (see below) generates two types of descriptor+GbE setup:
|
||||
|
||||
|
|
@ -199,7 +199,7 @@ the contents of flash).
|
|||
For ease of use, libreboot provides ROMs that are read-write by default.
|
||||
|
||||
ICH9 deblob utility {#ich9deblob}
|
||||
===================
|
||||
-----------------------------------
|
||||
|
||||
This was the tool originally used to disable the ME on X200 (later
|
||||
adapted for other systems that use the GM45 chipset).
|
||||
|
|
@ -209,7 +209,7 @@ not rely on dumping the factory.rom image (whereas, ich9deblob does).
|
|||
Simply speaking, `ich9deblob` takes an original dump of the boot flash, where
|
||||
that boot flash contains a descriptor that defines the existence of Intel ME,
|
||||
and modifies it. The Intel Flash Descriptor is modified to disable the ME
|
||||
region. It disables the ME itself aswell. The GbE region is moved to the
|
||||
region. It disables the ME itself as well. The GbE region is moved to the
|
||||
location just after the descriptor. The BIOS region is specified as being
|
||||
after the descriptor+GbE regions, filling the rest of the boot flash.
|
||||
|
||||
|
|
@ -278,7 +278,7 @@ back to [index.md/\#gm45](index.md/#gm45) for how to flash
|
|||
it.
|
||||
|
||||
demefactory utility {#demefactory}
|
||||
===================
|
||||
----------------------------------
|
||||
|
||||
This utility has never been tested, officially, but it *should* work.
|
||||
|
||||
|
|
|
|||
|
|
@ -0,0 +1 @@
|
|||
Documentation pertaining to the deprecated ich9utils which can generate or modify Intel Flash Descriptors, and Intel GbE NVM images.
|
||||
|
|
@ -1,21 +1,34 @@
|
|||
---
|
||||
title: Libreboot installation guides
|
||||
title: Install Libreboot Open Source BIOS/UEFI boot firmware
|
||||
x-toc-enable: true
|
||||
...
|
||||
|
||||
Open source BIOS/UEFI boot firmware
|
||||
------------------------------
|
||||
|
||||
With x86 machines, you can use the SeaBIOS or the GNU boot loader named GRUB as
|
||||
a payload. On ARM
|
||||
systems, you can use the U-Boot payload (coreboot still initialises hardware).
|
||||
An x86/x86\_64 U-Boot UEFI payload is also available.
|
||||
|
||||
This article will teach you how to install Libreboot, on any of the supported
|
||||
laptop, desktop and server motherboards.
|
||||
laptop, desktop and server motherboards of Intel/AMD x86/x86\_64 and ARM64
|
||||
platform.
|
||||
Libreboot is a [Free Software](https://writefreesoftware.org/learn) project
|
||||
that replaces proprietary BIOS/UEFI firmware.
|
||||
|
||||
**ALWAYS remember to make a backup of the current flash, when overwriting it,
|
||||
regardless of what firmware you currently have and what firmware you're
|
||||
re-flashing it with; this includes updates between Libreboot releases. Use
|
||||
the `-r` option in flashprog instead `-w`, to read from the flash.**
|
||||
|
||||
**SAFETY WARNING!**
|
||||
====================================================================
|
||||
SAFETY WARNING!
|
||||
---------------
|
||||
|
||||
**IMPORTANT ADVICE: [PLEASE READ THESE INSTRUCTIONS BEFORE INSTALLING/UPDATING
|
||||
LIBREBOOT](../../news/safety.md).**]
|
||||
**[PLEASE READ THESE INSTRUCTIONS BEFORE INSTALLING](ivy_has_common.md), OR
|
||||
YOU MAY BRICK YOUR MACHINE!! - Please click the link and follow the instructions
|
||||
there, before flashing. For posterity,
|
||||
[here is the link again](ivy_has_common.md).**
|
||||
|
||||
**If you're using release ROMs, some files may be missing inside them, and must
|
||||
be added. See: [Inserting Vendor Files](ivy_has_common.md).**
|
||||
|
|
@ -23,7 +36,7 @@ be added. See: [Inserting Vendor Files](ivy_has_common.md).**
|
|||
If you're [building from source](../build/), you can ignore the above guidance.
|
||||
|
||||
Install Libreboot via external flashing
|
||||
=================
|
||||
---------------------------------------
|
||||
|
||||
Refer to the following article:\
|
||||
[Externally rewrite 25xx NOR flash via SPI protocol](spi.md)
|
||||
|
|
@ -35,7 +48,7 @@ externally or internally - if only external flashing is available, then it's
|
|||
usually the case that only external dumping is available too.
|
||||
|
||||
Need help?
|
||||
==========
|
||||
----------
|
||||
|
||||
Help is available on [Libreboot IRC](../../contact.md) and other channels.
|
||||
|
||||
|
|
@ -48,7 +61,7 @@ Leah Rowe, the founder and lead developer of Libreboot, also owns and
|
|||
operates Minifree Ltd; sales provide funding for the Libreboot project.
|
||||
|
||||
Which systems are supported by Libreboot?
|
||||
========================================
|
||||
-----------------------------------------
|
||||
|
||||
Before actually reading the installation guides, please ensure that your
|
||||
system is fully supported by Libreboot. More information about the Libreboot
|
||||
|
|
@ -56,35 +69,30 @@ build system can be found in the [lbmk maintenance manual](../maintain/),
|
|||
and information about porting new systems in
|
||||
the [porting manual](../maintain/porting.md).
|
||||
|
||||
With x86 machines, you can use the SeaBIOS or GNU GRUB payloads. On ARM
|
||||
systems, you can use the U-Boot payload (coreboot still initialises hardware).
|
||||
|
||||
Libreboot currently supports the following systems:
|
||||
|
||||
Games consoles
|
||||
--------------
|
||||
### Games consoles
|
||||
|
||||
- [Sony Playstation](playstation.md) (PS1/PSX)
|
||||
|
||||
Servers (AMD, x86)
|
||||
------------------
|
||||
### Servers (AMD, x86)
|
||||
|
||||
- [ASUS KFSN4-DRE motherboard](kfsn4-dre.md)
|
||||
- [ASUS KGPE-D16 motherboard](kgpe-d16.md)
|
||||
|
||||
Desktops (AMD, Intel, x86)
|
||||
--------------------------
|
||||
### Desktops (AMD, Intel, x86)
|
||||
|
||||
- **[Dell OptiPlex 7020/9020 MT and SFF](dell9020.md) - Also [available to buy
|
||||
with Libreboot preinstalled](https://minifree.org/product/libreboot-9020/)** - Dell OptiPlex XE2 MT/SFF also known to work
|
||||
- [Dell OptiPlex 3050 Micro](dell3050.html) - **Also [available to buy with Libreboot pre-installed](https://minifree.org/product/libreboot-3050-micro/)**
|
||||
- [Dell OptiPlex 7020/9020 MT and SFF](dell9020.md) - Dell OptiPlex XE2 MT/SFF also known to work
|
||||
- [Acer G43T-AM3](acer_g43t-am3.md)
|
||||
- Apple iMac 5,2
|
||||
- [ASUS KCMA-D8 motherboard](kcma-d8.md)
|
||||
- Dell OptiPlex 7010 **MT** (known to work, using the T1650 ROM, but more
|
||||
research is needed) - 9010 also known to work. No GPIO changes, so it should
|
||||
be safe to flash.
|
||||
- [Dell OptiPlex 3050 Micro](dell3050.md)
|
||||
- [Dell OptiPlex 780 variants e.g. MT, USFF](dell780.md)
|
||||
- [Dell OptiPlex 7010/9010 SFF](dell7010.md) **(for MT, please use the T1650 image)**
|
||||
- Dell Precision T1700 (use the same ROM as 9020 MT, but it won't have ECC support)
|
||||
- [Dell Precision T1650](t1650.md) **(the same ROM works on 7010/9010 MT variant)**
|
||||
- [Gigabyte GA-G41M-ES2L motherboard](ga-g41m-es2l.md)
|
||||
- [HP Elite 8200 SFF/MT](hp8200sff.md) (HP 6200 Pro Business probably works too)
|
||||
|
|
@ -92,13 +100,11 @@ Desktops (AMD, Intel, x86)
|
|||
- Intel D510MO and D410PT motherboards
|
||||
- [Intel D945GCLF](d945gclf.md)
|
||||
|
||||
Laptops (Intel, x86)
|
||||
--------------------
|
||||
### Laptops (Intel, x86)
|
||||
|
||||
- **Lenovo ThinkPad T440p - Also [available
|
||||
to buy with Libreboot preinstalled](https://minifree.org/product/libreboot-t440p/)**
|
||||
- **Lenovo ThinkPad W541 - Also [available to
|
||||
buy with Libreboot preinstalled](https://minifree.org/product/libreboot-w541/)** - NOTE: W540 also compatible (same mainboard, so flash the same ROM)
|
||||
- [Lenovo ThinkPad T480 and ThinkPad T480s](t480.html) - Also **[available to buy with Libreboot pre-installed](https://minifree.org/product/libreboot-t480/)**
|
||||
- Lenovo ThinkPad T440p
|
||||
- Lenovo ThinkPad W541
|
||||
- Lenovo ThinkPad X230 - *Also* available on Minifree: <https://minifree.org/product/libreboot-x230/>
|
||||
- [Apple MacBook1,1 and MacBook2,1](macbook21.md)
|
||||
- [Dell Latitude E4300, E6400, E6400 XFR and E6400 ATG, all with Nvidia or Intel
|
||||
|
|
@ -119,25 +125,24 @@ Laptops (Intel, x86)
|
|||
- Lenovo Thinkpad T420 / T420S
|
||||
- Lenovo ThinkPad T430 (**but not the T430S**)
|
||||
- [Lenovo ThinkPad T500 / W500](t500.md)
|
||||
- Lenovo ThinkPad T520 / W520 / T530 / W530
|
||||
- Lenovo ThinkPad T520
|
||||
- Lenovo ThinkPad T530
|
||||
- Lenovo ThinkPad T60, X60, X60S, X60 Tablet (with Intel GPU)
|
||||
- [Lenovo ThinkPad X200 / X200S / X200 Tablet](x200.md)
|
||||
- Lenovo Thinkpad X220 / X200 Tablet
|
||||
- [Lenovo Thinkpad X230 / X230 Tablet](x230_external.md)
|
||||
|
||||
Laptops (ARM, with U-Boot payload)
|
||||
----------------------------------
|
||||
### Laptops (ARM, with U-Boot payload)
|
||||
|
||||
- [ASUS Chromebook Flip C101 (gru-bob)](chromebooks.md)
|
||||
- [Samsung Chromebook Plus (v1) (gru-kevin)](chromebooks.md)
|
||||
|
||||
Emulation
|
||||
---------
|
||||
### Emulation
|
||||
|
||||
- [Qemu x86 and arm64](../misc/emulation.md)
|
||||
|
||||
**Disable security before flashing**
|
||||
================================
|
||||
Disable security before flashing
|
||||
--------------------------------
|
||||
|
||||
**Before internal flashing, you must first disable `/dev/mem` protections. Make
|
||||
sure to re-enable them after you're finished.**
|
||||
|
|
@ -145,7 +150,7 @@ sure to re-enable them after you're finished.**
|
|||
**See: [Disabling /dev/mem protection](devmem.md)**
|
||||
|
||||
ROM image file names
|
||||
====================
|
||||
--------------------
|
||||
|
||||
Libreboot ROM images are named like
|
||||
this: `payload_board_inittype_displaytype_keymap.rom`
|
||||
|
|
@ -175,7 +180,7 @@ executed instead, if the primary payload is SeaBIOS, whether that be pure
|
|||
SeaBIOS or a SeaGRUB setup.
|
||||
|
||||
EC firmware updates
|
||||
===================
|
||||
-------------------
|
||||
|
||||
Obviously, free EC firmware would be preferable, but it is not the case on
|
||||
all machine. We would like to have free EC firmware on more machines, but for
|
||||
|
|
@ -196,31 +201,28 @@ It is recommended that you update to the latest EC firmware version. The
|
|||
Updating the EC can sometimes provide benefit depending on the vendor. For
|
||||
example, they might fix power issues that could then enhance battery life.
|
||||
|
||||
ThinkPads
|
||||
---------
|
||||
### ThinkPads
|
||||
|
||||
See: <http://www.thinkwiki.org/wiki/BIOS_update_without_optical_disk>
|
||||
|
||||
Otherwise, check the Lenovo website to find the update utility for your
|
||||
mainboard.
|
||||
motherboard.
|
||||
|
||||
HP EliteBooks
|
||||
-------------
|
||||
### HP EliteBooks
|
||||
|
||||
EC firmware is required in the main boot flash, but Libreboot's build system
|
||||
automatically downloads this from HP for each machine, and inserts it, so
|
||||
you don't have to worry. Just make sure that [vendor files are
|
||||
inserted](ivy_has_common.md) if using release images.
|
||||
|
||||
Other
|
||||
-----
|
||||
### Other
|
||||
|
||||
The same wisdom applies to other laptop vendors.
|
||||
|
||||
Non-laptops typically do not have embedded controllers in them.
|
||||
|
||||
Libreboot installation instructions
|
||||
===================================
|
||||
-----------------------------------
|
||||
|
||||
In general, if Libreboot is already running, you can skip
|
||||
towards the final section on this page, which provides general internal
|
||||
|
|
@ -235,8 +237,7 @@ Therefore, before following generic guides, make sure to check first whether
|
|||
your board has special instructions, otherwise use the generic guide at the
|
||||
end of this article.
|
||||
|
||||
Intel GbE MAC address (IFD-based systems)
|
||||
---------------------------------------
|
||||
### Intel GbE MAC address (IFD-based systems)
|
||||
|
||||
On all Intel platforms except X4X (e.g. Gigabyte GA-G41M-ES2L) and i945
|
||||
ones (e.g. ThinkPad X60, ThinkPad T60, MacBook2,1), an Intel Flash Descriptor is
|
||||
|
|
@ -246,8 +247,7 @@ flash, and can (must) be changed prior to installation.
|
|||
You can use [nvmutil](nvmutil.md) to change the MAC address. You will perform
|
||||
this modification to the ROM image, before flashing it.
|
||||
|
||||
Flash lockdown / boot security
|
||||
-------------------
|
||||
### Flash lockdown / boot security
|
||||
|
||||
This is referred to informally as *Secure libreBoot*.
|
||||
|
||||
|
|
@ -259,10 +259,9 @@ See: [GRUB hardening / Secure libreBoot](../linux/grub_hardening.md)
|
|||
If you already did this, it's possible that you may no longer be able to
|
||||
flash internally. If that is the case, you must [flash externally](spi.md).
|
||||
|
||||
Updating an existing installation
|
||||
---------------------------------
|
||||
### Updating an existing installation
|
||||
|
||||
Unless otherwise stated, in sections pertaining to each mainboard below,
|
||||
Unless otherwise stated, in sections pertaining to each motherboard below,
|
||||
an existing Libreboot installation can be updated via internal flashing,
|
||||
without any special steps; simply follow the general internal flashing
|
||||
guide, in the final section further down this page.
|
||||
|
|
@ -274,33 +273,29 @@ If you currently have the factory firmware, you probably need to flash
|
|||
externally; on *some* machines, internal flashing is possible, usually with
|
||||
special steps required that differ from updating an existing installation.
|
||||
|
||||
The next sections will pertain to specific mainboards, where indicated,
|
||||
The next sections will pertain to specific motherboards, where indicated,
|
||||
followed by general internal flashing instructions where applicable.
|
||||
|
||||
HP EliteBook 820 G2 (internal and external)
|
||||
-------------------
|
||||
### HP EliteBook 820 G2 (internal and external)
|
||||
|
||||
See: [HP EliteBook 820 G2 flashing guide](hp820g2.md)
|
||||
|
||||
The flashprog command is identical, except programmer selection, on external
|
||||
and internal flashing; internal is only possible if you already have Libreboot.
|
||||
|
||||
HP EliteBook 8560w (vendor BIOS)
|
||||
--------------------
|
||||
### HP EliteBook 8560w (vendor BIOS)
|
||||
|
||||
If you have the factory
|
||||
firmware: [HP 8560w external flashing guide](hp8560w.md)
|
||||
|
||||
Dell Latitude laptops (vendor BIOS)
|
||||
---------------------
|
||||
### Dell Latitude laptops (vendor BIOS)
|
||||
|
||||
See: [Dell Latitude flashing guide](latitude.md)
|
||||
|
||||
This applies to all supported Dell Latitude models. Remember to [update the
|
||||
MAC address with nvmutil](nvmutil.md), before flashing.
|
||||
|
||||
ThinkPad X200/T400/T500/W500/R400/R500
|
||||
--------------------------------------
|
||||
### ThinkPad X200/T400/T500/W500/R400/R500
|
||||
|
||||
If you're running one of these with Lenovo BIOS, you must externally flash
|
||||
Libreboot, because the original firmware restricts writes to the flash.
|
||||
|
|
@ -321,35 +316,30 @@ You can find WSON8 probes online, that are similar to a SOIC8/SOIC16 clip. Your
|
|||
mileage may very, but WSON8 has the same pinout as SOIC8 so you might have some
|
||||
luck with that.
|
||||
|
||||
Intel D510MO/D410PT (vendor BIOS)
|
||||
-----------------------
|
||||
### Intel D510MO/D410PT (vendor BIOS)
|
||||
|
||||
See: [External flashing guide](spi.md) - both boards are compatible with
|
||||
the same image.
|
||||
|
||||
Gigabyte GA-G41M-ES2L (vendor BIOS)
|
||||
---------------------
|
||||
### Gigabyte GA-G41M-ES2L (vendor BIOS)
|
||||
|
||||
Internal flashing is possible, from factory BIOS to Libreboot, but special
|
||||
steps are required.
|
||||
|
||||
See: [Gigabyte GA-G41M-ES2L installation guide](ga-g41m-es2l.md)
|
||||
|
||||
Acer G43T-AM3 (vendor BIOS)
|
||||
--------------------
|
||||
### Acer G43T-AM3 (vendor BIOS)
|
||||
|
||||
See: [Acer G43T-AM3](acer_g43t-am3.md)
|
||||
|
||||
MacBook 1,1 / 2,1 / iMac 5,2 (vendor BIOS)
|
||||
-------------------------
|
||||
### MacBook 1,1 / 2,1 / iMac 5,2 (vendor BIOS)
|
||||
|
||||
MacBook *1,1* requires [external flashing](spi.md). MacBook *2,1* can always
|
||||
be flashed internally. iMac 5,2 can be flashed internally.
|
||||
|
||||
Also check the [Macbook2,1 hardware page](macbook21.md)
|
||||
|
||||
ASUS KCMA-D8 / KGPE-D16 (vendor BIOS)
|
||||
--------------------------
|
||||
### ASUS KCMA-D8 / KGPE-D16 (vendor BIOS)
|
||||
|
||||
[You must flash it externally](spi.md) (DIP-8 section) - also look at
|
||||
the [KGPE-D16 hardware page](kgpe-d16.md).
|
||||
|
|
@ -359,8 +349,7 @@ Further information is available on the [KCMA-D8 page](kcma-d8.md).
|
|||
KGPE-D16 installation is essentially the same, with the same type of flash
|
||||
IC (DIP-8). Refer to the external flashing guide.
|
||||
|
||||
ASUS KFSN4-DRE (vendor BIOS)
|
||||
-------------------------
|
||||
### ASUS KFSN4-DRE (vendor BIOS)
|
||||
|
||||
This board uses LPC flash in a PLCC32 socket. This coreboot page shows an
|
||||
example of the push pin as a proof of concept:
|
||||
|
|
@ -371,27 +360,23 @@ See: [ASUS KFSN4-DRE guide](kfsn4-dre.md)
|
|||
Hot-swap the flash IC with another one while it's running, and flash it
|
||||
internally.
|
||||
|
||||
Intel D945GCLF (vendor BIOS)
|
||||
---------------------------------
|
||||
### Intel D945GCLF (vendor BIOS)
|
||||
|
||||
See: [Intel D945GCLF flashing guide](d945gclf.md)
|
||||
|
||||
Dell OptiPlex 3050 Micro (vendor BIOS)
|
||||
---------------------
|
||||
### Dell OptiPlex 3050 Micro (vendor BIOS)
|
||||
|
||||
Refer to the [3050 Micro page](dell3050.md). Internal flashing also possible.
|
||||
This has the Intel Boot Guard, but Libreboot uses the *deguard* utility to
|
||||
disable the Boot Guard on this Intel 7th gen board.
|
||||
|
||||
Dell OptiPlex 7010/9010 SFF (vendor BIOS)
|
||||
---------------------
|
||||
### Dell OptiPlex 7010/9010 SFF (vendor BIOS)
|
||||
|
||||
Refer to the [7010/9020 SFF page](dell7010.md). Internal flashing also possible.
|
||||
NOTE: If you have the *MT* variant, read the sections below instead (the SFF
|
||||
ROM is only for SFF).
|
||||
|
||||
Dell OptiPlex 7010/9010 MT (vendor BIOS)
|
||||
---------------------
|
||||
### Dell OptiPlex 7010/9010 MT (vendor BIOS)
|
||||
|
||||
This board is essentially identical to the Dell Precision T1650, except that
|
||||
it does not support ECC memory. Same wiring.
|
||||
|
|
@ -399,22 +384,19 @@ it does not support ECC memory. Same wiring.
|
|||
You can flash the T1650 image on this machine. NOTE: This applies to the MT
|
||||
variant, specifically. Do not flash T1650 images on the 7010/9010 *SFF*.
|
||||
|
||||
Dell Precision T1650 desktop
|
||||
------------------------------------
|
||||
### Dell Precision T1650 desktop
|
||||
|
||||
Refer to the [T1650 hardware page](t1650.md). External flashing
|
||||
required, or you can set the Service Mode jumper and flash internally (from
|
||||
vendor firmware, to Libreboot).
|
||||
|
||||
Dell OptiPlex 7020/9020/XE2 SFF/MT
|
||||
------------------------------------
|
||||
### Dell OptiPlex 7020/9020/XE2 SFF/MT / Precision T1700
|
||||
|
||||
Refer to the [7020/9020 hardware page](dell9020.md). Internal
|
||||
flashing (from vendor firmware to Libreboot) is possible if you set the Service
|
||||
Mode jumper.
|
||||
|
||||
HP EliteBook laptops (vendor BIOS)
|
||||
--------------------
|
||||
### HP EliteBook laptops (vendor BIOS)
|
||||
|
||||
Refer to the [hardware page]() for info about HP laptops, and
|
||||
read the [external flashing guide](spi.md).
|
||||
|
|
@ -432,18 +414,15 @@ Links to specific HP laptop pages:
|
|||
These pages provide more info about external flashing. You must remember
|
||||
to [insert vendor files](ivy_has_common.md), if you're using release ROMs.
|
||||
|
||||
HP Elite 8200 SFF (vendor BIOS)
|
||||
-------------------------
|
||||
### HP Elite 8200 SFF (vendor BIOS)
|
||||
|
||||
See: [HP Elite 8200 SFF install guide](hp8200sff.md)
|
||||
|
||||
HP Elite 8300 USDT (vendor BIOS)
|
||||
----------------------------
|
||||
### HP Elite 8300 USDT (vendor BIOS)
|
||||
|
||||
See: [HP Elite 8200 USDT install guide](hp8300usdt.md)
|
||||
|
||||
ThinkPad X220/X220T/T420/T420s/T520
|
||||
-----------------------------------
|
||||
### ThinkPad X220/X220T/T420/T420s/T520
|
||||
|
||||
T420/T520: [T420 flash instructions](t420_external.md)
|
||||
|
||||
|
|
@ -457,8 +436,7 @@ internally; you must use [an external flasher](spi.md).
|
|||
Otherwise, look at [X230 disassembly](x230_external.md). Note that the X220
|
||||
has a single 8MB flash, instead of 8MB and 4MB.
|
||||
|
||||
ThinkPad X230/T430/T530/W530/X230T
|
||||
----------------------------------
|
||||
### ThinkPad X230/T430/T530/W530/X230T
|
||||
|
||||
Internal flashing from vendor BIOS to Libreboot is possible, but not
|
||||
recommended. See: [IvyBridge ThinkPad internal flashing](ivy_internal.md).
|
||||
|
|
@ -468,8 +446,7 @@ See: [ThinkPad X230 install guide](x230_external.md).
|
|||
|
||||
Otherwise, refer to [external SPI flashing](spi.md).
|
||||
|
||||
ThinkPad T60/X60/X60Tablet/X60S
|
||||
-------------------------------
|
||||
### ThinkPad T60/X60/X60Tablet/X60S
|
||||
|
||||
Only the Intel GPU is compatible. Do not flash the ATI GPU models.
|
||||
|
||||
|
|
@ -562,16 +539,20 @@ bootblock, set bucts back to zero:
|
|||
The second flash can be done by simply following the general internal flashing
|
||||
guide further down on this page.
|
||||
|
||||
Thinkpad T440p/W541 (vendor BIOS)
|
||||
---------------------
|
||||
### ThinkPad T480/T480S (vendor BIOS)
|
||||
|
||||
See:
|
||||
|
||||
* [ThinkPad T480/T480S](t480.md)
|
||||
|
||||
### Thinkpad T440p/W541 (vendor BIOS)
|
||||
|
||||
Guides:
|
||||
|
||||
* [ThinkPad T440p flashing guide](t440p_external.md)
|
||||
* [ThinkPad W541 flashing guide](w541_external.md)
|
||||
|
||||
HP EliteBook laptops (vendor BIOS)
|
||||
-------------------------
|
||||
### HP EliteBook laptops (vendor BIOS)
|
||||
|
||||
Each machine has it's own guide:
|
||||
|
||||
|
|
@ -584,16 +565,14 @@ Each machine has it's own guide:
|
|||
* [HP EliteBook 8560w](hp8560w.md)
|
||||
* [HP EliteBook Folio 9470m](hp9470m.md)
|
||||
|
||||
HP Elite desktops (vendor BIOS)
|
||||
-------------------------
|
||||
### HP Elite desktops (vendor BIOS)
|
||||
|
||||
Each machine has it's own guide:
|
||||
|
||||
* [HP Elite 8200 SFF/MT](hp8200sff.md) (HP 6200 Pro Business probably works too)
|
||||
* [HP Elite 8300 USDT](hp8300usdt.md)
|
||||
|
||||
ARM-based Chromebooks
|
||||
---------------------
|
||||
### ARM-based Chromebooks
|
||||
|
||||
See: [Chromebook flashing instructions](chromebooks.md)
|
||||
|
||||
|
|
@ -602,8 +581,7 @@ the x86 machines, because the Chromebooks still use flashrom with
|
|||
the `-p host` argument instead of `-p internal` when flashing, and you typically
|
||||
need to flash externally, due to Google's security model.
|
||||
|
||||
QEMU (arm64 and x86)
|
||||
--------------------
|
||||
### QEMU (arm64 and x86)
|
||||
|
||||
Libreboot can be used on QEMU (virtual machine), which is useful for debugging
|
||||
payloads and generally trying out Libreboot, without requiring real hardware.
|
||||
|
|
@ -611,12 +589,12 @@ payloads and generally trying out Libreboot, without requiring real hardware.
|
|||
See: [Libreboot QEMU guide](../misc/emulation.md)
|
||||
|
||||
Install via host CPU (internal flashing)
|
||||
========================================
|
||||
----------------------------------------
|
||||
|
||||
NOTE: This mainly applies to the x86 machines.
|
||||
|
||||
Please check other sections listed above, to see if there is anything
|
||||
pertaining to your mainboard. Internal flashing means that you boot Linux or
|
||||
pertaining to your motherboard. Internal flashing means that you boot Linux or
|
||||
BSD on the target machine, and run `flashprog` there, flashing the machine
|
||||
directly.
|
||||
|
||||
|
|
@ -625,14 +603,13 @@ directly.
|
|||
Internal flashing is often unavailable with the factory firmware, but it is
|
||||
usually possible when Libreboot is running (barring special circumstances).
|
||||
|
||||
Run flashprog on host CPU
|
||||
------------------------
|
||||
### Run flashprog on host CPU
|
||||
|
||||
**Always remember to [insert vendor files](ivy_has_common.md), when using
|
||||
release images. Otherwise, these files are added automatically at build
|
||||
time, when building from source (but they are not present in release images).**
|
||||
|
||||
### Flash chip size
|
||||
#### Flash chip size
|
||||
|
||||
Use this to find out:
|
||||
|
||||
|
|
@ -640,7 +617,7 @@ Use this to find out:
|
|||
|
||||
In the output will be information pertaining to your boot flash.
|
||||
|
||||
### Howto: read/write/erase the boot flash
|
||||
#### Howto: read/write/erase the boot flash
|
||||
|
||||
How to read the current chip contents:
|
||||
|
||||
|
|
@ -654,7 +631,7 @@ How to erase and rewrite the chip contents:
|
|||
sudo flashprog -p internal:laptop=force_I_want_a_brick,boardmismatch=force -w libreboot.rom
|
||||
|
||||
NOTE: `force_I_want_a_brick` is not scary. Do not be scared! This merely disables
|
||||
the safety checks in flashprog. Flashrom and coreboot change a lot, over the years,
|
||||
the safety checks in flashprog. Flashprog and coreboot change a lot, over the years,
|
||||
and sometimes it's necessary to use this option. If you're scared, then just
|
||||
follow the above instructions, but remove that option. So, just use `-p internal`.
|
||||
If that doesn't work, next try `-p internal:boardmismatch=force`. If that doesn't
|
||||
|
|
@ -670,7 +647,7 @@ NOTE: there are exceptions where the above is not possible. Read about them in
|
|||
the sections below:
|
||||
|
||||
Removed boards
|
||||
==============
|
||||
--------------
|
||||
|
||||
These boards were in Libreboot, but have been removed with the intention of
|
||||
re-adding them at a later date. They were removed due to issues. List:
|
||||
|
|
@ -687,8 +664,7 @@ re-adding them at a later date. They were removed due to issues. List:
|
|||
- [Samsung Chromebook XE303 (daisy-snow)](chromebooks.md)
|
||||
- Lenovo ThinkPad X301 (still in lbmk, but with `release="n"`)
|
||||
|
||||
NOTES about removed boards
|
||||
--------------------------
|
||||
### NOTES about removed boards
|
||||
|
||||
**WARNING: veyron speedy boards (e.g. C201) have non-functional video init as
|
||||
of 19 February 2023, and no fix is yet available on that date. See:
|
||||
|
|
@ -707,7 +683,7 @@ for now, and have been deleted from the Libreboot 20221214 and 20230319
|
|||
releases. - see: <https://review.coreboot.org/plugins/gitiles/blobs/+/4c0dcf96ae73ba31bf9aa689768a5ecd47bac19e>
|
||||
and <https://review.coreboot.org/plugins/gitiles/blobs/+/b36cc7e08f7337f76997b25ee7344ab8824e268d>**
|
||||
|
||||
d945gclf: Doesn't boot at all, according to last report. D510MO is still in
|
||||
D945GCLF: Doesn't boot at all, according to last report. D510MO is still in
|
||||
lbmk but still was reported problematic; other boards should be fine (see list
|
||||
above).
|
||||
|
||||
|
|
|
|||
|
|
@ -0,0 +1 @@
|
|||
Learn how to install Libreboot free/opensource BIOS/UEFI boot firmware on various laptop, desktop and server motherboards. Boot payloads like GNU GRUB.
|
||||
|
|
@ -1,74 +1,230 @@
|
|||
---
|
||||
title: Insert vendor files on Sandybridge/Ivybridge/Haswell
|
||||
title: Insert vendor files not included in Libreboot release images
|
||||
x-toc-enable: true
|
||||
...
|
||||
|
||||
Please make sure to install [build dependencies](../build/) if following this
|
||||
guide, and note that this guide assumes you use [lbmk.git](../git.md), not the
|
||||
release archives, even if you're using release *ROM images*, which is fine.
|
||||
Open source BIOS/UEFI firmware
|
||||
------------------------------
|
||||
|
||||
Coreboot is nominally free software, but requires certain vendor code on some
|
||||
boards, for certain functionalities; we cover this more thoroughly in
|
||||
the [Freedom Status](../../freedom-status.md) page and in the [Binary Blob
|
||||
Reduction Policy](../../news/policy.md).
|
||||
Libreboot is a [Free Software](https://writefreesoftware.org/learn) project
|
||||
that replaces proprietary BIOS/UEFI firmware, but some newer boards still
|
||||
occasionally need code from the hardware manufacturer in order to boot properly.
|
||||
This document will teach you how to handle such a scenario, and how to check
|
||||
for it. For more context, please read Libreboot's [Binary Blob Reduction
|
||||
Policy](../../news/policy.md) and [Freedom Status](../../freedom-status.md)
|
||||
pages.
|
||||
|
||||
Therefore, you should just follow this guide if in any doubt. Otherwise, the
|
||||
freedom status page lists all boards that require vendor files, and it says
|
||||
what they are. This is because Libreboot cannot directly distribute some of them,
|
||||
but they are extracted from vendor updates at build time, and inserted into
|
||||
images; when those images are then archived for release, the non-redistributable
|
||||
filejs are removed.
|
||||
**PLEASE MAKE SURE you read and follow the instructions on this page, prior
|
||||
to flashing Libreboot, if required for your motherboard; failure to heed this
|
||||
warning can and will result in a soft-brick, which would then necessitate
|
||||
recovery via [external flashing](spi.md) - regardless, you are advised to
|
||||
also read the external flashing guide just in caes, and have an external
|
||||
flasher handy in case you need it.**
|
||||
|
||||
The same logic can be used after the fact, to re-download and re-insert these
|
||||
files; the page that you're reading now will tell you how to do so.
|
||||
Even if your board doesn't need vendor firmware inserted, you can also use this
|
||||
guide to change the GbE MAC address in the flash, if your board has an Intel
|
||||
Gigabit Ethernet device (where an Intel Flash Descriptor is used).
|
||||
|
||||
*If in doubt, just follow these instructions anyway; if your board doesn't need
|
||||
vendor files inserted, nothing will happen. You only need to follow this guide
|
||||
if you use release ROMs; if you're building directly from source, using the
|
||||
Libreboot build system, then you can just flash the result.*
|
||||
WARNING: eCryptfs file name limits
|
||||
----------------------------------
|
||||
|
||||
Injecting vendor files into ROM
|
||||
Do not run the build system on a eCryptfs file system, because it has
|
||||
very short file name limits and Libreboot's build system deals with very
|
||||
long file names. We commonly get reports from this by Linux Mint users
|
||||
who encrypt their home directory with eCryptfs; regular LUKS encryption will
|
||||
do nicely.
|
||||
|
||||
Install build dependencies first
|
||||
------------------------------------
|
||||
|
||||
You must determine the correct board name, for your board, based on the list
|
||||
generated when running this command:
|
||||
**You will be compiling several small utilities from source code. This means
|
||||
you need the compilers and various libraries.**
|
||||
|
||||
./mk -b coreboot list
|
||||
**Please make sure to install [build dependencies](../build/)** before using this
|
||||
guide, and note that this guide assumes you use [lbmk.git](../../git.md).
|
||||
|
||||
**Failure to adhere to this warning will result in vendor file insertion not
|
||||
working. The insertion must work correctly, prior to Libreboot installation,
|
||||
if your board requires it, otherwise your board simply will not boot.**
|
||||
|
||||
Introduction
|
||||
------------
|
||||
|
||||
On *some* boards, but certainly not all of them, certain files are required from
|
||||
the hardware vendor. Libreboot has strict [rules](../../news/policy.md)
|
||||
governing this, and you can find more information on
|
||||
the [Freedom Status](../../freedom-status.md) page.
|
||||
|
||||
Libreboot can't directly distribute *all* of these files, so some of them are
|
||||
downloaded at build-time, and processed for insertion into the firmware images.
|
||||
**On pre-compiled ROM images in releases, these files are removed, and can be
|
||||
re-added using the same automation that was applied during the build process.**
|
||||
|
||||
Examples of these files can be found on
|
||||
the [Freedom Status](../../freedom-status.md) page.
|
||||
|
||||
**If in doubt, you should simply follow these instructions. If your board
|
||||
doesn't need vendor files, the tar archive won't be modified.**
|
||||
|
||||
### MAC address
|
||||
|
||||
Regardless of whether your board needs vendorfiles or not, you can also use
|
||||
this command to change the MAC address on systems with Intel GbE regions in
|
||||
the flash, where an Intel gigabit ethernet device is used.
|
||||
|
||||
For example, a Lenovo ThinkPad X200 doesn't need any files added, but can still
|
||||
have the mac address changed; please continue reading!
|
||||
|
||||
### Injecting vendor files into tarballs
|
||||
|
||||
In order to inject the necessary files into a rom image, run the script from the root of lbmk and point to the rom image.
|
||||
|
||||
If you only wish to flash a release rom then the process of injecting the necessary files is quite simple.
|
||||
Run the injection script pointing to the release archive you downloaded:
|
||||
|
||||
./vendor inject libreboot-RELEASE_targetname.tar.xz
|
||||
./mk inject libreboot-RELEASE_targetname.tar.xz
|
||||
|
||||
**You are strongly advised only to insert it on the tarball, because then
|
||||
checksums are verified to ensure that the vendor files were inserted correctly.
|
||||
Otherwise, you can do it manually on each individual image, specifying the
|
||||
board name with the instructions provided below:**
|
||||
**NOTE: As of Libreboot 20241206 rev8 or newer, the above command will behave
|
||||
the same way as if you declared `setmac` without argument, mentioned below:**
|
||||
|
||||
Where a GbE region is present in the flash, you can also use the above command
|
||||
to change the MAC address, by modifying it like so:
|
||||
|
||||
./mk inject libreboot-RELEASE_targetname.tar.xz setmac
|
||||
|
||||
Note that `setmac`, without additional argument, will *randomise* the MAC
|
||||
address, setting a *local*, *unicast* MAC address. You can specify a custom
|
||||
MAC address, like so:
|
||||
|
||||
./mk inject libreboot-RELEASE_targetname.tar.xz setmac 00:1f:16:00:01:02
|
||||
|
||||
The `setmac` command, without argument, is technically redundant, since MAC
|
||||
addresses are randomised by default, every time you run the inject script.
|
||||
|
||||
If you wish to *skip* changing the MAC address (not recommended), you can
|
||||
use the `keep` argument, like so:
|
||||
|
||||
./mk inject libreboot-RELEASE_targetname.tar.xz setmac keep
|
||||
|
||||
The `setmac` command works by inserting a reference GbE file, contained within
|
||||
lbmk. The `keep` command makes lbmk *skip* changing your current GbE region;
|
||||
it does not, for example, restore the reference GbE image from lbmk.
|
||||
|
||||
The `setmac` command, when not using `keep`, copied the default GbE file within
|
||||
lbmk for that board, modifying the temporary copy and then inserting that. To
|
||||
insert the *original file*, without modification, you can do this:
|
||||
|
||||
./mk inject libreboot-RELEASE_targetname.tar.xz setmac restore
|
||||
|
||||
The `restore` setting does the same as `setmac` (without `keep`), but skips
|
||||
running `nvmutil`; it also skips building nvmutil. Essentially, this will
|
||||
restore the default MAC address from standard release images.
|
||||
|
||||
The above MAC address is a random example; please make sure to use one that matches
|
||||
your board, if you wish. You can also use randomisation this way; the `?` character
|
||||
will be randomised, e.g.:
|
||||
|
||||
./mk inject libreboot-RELEASE_targetname.tar.xz setmac ??:??:??:??:??:??
|
||||
|
||||
You can mix and match arbitrary characters with random ones, e.g.:
|
||||
|
||||
./mk inject libreboot-RELEASE_targetname.tar.xz setmac 0?:??:12:?a:6?:69
|
||||
|
||||
The script can automatically detect the board as long as you do not change the file name.
|
||||
You can then find flash-ready ROMs in `/bin/release/`
|
||||
|
||||
Alternatively, you may patch only a single rom file, but you must supply the
|
||||
correct board target name as alluded to above.
|
||||
For example:
|
||||
On Libreboot 20241206 rev8 or newer, releases newer than the 20241206 series,
|
||||
and in the latest lbmk Git repository branch revisions (`master` branch), the
|
||||
commands above *directly modify the tarball*.
|
||||
|
||||
./vendor inject -r x230_libreboot.rom -b x230_12mb
|
||||
Older versions left the tarball unmodified, and extracted the modified images
|
||||
to `bin/release/` - on current behaviour, you inject the tarball and then
|
||||
extract the tarball yourself afterward, to flash the modified images.
|
||||
|
||||
Optionally, you can use this script to modify the mac address of the rom with the `-m` flag.
|
||||
For example:
|
||||
### Behaviour changes in Libreboot 20241206 rev8
|
||||
|
||||
./vendor inject -r x230_libreboot.rom -b x230_12mb -m 00:f6:f0:40:71:fd
|
||||
*Older* versions of this script would have produced the injected images under
|
||||
the `bin/release/` directory, and/or allow you to do it on specific ROM images.
|
||||
|
||||
The *current* version, pertaining to this documentation, *only* supports injecting
|
||||
tarballs, because the tarball-based mechanism verifies checksums on images,
|
||||
after insertion.
|
||||
|
||||
The older versions of this script would have left the tarball unmodified, while
|
||||
producing `bin/release/` containing your images.
|
||||
|
||||
The *current* version, pertaining to this documentation, modifies the tarball
|
||||
itself. You can inject and un-inject. To un-inject, you can do:
|
||||
|
||||
./mk inject libreboot-RELEASE_targetname.tar.xz nuke
|
||||
|
||||
Running the `nuke` command will remove vendorfiles, and re-generate a file inside
|
||||
the archive named `vendorhashes`. When running regular inject, not `nuke`,
|
||||
the `vendorfiles` file is removed after insertion; this way, subsequent
|
||||
injections are avoided, by detecting whether they're needed on the basis of
|
||||
that file.
|
||||
|
||||
The nuke command is available because Libreboot's build system uses it when
|
||||
producing release archives. You otherwise shouldn't use `nuke` yourself, except
|
||||
for testing purposes or if you're just curious.
|
||||
|
||||
Libreboot 20241206 rev8 have different command structure for the inject script.
|
||||
Older versions could insert into lone ROM images, with a special command, and
|
||||
generally didn't have good error checking. The new version of this script is
|
||||
much safer and easier to use. **These changes are also present in the latest
|
||||
lbmk git repository.**
|
||||
|
||||
ALSO: Non-injected images do, on Libreboot 20241206 rev8 or higher, have 1 byte
|
||||
of padding - yes, *1 byte* - at the end, to make flashprog fail to flash it due
|
||||
to size mismatch versus chip size, and the words `DO_NOT_FLASH` are inserted
|
||||
into the file name. With both of these things, the user is unlikely to flash
|
||||
an image that hasn't been injected.
|
||||
|
||||
After injection, the `DO_NOT_FLASH` file name prefix is removed, as is the
|
||||
padding, so that the injected images are ready to flash, and the tarball is
|
||||
re-generated with these images.
|
||||
|
||||
ALSO: If vendorfiles are not needed, or if an error occurs, modification of
|
||||
the tarball is avoided and it's left alone, UNLESS the following condition is
|
||||
met:
|
||||
|
||||
If no errors occured, but no vendor files are needed, you can still inject a
|
||||
new MAC address, where there is a GbE region. If there isn't a GbE region,
|
||||
such modification is skipped (some boards don't have Intel gigabit ethernet,
|
||||
and might have a different ethernet adapter instead).
|
||||
|
||||
When vendor files are inserted and/or a MAC address is inserted, the tarball
|
||||
is re-generated. MAC address insertion is handled with [nvmutil](nvmutil.md);
|
||||
the steps there are applied automatically.
|
||||
|
||||
Older release images, prior to 20241206 rev8, do not have `DO_NOT_FLASH` or
|
||||
the 1-byte padding, so watch out! However, this script, the new version, is
|
||||
backwards compatible with older releases.
|
||||
|
||||
That's one possible use for the `nuke` command, running it yourself. If you're
|
||||
distributing the older release images, you could inject them, and then nuke
|
||||
them; doing so will re-generate the `vendorhashes` file, *and* retroactively
|
||||
pad them (and add `DO_NOT_FLASH` to the image file names). It would be pointless
|
||||
for Libreboot to retroactively modify the official images in this way, since
|
||||
20241206 rev8 and newer already has this done to it. Just be careful when
|
||||
using the older tarballs.
|
||||
|
||||
Check that the files were inserted
|
||||
==================================
|
||||
----------------------------------
|
||||
|
||||
### Automatic verification
|
||||
|
||||
You *must* ensure that the files were inserted. The inject command automatically
|
||||
verifies checksums of the complete images, when you run it directly on a
|
||||
release tarball, but not when running it manually on an individual image;
|
||||
checking it manually is useful for the latter, but you should probably just
|
||||
insert it into the tarball.
|
||||
release tarball.
|
||||
|
||||
If there was an error, and/or the checksums didn't match, then the tarball won't
|
||||
be modified. If you're using newer release images with `DO_NOT_FLASH` and
|
||||
the one-byte padding (as described above), that's a good indicator, but older
|
||||
release images didn't have this modification.
|
||||
|
||||
### Manual inspection
|
||||
|
||||
You could check the files manually, if you're paranoid, after insertion.
|
||||
|
||||
Some examples of how to do that in lbmk:
|
||||
|
||||
|
|
@ -85,7 +241,15 @@ below):
|
|||
./elf/cbfstool/TREENAME/cbfstool libreboot.rom print
|
||||
|
||||
You should check that the files were inserted in cbfs, if needed; for example,
|
||||
EC firmware or MRC firmware.
|
||||
EC firmware or MRC firmware, perhaps FSP.
|
||||
|
||||
FSP is redistributable by Intel, but not with modification. Since coreboot has
|
||||
to de-concatenate FSP into its modules, and modify pointers in the FSP-M module,
|
||||
for raminit, Libreboot treats FSP modules like other injectable vendor files.
|
||||
|
||||
(in the original 20241206 release, FSP was directly baked in; the change
|
||||
described above was applied in Libreboot 20241206 and newer, and the 3050micro
|
||||
image from Libreboot 20241008 was removed from Libreboot's rsync server)
|
||||
|
||||
Next:
|
||||
|
||||
|
|
@ -96,22 +260,28 @@ Run hexdump on it:
|
|||
|
||||
hexdump flashregion_2_intel_me.bin
|
||||
|
||||
Check the output. If it's all `0xFF` (all ones) or otherwise isn't a bunch
|
||||
of code, then the Intel ME firmware wasn't inserted.
|
||||
Check the output. If it's all `0xFF` (all ones) or zeroes or otherwise isn't a
|
||||
bunch of code, then the Intel ME firmware wasn't inserted. You could also run
|
||||
the `me_cleaner` program on this file, to see if it gives you any information,
|
||||
if you're not savvy enough to look at stuff in hexdump.
|
||||
|
||||
You'll note the small size of the Intel ME, e.g. 84KB on sandybridge platforms.
|
||||
This is because lbmk *automatically* neuters it, disabling it during
|
||||
early boot. This is done using `me_cleaner`, which lbmk imports.
|
||||
|
||||
NOTE: the MAC changer makes use of `nvmutil`, which you can read more about in
|
||||
the [nvmutil documentation](nvmutil.md).
|
||||
early boot. This is done using `me_cleaner`, which lbmk imports. If the platform
|
||||
uses MEv11 with Intel Boot Guard, the boot guard is automatically disabled
|
||||
by processing the MEv11 image with Mate Kukri's [deguard](deguard.md) utility.
|
||||
|
||||
Errata
|
||||
======
|
||||
------
|
||||
|
||||
This section should not concern you, if you're using newer Libreboot releases.
|
||||
This section largely concerns *bugs* which existed in older releases, pertaining
|
||||
to this documentation, and design changes made accordingly.
|
||||
|
||||
NOTE: As of Libreboot releases from May 2024 onward, the Intel MRC is no longer
|
||||
included for Haswell; MRC is a blob for raminit, but we now provide libre
|
||||
raminit. The following targets no longer exist in the build system:
|
||||
included for Haswell; MRC is a firmware for raminit, but we now provide native
|
||||
raminit written by Angel Pons, for the coreboot project. The following targets
|
||||
no longer exist in the build system:
|
||||
|
||||
* `t440pmrc_12mb` (use `t440plibremrc_12mb` instead)
|
||||
* `t440pbmrc_12mb` (use `t440plibremrc_12mb` instead)
|
||||
|
|
@ -122,12 +292,27 @@ raminit. The following targets no longer exist in the build system:
|
|||
* `dell9020mt_12mb` (use `dell9020mt_nri_12mb` instead)
|
||||
* `dell9020mtbmrc` (use `dell9020mt_nri_12mb` instead)
|
||||
|
||||
FSP images are also no longer baked in on release images, from
|
||||
Libreboot 20241206 rev8 or higher (or releases newer than the 20241206 series),
|
||||
but the machines that use them still need them; they are injected instead,
|
||||
using the commands shown above on this very page. Older images with FSP baked
|
||||
directly into release images had `_fsp` in the file names; newer images that
|
||||
need it to be injected have `_vfsp` in the file name. Releases from Libreboot
|
||||
20241206 release series at revision 8 or higher, or releases newer than the
|
||||
20241206 series, no longer include `_fsp` images as they are set `release="n"`
|
||||
in the build system; these releases include `_vfsp` images instead. Newer
|
||||
targets added in the future, that need FSP, will also have `_vfsp` in the
|
||||
file name, for consistency.
|
||||
|
||||
This is written as errata because some users may still be using older release
|
||||
images but on the newer build system from May 2024 onward; you must use the
|
||||
Libreboot 20240225 release if you want to inject MRC and so on, for these older
|
||||
targets.
|
||||
|
||||
Libreboot's [binary blob reduction policy](../../news/policy.md) is very strict,
|
||||
and states: if a blob can be avoided, it must be avoided. Therefore, the MRC
|
||||
is removed on Haswell and Libreboot will only use the libre raminit (called
|
||||
NRI, short for Native Ram Initialisation).
|
||||
Libreboot's [Binary Blob Reduction Policy](../../news/policy.md) is very strict,
|
||||
and states: if it can be done with free software exclusively, then it should be
|
||||
done with free software exclusively. Therefore, the MRC is removed on Haswell
|
||||
and Libreboot will only use the libre raminit (called NRI, short for Native Ram
|
||||
Initialisation).
|
||||
|
||||
The four freedoms are absolute.
|
||||
|
|
|
|||
|
|
@ -0,0 +1 @@
|
|||
Learn how to install Libreboot free/opensource BIOS/UEFI boot firmware on your, with vendor code. Libreboot's strict Binary Blob Reduction Policy is observed.
|
||||
|
|
@ -1,174 +0,0 @@
|
|||
---
|
||||
title: Insert vendore files on Sandybridge/Ivybridge/Haswell
|
||||
x-toc-enable: true
|
||||
...
|
||||
|
||||
Regarding vendorfile insertion: if unsure, just follow these instructions.
|
||||
If a given target does not require vendor files, none will be inserted.
|
||||
|
||||
**TODO: Re-translate this again to Ukrainian. It was translated before, but
|
||||
the english page got heavily re-written.**
|
||||
|
||||
**NOTE: This page also applies to PM45 machine Dell Latitude E6400 if it
|
||||
contains an Nvidia GPU (Libreboot vendor scripts can insert the VGA ROM)**
|
||||
|
||||
This is not a general purpose installation guide, but you *should read it*
|
||||
before installing Libreboot! *This* guide *must* be followed, no matter what
|
||||
method you use to install Libreboot; even if you compile from source, you should
|
||||
still read this page for later reference.
|
||||
|
||||
For how to use an external programmer see the [25xx NOR flashing guide](/docs/install/spi.html)
|
||||
|
||||
Introduction
|
||||
============
|
||||
|
||||
**PLEASE MAKE SURE you have build dependencies installed first. Although you
|
||||
do not need to re-compile release ROMs, you should follow these instructions
|
||||
before reading the instructions below:
|
||||
<https://libreboot.org/docs/build/#first-install-build-dependencies>**
|
||||
|
||||
Coreboot is nominally free software, but requires certain vendor code on some
|
||||
boards, for certain functionalities; it differs per board, and some boards do
|
||||
not require vendor code of any kind in the flash. We cover this more thoroughly in
|
||||
the [Freedom Status](../../freedom-status.md) page and in the [Binary Blob
|
||||
Reduction Policy](../../news/policy.md).
|
||||
|
||||
Well, not all of these files are freely redistributable. Coreboot does provide
|
||||
vendor files in some cases, if the vendor has allowed it. In other cases,
|
||||
extraction from factory firmware is required, or you can extract them from
|
||||
vendor-supplied updates - Libreboot's build system does the latter.
|
||||
|
||||
When you [compile Libreboot ROM images from source](../build/), Libreboot will
|
||||
automatically download any given vendor files required, for any given board
|
||||
target. This is done without user intervention, and only when absolutely needed
|
||||
to make the machine boot properly.
|
||||
|
||||
The problem?
|
||||
------------
|
||||
|
||||
Well, if the files cannot be freely redistributed, then we can't provide them.
|
||||
So how do we handle *that*, in the context of Libreboot releases?
|
||||
|
||||
The solution
|
||||
------------
|
||||
|
||||
The answer is very simple: these files are **NOT** provided, at all! However,
|
||||
the very same logic used by the build system can be run standalone, to re-insert
|
||||
these vendor files on release ROMs. The `inject` script detects what files are
|
||||
needed for your ROM image.
|
||||
|
||||
The script will detect what board you're inserting on, or you can manually tell
|
||||
it what board, and it will fetch them for you, inserting them, so that your
|
||||
board is ready to flash - flashing it without these required files may result in
|
||||
a brick.
|
||||
|
||||
Vendor file locations
|
||||
--------------
|
||||
|
||||
During auto-download of files, they are saved to these locations within the
|
||||
Libreboot build system:
|
||||
|
||||
* ME firmware: `vendor/*/me.bin` - the `*` can be any given directory. Different ones will
|
||||
be used by given boards, but the directory name may not match the board
|
||||
target name.
|
||||
* SMSC SCH5545 fan control firmware (for Dell T1650): `vendor/t1650/sch5545ec.bin` -
|
||||
ditto 7010/9010 MT/SFF optiplex machines.
|
||||
* SMSC KBC1126 embedded controller firmware, on HP EliteBooks: `ec/`
|
||||
* Intel MRC firmware, provides raminit on HP EliteBook 820 G2
|
||||
|
||||
The above list refers to the *non-redistributable files*, and these are not
|
||||
directly included in releases. These are auto-downloaded during the build.
|
||||
The `me.bin` files are produced by extracting them from vendor updates and
|
||||
neutering them with `me_cleaner` so that Intel ME is disabled during early boot.
|
||||
|
||||
Inject vendor files into ROM
|
||||
------------------------------------
|
||||
|
||||
You must determine the correct board name, for your board, based on the list
|
||||
generated when running this command:
|
||||
|
||||
./mk -b coreboot list
|
||||
|
||||
In order to inject the necessary files into a rom image, run the script from the root of lbmk and point to the rom image.
|
||||
|
||||
If you only wish to flash a release rom then the process of injecting the necessary files is quite simple.
|
||||
Run the injection script pointing to the release archive you downloaded:
|
||||
|
||||
./vendor inject /path/to/libreboot-20230319-18-g9f76c92_t440pmrc_12mb.tar.xz
|
||||
|
||||
The script can automatically detect the board as long as you do not change the file name.
|
||||
You can then find flash-ready ROMs in `/bin/release/`
|
||||
|
||||
Alternatively, you may patch only a single rom file, but you must supply the
|
||||
correct board target name as alluded to above.
|
||||
For example:
|
||||
|
||||
./vendor inject -r x230_libreboot.rom -b x230_12mb
|
||||
|
||||
Optionally, you can use this script to modify the mac address of the rom with the `-m` flag.
|
||||
For example:
|
||||
|
||||
./vendor inject -r x230_libreboot.rom -b x230_12mb -m 00:f6:f0:40:71:fd
|
||||
|
||||
Check that the files were inserted
|
||||
==================================
|
||||
|
||||
You *must* ensure that the files were inserted.
|
||||
|
||||
Some examples of how to do that in lbmk:
|
||||
|
||||
./update trees -d coreboot TREENAME
|
||||
|
||||
Now you find `cbutitls/default`, which is a directory containing `cbfstool`
|
||||
and `ifdtool`. Do this on your ROM image (`libreboot.rom` in the example
|
||||
below):
|
||||
|
||||
./cbutils/default/cbfstool libreboot.rom print
|
||||
|
||||
You should check that the files were inserted in cbfs, if needed; for example,
|
||||
EC firmware or MRC firmware.
|
||||
|
||||
Next:
|
||||
|
||||
./cbutils/default/ifdtool -x libreboot.rom
|
||||
|
||||
This creates several `.bin` files, one of which says `me` in it (Intel ME).
|
||||
Run hexdump on it:
|
||||
|
||||
hexdump flashregion_2_intel_me.bin
|
||||
|
||||
Check the output. If it's all `0xFF` (all ones) or otherwise isn't a bunch
|
||||
of code, then the Intel ME firmware wasn't inserted.
|
||||
|
||||
You'll note the small size of the Intel ME, e.g. 84KB on sandybridge platforms.
|
||||
This is because lbmk *automatically* neuters it, disabling it during
|
||||
early boot. This is done using `me_cleaner`, which lbmk imports.
|
||||
|
||||
NOTE: the MAC changer makes use of `nvmutil`, which you can read more about in
|
||||
the [nvmutil documentation](nvmutil.md).
|
||||
|
||||
Errata
|
||||
======
|
||||
|
||||
NOTE: As of Libreboot releases from May 2024 onward, the Intel MRC is no longer
|
||||
included for Haswell; MRC is a blob for raminit, but we now provide libre
|
||||
raminit. The following targets no longer exist in the build system:
|
||||
|
||||
* `t440pmrc_12mb` (use `t440plibremrc_12mb` instead)
|
||||
* `t440pbmrc_12mb` (use `t440plibremrc_12mb` instead)
|
||||
* `w541mrc_12mb` (use `w541_12mb` instead)
|
||||
* `w541bmrc_12mb` (use `w541_12mb` instead)
|
||||
* `dell9020sff_12mb` (use `dell9020sff_nri_12mb` instead)
|
||||
* `dell9020sffbmrc` (use `dell9020sff_nri_12mb` instead)
|
||||
* `dell9020mt_12mb` (use `dell9020mt_nri_12mb` instead)
|
||||
* `dell9020mtbmrc` (use `dell9020mt_nri_12mb` instead)
|
||||
|
||||
This is written as errata because some users may still be using older release
|
||||
images but on the newer build system from May 2024 onward; you must use the
|
||||
Libreboot 20240225 release if you want to inject MRC and so on, for these older
|
||||
targets.
|
||||
|
||||
Libreboot's [binary blob reduction policy](../../news/policy.md) is very strict,
|
||||
and states: if a blob can be avoided, it must be avoided. Therefore, the MRC
|
||||
is removed on Haswell and Libreboot will only use the libre raminit (called
|
||||
NRI, short for Native Ram Initialisation).
|
||||
|
|
@ -1,13 +1,26 @@
|
|||
---
|
||||
title: Ivybridge internal flashing
|
||||
title: Install Libreboot internally on Lenovo ThinkPad X230
|
||||
x-toc-enable: true
|
||||
...
|
||||
|
||||
**[PLEASE READ THESE INSTRUCTIONS BEFORE INSTALLING](../../news/safety.md),
|
||||
OR YOU MIGHT BRICK YOUR MACHINE: [SAFETY PRECAUTIONS](../../news/safety.md)**
|
||||
Open source BIOS/UEFI firmware
|
||||
------------------------------
|
||||
|
||||
This document will teach you how to install Libreboot, on your
|
||||
Lenovo ThinkPad X230 laptop motherboard.
|
||||
Libreboot is a [Free Software](https://writefreesoftware.org/learn) project
|
||||
that replaces proprietary BIOS/UEFI firmware.
|
||||
|
||||
This document demonstrates an *internal flashing* method, by exploiting a
|
||||
little-known security vulnerability in Lenovo's original UEFI firmware.
|
||||
|
||||
**[PLEASE READ THESE INSTRUCTIONS BEFORE INSTALLING](ivy_has_common.md), OR
|
||||
YOU MAY BRICK YOUR MACHINE!! - Please click the link and follow the instructions
|
||||
there, before flashing. For posterity,
|
||||
[here is the link again](ivy_has_common.md).**
|
||||
|
||||
Ch1p's guide
|
||||
============
|
||||
------------
|
||||
|
||||
This page tells you how to flash an ivybridge ThinkPad with Libreboot,
|
||||
internally, when it has the Lenovo firmware on it. It was written independently
|
||||
|
|
@ -34,9 +47,6 @@ coreboot patch:
|
|||
Anyway, follow ch1p's guide or this one. Ch1p was on Libreboot IRC and linked
|
||||
the above guide, so it has been added here to honour him.
|
||||
|
||||
Introduction
|
||||
============
|
||||
|
||||
External flashing still recommended
|
||||
-----------------------------------
|
||||
|
||||
|
|
@ -56,7 +66,7 @@ or just a dead ThinkPad. Proceed at your own risk!
|
|||
If you prefer external flashing, see: [external flashing](x230_external.md)
|
||||
|
||||
Internal flashing from vendor firmware (ThinkPads only)
|
||||
----------------------------------------
|
||||
-------------------------------------------------------
|
||||
|
||||
IVYBRIDGE ONLY:
|
||||
|
||||
|
|
|
|||
|
|
@ -0,0 +1 @@
|
|||
Learn how to install Libreboot free/opensource BIOS/UEFI boot firmware on your Lenovo ThinkPad X230.
|
||||
|
|
@ -1,12 +1,17 @@
|
|||
---
|
||||
title: ASUS KCMA-D8 desktop/workstation board
|
||||
title: Install Libreboot on ASUS KCMA-D8
|
||||
x-toc-enable: true
|
||||
...
|
||||
|
||||
TODO: this page is OLD. check that the info is still valid.
|
||||
|
||||
Introduction
|
||||
============
|
||||
Open source BIOS/UEFI firmware
|
||||
------------------------------
|
||||
|
||||
This document will teach you how to install Libreboot, on your
|
||||
ASUS KCMA-D8 server/workstation motherboard.
|
||||
Libreboot is a [Free Software](https://writefreesoftware.org/learn) project
|
||||
that replaces proprietary BIOS/UEFI firmware.
|
||||
|
||||
Specifications available here:
|
||||
<https://www.asus.com/uk/Commercial-Servers-Workstations/KCMAD8/>
|
||||
|
|
@ -36,7 +41,7 @@ If you currently have the ASUS firmware, please ignore the above link and
|
|||
instead refer to the section below:
|
||||
|
||||
Flashing
|
||||
========
|
||||
--------
|
||||
|
||||
The default ASUS firmware write-protects the flash, so you have to remove the
|
||||
chip and re-flash it using external hardware.
|
||||
|
|
@ -56,7 +61,7 @@ Refer to the following guide:\
|
|||
[Externally rewrite 25xx NOR flash via SPI protocol](../install/spi.md)
|
||||
|
||||
PCI option ROMs
|
||||
===============
|
||||
---------------
|
||||
|
||||
Unlike Libreboot 20160907, Libreboot in newer releases now supports finding and
|
||||
loading PCI option ROMs automatically, both in GRUB and SeaBIOS on this machine.
|
||||
|
|
@ -66,21 +71,21 @@ So for example, if you wish to use an add-on graphics card, you can! It's no
|
|||
problem, and should work just fine.
|
||||
|
||||
CPU coolers
|
||||
===========
|
||||
-----------
|
||||
|
||||
With some creativity, standard AM3+ coolers will work fine.
|
||||
|
||||
2 x Socket C32 (LGA1207) available, so you can use 2 CPUs. (up to 32GiB per CPU)
|
||||
|
||||
CPU compatibility
|
||||
=================
|
||||
-----------------
|
||||
|
||||
- Opteron 4100 series: Incompatible
|
||||
- Opteron 4200 series: Compatible
|
||||
- Opteron 4300 series: Compatible
|
||||
|
||||
Board status (compatibility) {#boardstatus}
|
||||
============================
|
||||
-------------------------------------
|
||||
|
||||
There are two ways to identify a supported KCMA-D8 board:
|
||||
|
||||
|
|
@ -99,24 +104,24 @@ For more detailed information regarding the coreboot port, see
|
|||
<https://raptorengineeringinc.com/coreboot/kcma-d8-status.php>
|
||||
|
||||
Form factor {#formfactor}
|
||||
===========
|
||||
-----------------------
|
||||
|
||||
This board is ATX form factor. While the [ATX standard, version 2.2](https://web.archive.org/web/20120725150314/http://www.formfactors.org/developer/specs/atx2_2.pdf)
|
||||
specifies board dimensions 305mm x 244mm, this board measures 305mm x 253mm;
|
||||
please ensure that your case supports this extra ~cm in width.
|
||||
|
||||
IPMI iKVM module add-on {#ipmi}
|
||||
=======================
|
||||
----------------------------
|
||||
|
||||
Don't use it. It uses proprietary firmware and adds a backdoor (remote
|
||||
out-of-band management chip, similar to the [Intel Management
|
||||
Engine](../../faq.md#intelme). Fortunately, the firmware is
|
||||
unsigned (possible to replace) and physically separate from the
|
||||
mainboard since it's on the add-on module, which you don't have to
|
||||
motherboard since it's on the add-on module, which you don't have to
|
||||
install.
|
||||
|
||||
Flash chips {#flashchips}
|
||||
===========
|
||||
-----------------------
|
||||
|
||||
2MiB flash chips are included by default, on these boards. It's on a
|
||||
P-DIP 8 slot (SPI chip). The flash chip can be upgraded to higher sizes:
|
||||
|
|
@ -133,13 +138,13 @@ Ideally, you should not hot-swap. Only remove the IC when the system is
|
|||
powered down and disconnected from mains.
|
||||
|
||||
Native graphics initialization {#graphics}
|
||||
==============================
|
||||
-----------------------------------------
|
||||
|
||||
Only text-mode is known to work, but linux(kernel) can initialize the
|
||||
framebuffer display (if it has KMS - kernel mode setting).
|
||||
|
||||
NOTE: This section relates to the onboard ASpeed GPU. You *can* use an add-on
|
||||
PCI-E GPU in one of the available slots on the mainboard. Nvidia GTX 780 cards
|
||||
PCI-E GPU in one of the available slots on the motherboard. Nvidia GTX 780 cards
|
||||
are what libreboot recommends; it has excellent support in Nouveau (free Linux
|
||||
kernel / mesa driver for Nvidia cards) and generally works well; however, the
|
||||
performance won't be as high in Nouveau, compared to the non-free Nvidia driver
|
||||
|
|
@ -147,7 +152,7 @@ because the Nouveau driver can't increase the GPU clock (it doesn't know how,
|
|||
as of 18 March 2021).
|
||||
|
||||
Current issues {#issues}
|
||||
==============
|
||||
----------------------
|
||||
|
||||
- Opteron 4100 series CPUs are currently incompatible
|
||||
- LRDIMM memory modules are currently incompatible
|
||||
|
|
|
|||
|
|
@ -0,0 +1 @@
|
|||
Learn how to install Libreboot free/opensource BIOS/UEFI boot firmware on your ASUS KCMA-D8 motherboard.
|
||||
|
|
@ -1,5 +1,5 @@
|
|||
---
|
||||
title: ASUS KFSN4-DRE server/workstation board
|
||||
title: Install Libreboot on ASUS KFSN4-DRE
|
||||
x-toc-enable: true
|
||||
...
|
||||
|
||||
|
|
@ -12,7 +12,7 @@ x-toc-enable: true
|
|||
|----------------------------|------------------------------------------------|
|
||||
| **Manufacturer** | ASUS |
|
||||
| **Name** | KFSN4-DRE |
|
||||
| **Released** | ? |
|
||||
| **Released** | 2007 |
|
||||
| **Chipset** | nVIDIA nForce Professional 2200 |
|
||||
| **CPU** | AMD Opteron 2000 series (Barcelona Family) |
|
||||
| **Graphics** | XGI Z9s VGA Controller |
|
||||
|
|
@ -24,12 +24,12 @@ x-toc-enable: true
|
|||
| **Flash chip** | PLCC 1MiB (Upgradable to 2MiB) |
|
||||
|
||||
```
|
||||
W+: Works without blobs;
|
||||
W+: Works without vendor firmware;
|
||||
N: Doesn't work;
|
||||
W*: Works with blobs;
|
||||
W*: Works with vendor firmware;
|
||||
U: Untested;
|
||||
P+: Partially works;
|
||||
P*: Partially works with blobs
|
||||
P*: Partially works with vendor firmware
|
||||
```
|
||||
|
||||
| ***Features*** | |
|
||||
|
|
@ -48,24 +48,34 @@ P*: Partially works with blobs
|
|||
| **SeaBIOS with GRUB** | Partially works |
|
||||
</div>
|
||||
|
||||
Open source BIOS/UEFI firmware
|
||||
------------------------------
|
||||
|
||||
This document will teach you how to install Libreboot, on your
|
||||
ASUS KFSN4-DRE server/workstation motherboard.
|
||||
Libreboot is a [Free Software](https://writefreesoftware.org/learn) project
|
||||
that replaces proprietary BIOS/UEFI firmware.
|
||||
|
||||
This is a server board using AMD hardware (Fam10h). It can also be used
|
||||
for building a high-powered workstation. Powered by libreboot.
|
||||
|
||||
Flashing instructions can be found at
|
||||
[../install/\#flashprog](../install/)
|
||||
|
||||
NOTE: Libreboot standardises on [flashprog](https://flashprog.org/wiki/Flashprog)
|
||||
**NOTE: Libreboot standardises on [flashprog](https://flashprog.org/wiki/Flashprog)
|
||||
now, as of 27 January 2024, which is a fork of flashrom.
|
||||
The reason why was explained, in
|
||||
the [Libreboot 20240225 release](../../news/libreboot20240225.md#flashprog-now-used-instead-of-flashrom)**
|
||||
|
||||
Form factor {#formfactor}
|
||||
===========
|
||||
---------------------
|
||||
|
||||
These boards use the SSI EEB 3.61 form factor; make sure that your case
|
||||
supports this. This form factor is similar to E-ATX in that the size is
|
||||
identical, but the position of the screws are different.
|
||||
|
||||
Flash chips {#flashchips}
|
||||
===========
|
||||
-----------------------
|
||||
|
||||
These boards use LPC flash (not SPI), in a PLCC socket. The default
|
||||
flash size 1MiB (8Mbits), and can be upgraded to 2MiB (16Mbits).
|
||||
|
|
@ -78,18 +88,18 @@ extractor. These can be found online. See
|
|||
<http://www.coreboot.org/Developer_Manual/Tools#Chip_removal_tools>*
|
||||
|
||||
Native graphics initialization {#graphics}
|
||||
==============================
|
||||
---------------------------------------
|
||||
|
||||
Native graphics initialization exists (XGI Z9s) for this board.
|
||||
Framebuffer- and text-mode both work. A serial port is also available.
|
||||
|
||||
Memory
|
||||
======
|
||||
-------
|
||||
|
||||
DDR2 533/667 Registered ECC. 16 slots. Total capacity up to 64GiB.
|
||||
|
||||
Hex-core CPUs {#hexcore}
|
||||
=============
|
||||
---------------------
|
||||
|
||||
PCB revision 1.05G is the latest version of this board and the best one
|
||||
(the revision number is be printed on the board), if you want to use
|
||||
|
|
@ -103,7 +113,8 @@ To be sure your board supports a CPU check the official ASUS website here:
|
|||
If you are running a Hex-Core CPU on any board version, please contact us.
|
||||
|
||||
Board configurations {#configurations}
|
||||
==============
|
||||
----------------------------------------
|
||||
|
||||
There are 7 different configurations of this board: "standard", 2S, iKVM,
|
||||
iKVM/IST, SAS, SAS/iKVM and SAS/iKVM/IST.
|
||||
|
||||
|
|
@ -122,7 +133,7 @@ The IST versions with PCB revision 1.05G are the ones who are believed to
|
|||
support the six core Opteron Istanbul processors (2400 and 8400 series).
|
||||
|
||||
Current issues {#issues}
|
||||
==============
|
||||
-----------------------
|
||||
|
||||
- There seems to be a 30 second bootblock delay (observed by
|
||||
tpearson); the system otherwise boots and works as expected. See
|
||||
|
|
@ -149,7 +160,7 @@ Current issues {#issues}
|
|||
the USB booting doesn't work.
|
||||
|
||||
Other information
|
||||
=================
|
||||
------------------
|
||||
|
||||
[specifications](https://web.archive.org/web/20181212180051/http://ftp.tekwind.co.jp/pub/asustw/mb/Socket%20F/KFSN4-DRE/Manual/e3335_kfsn4-dre.pdf)
|
||||
|
||||
|
|
|
|||
|
|
@ -0,0 +1 @@
|
|||
Learn how to install Libreboot free/opensource BIOS/UEFI boot firmware on your ASUS KFSN4-DRE motherboard.
|
||||
|
|
@ -3,10 +3,18 @@ title: ASUS KGPE-D16 server/workstation board
|
|||
x-toc-enable: true
|
||||
...
|
||||
|
||||
Open source BIOS/UEFI firmware
|
||||
------------------------------
|
||||
|
||||
This document will teach you how to install Libreboot, on your
|
||||
ASUS KGPE-D16 server/workstation motherboard.
|
||||
Libreboot is a [Free Software](https://writefreesoftware.org/learn) project
|
||||
that replaces proprietary BIOS/UEFI firmware.
|
||||
|
||||
TODO: OLD page. TODO: check that all the info is still valid.
|
||||
|
||||
Introduction
|
||||
============
|
||||
Free your BIOS today!
|
||||
---------------------
|
||||
|
||||
This is a server board using AMD hardware (Fam10h *and Fam15h* CPUs
|
||||
available). It can also be used for building a high-powered workstation.
|
||||
|
|
@ -26,34 +34,34 @@ possible to re-flash using software running in Linux on the
|
|||
KGPE-D16, without using external hardware.
|
||||
|
||||
CPU compatibility
|
||||
=================
|
||||
-----------------
|
||||
|
||||
Opteron 62xx and 63xx CPUs work just fine.
|
||||
|
||||
Board status (compatibility) {#boardstatus}
|
||||
============================
|
||||
---------------------
|
||||
|
||||
See <https://raptorengineeringinc.com/coreboot/kgpe-d16-status.php>.
|
||||
|
||||
Form factor {#formfactor}
|
||||
===========
|
||||
----------------------
|
||||
|
||||
These boards use the SSI EEB 3.61 form factor; make sure that your case
|
||||
supports this. This form factor is similar to E-ATX in that the size is
|
||||
identical, but the position of the screws are different.
|
||||
|
||||
IPMI iKVM module add-on {#ipmi}
|
||||
=======================
|
||||
--------------------------
|
||||
|
||||
Don't use it. It uses proprietary firmware and adds a backdoor (remote
|
||||
out-of-band management chip, similar to the [Intel Management
|
||||
Engine](../../faq.md#intelme). Fortunately, the firmware is
|
||||
unsigned (possibly to replace) and physically separate from the
|
||||
mainboard since it's on the add-on module, which you don't have to
|
||||
motherboard since it's on the add-on module, which you don't have to
|
||||
install.
|
||||
|
||||
Flash chips {#flashchips}
|
||||
===========
|
||||
--------------------------
|
||||
|
||||
2MiB flash chips are included by default, on these boards. It's on a
|
||||
P-DIP 8 slot (SPI chip). The flash chip can be upgraded to higher sizes:
|
||||
|
|
@ -72,13 +80,13 @@ This guide shows how to flash the chip:\
|
|||
[25xx NOR flashing guide](../install/spi.md)
|
||||
|
||||
Native graphics initialization {#graphics}
|
||||
==============================
|
||||
----------------------------------
|
||||
|
||||
Only text-mode is known to work, but linux(kernel) can initialize the
|
||||
framebuffer display (if it has KMS - kernel mode setting).
|
||||
|
||||
Current issues {#issues}
|
||||
==============
|
||||
----------------------------------
|
||||
|
||||
- LRDIMM memory modules are currently incompatible
|
||||
(IT MAY WORK NOWADAYS, TODO TEST)
|
||||
|
|
|
|||
|
|
@ -0,0 +1 @@
|
|||
Learn how to install Libreboot free/opensource BIOS/UEFI boot firmware on your ASUS KGPE-D16 motherboard.
|
||||
|
|
@ -1,19 +1,33 @@
|
|||
---
|
||||
title: Flashing Libreboot on Dell Latitude laptops
|
||||
title: Install Libreboot on Dell Latitude laptops
|
||||
x-toc-enable: true
|
||||
...
|
||||
|
||||
Open source BIOS/UEFI firmware
|
||||
------------------------------
|
||||
|
||||
This document will teach you how to install Libreboot, on various models of
|
||||
Dell Latitude laptop motherboard, namely Dell Latitude E4300, E6400, E6400 XFR,
|
||||
E6400 ATG, E5420, E5520, E5530, E6420, E6430, E6520, E6530, E6230, E6330
|
||||
and E6220; you must only install Libreboot on models with *Intel graphics*.
|
||||
Libreboot is a [Free Software](https://writefreesoftware.org/learn) project
|
||||
that replaces proprietary BIOS/UEFI firmware.
|
||||
|
||||
In case any models are unlisted in the above paragraph, you should also check
|
||||
the full list of supported Dell Latitude models on the [Libreboot hardware
|
||||
compatibility](./#which-systems-are-supported-by-libreboot) page.
|
||||
|
||||
All of the Dell Latitude models can be flashed internally, which means that
|
||||
you do not need to disassemble them. You can do it from Linux/BSD, using the
|
||||
instructions on this page.
|
||||
|
||||
Disable security before flashing
|
||||
================================
|
||||
--------------------------------
|
||||
|
||||
**[SAFETY WARNING: Always insert vendor files before flashing.](../../news/safety.md),
|
||||
or look directly at [Injecting Vendor Files](ivy_has_common.md). If you flash
|
||||
Libreboot without inserting vendor files, you will brick the machine; if you
|
||||
do, please follow the external flashing instructions linked below.**
|
||||
**[PLEASE READ THESE INSTRUCTIONS BEFORE INSTALLING](ivy_has_common.md), OR
|
||||
YOU MAY BRICK YOUR MACHINE!! - Please click the link and follow the instructions
|
||||
there, before flashing. For posterity,
|
||||
[here is the link again](ivy_has_common.md).**
|
||||
|
||||
Please also [disable /dev/mem protection](devmem.md), otherwise flashprog
|
||||
and dell-flash-unlock won't work. You can re-enable the protections after
|
||||
|
|
@ -24,13 +38,13 @@ Note that Libreboot does not currently implement UEFI on x86 platforms, but
|
|||
you can set up [Secure libreBoot](../linux/grub_hardening.md) after flashing.
|
||||
|
||||
MAC address
|
||||
===========
|
||||
-----------
|
||||
|
||||
Make sure to set your own MAC address in the ROM image before flashing.
|
||||
Please read the [nvmutil manual](nvmutil.md) which says how to do this.
|
||||
|
||||
Thermal safety
|
||||
==============
|
||||
--------------
|
||||
|
||||
**Thermal safety**: this machine shuts down very quickly, when the machine
|
||||
exceeds 80c CPU temperature, which is far more conservative than on most
|
||||
|
|
@ -39,18 +53,16 @@ excellent. More info available [here](../install/dell_thermal.md). This is a
|
|||
known bug, but otherwise the machine will be mostly stable.
|
||||
|
||||
Machine-specific notes
|
||||
======================
|
||||
----------------------
|
||||
|
||||
Latitude E6400
|
||||
--------------
|
||||
### Latitude E6400
|
||||
|
||||
Vendor files not required for Dell Latitude E6400 if you have the Intel GPU.
|
||||
|
||||
If you have the Nvidia model, please use the `e6400nvidia_4mb` target, and
|
||||
make sure to run the inject script.
|
||||
make sure to run the [inject script](ivy_has_common.md) prior to flashing.
|
||||
|
||||
E6400 nvidia issues
|
||||
-------------------
|
||||
### E6400 nvidia issues
|
||||
|
||||
See: <https://codeberg.org/libreboot/lbmk/issues/14#issuecomment-907758>
|
||||
|
||||
|
|
@ -59,8 +71,7 @@ The `nv` drivers on BSD systems generally work, but can have severe performance
|
|||
issues; use of a tiling window manager is recommended, on BSD systems, because
|
||||
moving windows around can literally lag a lot otherwise, on most window managers.
|
||||
|
||||
dGPU variants
|
||||
-------------
|
||||
### dGPU variants
|
||||
|
||||
On everything except E6400, Libreboot only supports the variant with an Intel
|
||||
GPU. Therefore, you must *only* purchase a Dell Latitude that has the Intel
|
||||
|
|
@ -68,7 +79,7 @@ graphics; even on E6400, this is good advice, due to issues with the Nvidia
|
|||
GPU on E6400, documented later in this guide.
|
||||
|
||||
Internal flashing
|
||||
=================
|
||||
-----------------
|
||||
|
||||
You can simply boot Linux/BSD, on the Dell Latitude you wish to flash, and
|
||||
run `flashprog` from there, for Libreboot installation. Certain other steps
|
||||
|
|
@ -130,12 +141,11 @@ successful. If you don't see that, or you're unsure, please [contact the
|
|||
Libreboot project via IRC](../../contact.md).
|
||||
|
||||
External flashing
|
||||
=================
|
||||
-----------------
|
||||
|
||||
General guidance
|
||||
----------------
|
||||
### General guidance
|
||||
|
||||
Machine-specific disassembly instructions not provided, but you can find
|
||||
Machine-specific disassembly instructions are not provided, but you can find
|
||||
the hardware maintenance manual for your Latitude module online. Just search
|
||||
for it. The flash chips(s) is/are usually under the keyboard/palmrest. Near
|
||||
to the PCH/southbridge.
|
||||
|
|
@ -153,10 +163,9 @@ Please read the [external SPI flash guide](spi.md)
|
|||
|
||||
External flashing is usually not required, on these machines.
|
||||
|
||||
Chip size guidance
|
||||
------------------
|
||||
### Chip size guidance
|
||||
|
||||
SOme Dell Latitudes use a single flash chip, so you can
|
||||
Some Dell Latitudes use a single flash chip, so you can
|
||||
just use the ROM images as-is.
|
||||
|
||||
If there are two flash chips, you must split the ROM images. Check the silk
|
||||
|
|
|
|||
|
|
@ -0,0 +1 @@
|
|||
Learn how to install Libreboot free/opensource BIOS/UEFI boot firmware on various Dell Latitude laptop models.
|
||||
|
|
@ -4,7 +4,7 @@ x-toc-enable: true
|
|||
...
|
||||
|
||||
Introduction (GM45+e1000)
|
||||
=========================
|
||||
-------------------------
|
||||
|
||||
This section is applicable to all libreboot-supported laptops with the
|
||||
mobile 4 series chipset (as shown in `$ lspci`)
|
||||
|
|
@ -17,15 +17,11 @@ for the built-in gigabit ethernet controller is stored inside the flash chip,
|
|||
along with libreboot and other configuration data. Therefore, installing
|
||||
libreboot will overwrite it.
|
||||
|
||||
Thus, for these laptops, prebuilt libreboot already contains a generic
|
||||
MAC address in the configuration section. This address is `00:f5:f0:40:71:fe
|
||||
in builds before 2018-01-16 and `00:4c:69:62:72:65` (see the ascii character
|
||||
set) afterwards.
|
||||
Thus, for these laptops, prebuilt libreboot images already contain a generic
|
||||
MAC address in the GbE region.
|
||||
Unless you change it, your computer will boot and use it. This can lead
|
||||
to network problems if you have more than one libreboot computer on
|
||||
the same layer2 network (e.g. on the same network switch). The switch
|
||||
(postman) will simply not know who to deliver to as the MAC (house) addresses
|
||||
will be the same.
|
||||
the same layer2 network (e.g. on the same network switch).
|
||||
|
||||
To prevent these address clashes, you can either modify prebuilt libreboot
|
||||
to use an address of your own choosing or you can change the address in your
|
||||
|
|
@ -35,7 +31,7 @@ In either case, it is a good idea to write down the address that your
|
|||
computer originally had.
|
||||
|
||||
Obtaining the existing MAC address
|
||||
==================================
|
||||
----------------------------------
|
||||
|
||||
The existing MAC address may be obtained by the following methods:
|
||||
|
||||
|
|
@ -65,7 +61,7 @@ The existing MAC address may be obtained by the following methods:
|
|||
updated.
|
||||
|
||||
Changing the MAC address in the operating system
|
||||
================================================
|
||||
------------------------------------------------
|
||||
|
||||
There are three portable ways of doing so:
|
||||
|
||||
|
|
@ -90,19 +86,8 @@ init scripts or you can use your operating system's own networking
|
|||
configuration. Refer to your operating system's documentation for
|
||||
how to do this.
|
||||
|
||||
Changing the MAC address on X200/T400/T500/W500
|
||||
===============================================
|
||||
|
||||
On GM45 laptops with ICH9M southbridge and Intel PHY module, the MAC address
|
||||
is hardcoded in boot flash, which means it can be changed if you re-flash.
|
||||
|
||||
See [ich9utils documentation](../install/ich9utils.md)
|
||||
|
||||
If *all* you want to do is change the MAC address, you might try `nvmutil`
|
||||
instead. See notes below:
|
||||
|
||||
Changing the MAC address on ivybridge/sandybridge/haswell (e.g. X230/T440p)
|
||||
=========================================================
|
||||
Changing the MAC address (e.g. X230/T440p)
|
||||
-----------------------------------------------------------------
|
||||
|
||||
See [nvmutil documentation](../install/nvmutil.md)
|
||||
|
||||
|
|
@ -111,15 +96,6 @@ Sandybridge, Ivybridge and Haswell platforms, but it can be used on any
|
|||
platform with a valid GbE region in flash, where an Intel Flash Descriptor
|
||||
is used; this includes older GM45+ICH9M machines supported by Libreboot.
|
||||
|
||||
The `ich9utils` program is more useful in an lbmk context, because it
|
||||
generates an entire Intel Flash Descriptor and GbE region from scratch;
|
||||
coreboot has a similar method in its build system, using its own utility
|
||||
called bincfg, but this tool is unused in lbmk.
|
||||
|
||||
No tool like ich9utils exists for these boards yet, but lbmk includes the IFD
|
||||
and GbE files in-tree (Intel ME is handled by extracting from Lenovo updates,
|
||||
which the build system automatically fetches from the internet).
|
||||
|
||||
You can use `nvmutil` to change the existing MAC address in a GbE region. This
|
||||
sets the "hardcoded" MAC address, typically a globally assigned one set by
|
||||
the vendor.
|
||||
the vendor, but you can use local addresses, and you can use randomised MACs.
|
||||
|
|
|
|||
|
|
@ -0,0 +1 @@
|
|||
Libreboot lets you modify the MAC address on various supported motherboards. This guide will teach you how to change your MAC address, by various means.
|
||||
|
|
@ -1,5 +1,5 @@
|
|||
---
|
||||
title: MacBook2,1 and MacBook1,1
|
||||
title: Install Libreboot on MacBook2,1 and MacBook1,1
|
||||
x-toc-enable: true
|
||||
...
|
||||
|
||||
|
|
@ -20,19 +20,19 @@ x-toc-enable: true
|
|||
| **Graphics** | Intel GMA 950 |
|
||||
| **Display** | 1280x800 TFT |
|
||||
| **Memory** | 512MB, 1GB (upgradable to 4GB with 3GB usable) |
|
||||
| **Architecture** | x86_64 |
|
||||
| **Architecture** | x86\_64 |
|
||||
| **EC** | Proprietary |
|
||||
| **Original boot firmware** | Apple EFI |
|
||||
| **Intel ME/AMD PSP** | Not present. |
|
||||
| **Flash chip** | SOIC-8 2MiB (Upgradable to 16MiB) |
|
||||
|
||||
```
|
||||
W+: Works without blobs;
|
||||
W+: Works without vendor firmware;
|
||||
N: Doesn't work;
|
||||
W*: Works with blobs;
|
||||
W*: Works with vendor firmware;
|
||||
U: Untested;
|
||||
P+: Partially works;
|
||||
P*: Partially works with blobs
|
||||
P*: Partially works with vendor firmware
|
||||
```
|
||||
|
||||
| ***Features*** | |
|
||||
|
|
@ -50,6 +50,15 @@ P*: Partially works with blobs
|
|||
| **SeaBIOS** | Works |
|
||||
| **SeaBIOS with GRUB** | Works |
|
||||
</div>
|
||||
|
||||
Open source BIOS/UEFI firmware
|
||||
-------------------------
|
||||
|
||||
This document will teach you how to install Libreboot, on your
|
||||
Apple MacBook 2,1 2005-2007 laptop motherboard.
|
||||
Libreboot is a [Free Software](https://writefreesoftware.org/learn) project
|
||||
that replaces proprietary BIOS/UEFI firmware.
|
||||
|
||||
The MacBook1,1 and MacBook2,1 are very similar to the
|
||||
ThinkPad X60. It shares some hardware with the X60 such as the chipset.
|
||||
|
||||
|
|
@ -63,15 +72,14 @@ uses Core Duo processors (supports 32-bit OS but not 64-bit), and it is
|
|||
believed that this is the only difference.
|
||||
|
||||
Compatibility
|
||||
=============
|
||||
-------------
|
||||
|
||||
The following pages list many models of MacBook1,1 and MacBook2,1:
|
||||
|
||||
* <http://www.everymac.com/ultimate-mac-lookup/?search_keywords=MacBook1,1>
|
||||
* <http://www.everymac.com/ultimate-mac-lookup/?search_keywords=MacBook2,1>
|
||||
|
||||
Models
|
||||
------
|
||||
### Models
|
||||
|
||||
Specifically (Order No. / Model No. / CPU) for the MacBook1,1:
|
||||
|
||||
|
|
@ -99,20 +107,22 @@ then don't forget to [send a patch](../../git.md), confirming that it
|
|||
actually works!
|
||||
|
||||
Internal flashing
|
||||
=================
|
||||
-----------------
|
||||
|
||||
MacBook2,1 can always be flashed internally, even if running Apple firmware:
|
||||
|
||||
sudo flashprog -p internal:laptop=force_I_want_a_brick,boardmismatch=force -w your.rom
|
||||
|
||||
NOTE: Libreboot standardises on [flashprog](https://flashprog.org/wiki/Flashprog)
|
||||
**NOTE: Libreboot standardises on [flashprog](https://flashprog.org/wiki/Flashprog)
|
||||
now, as of 27 January 2024, which is a fork of flashrom.
|
||||
The reason why was explained, in
|
||||
the [Libreboot 20240225 release](../../news/libreboot20240225.md#flashprog-now-used-instead-of-flashrom)**
|
||||
|
||||
The MacBook1,1 can't be flashed internally if running the Apple EFI firmware.
|
||||
You must flash externally.
|
||||
|
||||
External flashing
|
||||
=================
|
||||
-----------------
|
||||
|
||||
MacBook1,1 requires external flashing, if running the default Apple firmware.
|
||||
MacBook2,1 can be flashed internally, regardless.
|
||||
|
|
@ -132,7 +142,7 @@ Refer to the following guide:\
|
|||
[Externally rewrite 25xx NOR flash via SPI protocol](../install/spi.md)
|
||||
|
||||
OSes using Linux on Apple EFI firmware
|
||||
======================================
|
||||
--------------------------------------
|
||||
|
||||
You have 2 choices for booting up OSes using Linux as their kernel
|
||||
on the MacBook:
|
||||
|
|
@ -141,8 +151,7 @@ on the MacBook:
|
|||
|
||||
* Boot via a CD or DVD.
|
||||
|
||||
Boot via a CD or DVD
|
||||
--------------------
|
||||
### Boot via a CD or DVD
|
||||
|
||||
The Apple EFI firmware contains a PC BIOS emulation layer for booting
|
||||
Microsoft Windows on CDs and DVDs. That emulation layer **only** works
|
||||
|
|
@ -172,8 +181,7 @@ should boot up properly automatically.
|
|||
to it using GRUB, despite the fact that it does sometimes show up. You
|
||||
also won't be able to boot it up when using Libreboot.*
|
||||
|
||||
Boot via USB
|
||||
------------
|
||||
### Boot via USB
|
||||
|
||||
This method is harder than booting from a CD/DVD and may soft-brick your
|
||||
MacBook but it's the only way to boot up successfully from a USB.
|
||||
|
|
@ -211,14 +219,14 @@ the CMOS/PRAM battery, wait a few minutes, and put it back in.
|
|||
to reconfigure GRUB2 correctly, else your system won't boot.*
|
||||
|
||||
Coreboot wiki page
|
||||
==================
|
||||
------------------
|
||||
|
||||
The following page has some information:
|
||||
|
||||
* <https://www.coreboot.org/Board:apple/macbook21>
|
||||
|
||||
Issues and solutions/workarounds
|
||||
================================
|
||||
--------------------------------
|
||||
|
||||
There is one mouse button only, however multiple finger tapping
|
||||
works. The Apple logo on the
|
||||
|
|
@ -229,8 +237,7 @@ should [cover it up](http://cweiske.de/tagebuch/tuxbook.htm).
|
|||
software. Webcams are a privacy and security risk; cover it up! Or
|
||||
remove it.*
|
||||
|
||||
Make it overheat less
|
||||
---------------------
|
||||
### Make it overheat less
|
||||
|
||||
NOTE: on newer libreboot revisions, this section is less relevant, because C3
|
||||
states are supported now. However, this section may still be useful, so it will
|
||||
|
|
@ -270,8 +277,7 @@ PLATFORM_PROFILE_ON_BAT=low-power
|
|||
|
||||
The MacBook will still overheat, just less.
|
||||
|
||||
Enable AltGr
|
||||
------------
|
||||
### Enable AltGr
|
||||
|
||||
The keyboard has a keypad enter instead of an AltGr. The first key on
|
||||
the right side of the spacebar is the Apple "command" key. On its
|
||||
|
|
@ -295,12 +301,11 @@ line:
|
|||
|
||||
to the file /etc/vconsole.conf and then restart the computer.
|
||||
|
||||
Make touchpad more responsive
|
||||
-----------------------------
|
||||
### Make touchpad more responsive
|
||||
|
||||
Linux kernels of version 3.15 or lower might make the touchpad
|
||||
extremely sluggish. A user reported that they could get better
|
||||
response from the touchpad with the following in their xorg.conf:
|
||||
response from the touchpad with the following in their `xorg.conf`:
|
||||
|
||||
```
|
||||
Section "InputClass"
|
||||
|
|
|
|||
|
|
@ -0,0 +1 @@
|
|||
Learn how to install Libreboot free/opensource BIOS/UEFI boot firmware on your Apple MacBook 2,1 and 1,1 circa 2006.
|
||||
|
|
@ -1,10 +1,11 @@
|
|||
---
|
||||
title: nvmutil manual
|
||||
title: nvmutil usage instructions
|
||||
x-toc-enable: true
|
||||
...
|
||||
|
||||
With this software, you can change the MAC address inside GbE regions
|
||||
on any system that uses an Intel Flash Descriptor.
|
||||
on any system that uses an Intel Flash Descriptor. This software works well
|
||||
on most/all of the major Linux or BSD operating systems.
|
||||
|
||||
This is the reference documentation for `nvmutil`, but an automated script
|
||||
using nvmutil is available for ivy/sandybridge and haswell hardware, when
|
||||
|
|
@ -15,38 +16,67 @@ inserting vendor files, which you can use to change the MAC address. See:
|
|||
You can use the documentation below, if you wish to use `nvmutil` manually.
|
||||
Continue reading...
|
||||
|
||||
Introduction
|
||||
============
|
||||
Change the Intel GbE MAC address
|
||||
--------------------------------
|
||||
|
||||
This is the manual for `nvmutil`, included in the Libreboot,
|
||||
build system (lbmk) under `util/nvmutil/`. This program lets you modify
|
||||
the MAC address, correct/verify/invalidate checksums,
|
||||
swap/copy and dump regions on Intel PHY NVM images,
|
||||
which are small binary configuration files that go
|
||||
in flash, for Gigabit (ethernet) Intel NICs.
|
||||
This is the manual for `nvmutil`, included within the [Libreboot build
|
||||
system](../maintain/) (lbmk) under `util/nvmutil/`. This program lets you modify
|
||||
the MAC address, correct/verify/invalidate checksums, swap/copy and dump regions
|
||||
on Intel PHY NVM images, which are small binary configuration files that go in
|
||||
flash, for Gigabit (ethernet) Intel NICs.
|
||||
|
||||
This software is largely targeted at coreboot users,
|
||||
but it can be used on most modern Intel systems, or
|
||||
most systems from about 2008/2009 onwards.
|
||||
**Please [install build dependencies](../build/) before you do this.**
|
||||
|
||||
NOTE: Libreboot X200/X200T/X200S/T400/T400S/T500/W500/R400
|
||||
users should know that this software does *not*
|
||||
replace `ich9gen`, because that program generates entire
|
||||
ICH9M IFD+GbE regions, in addition to letting you set the
|
||||
MAC address. *This* program, `nvmutil`, can *also* set
|
||||
the MAC address on those machines, but it operates on a
|
||||
single GbE dump that is already created.
|
||||
This software is largely targeted at coreboot users, but it can be used on most
|
||||
modern Intel systems, or most systems from about 2008/2009 onwards, regardless
|
||||
of which boot firmware they have.
|
||||
|
||||
This program is operated on dumps of the GbE NVM image,
|
||||
which normally goes in the boot flash (alongside BIOS/UEFI
|
||||
or coreboot, IFD and other regions in the flash). The first
|
||||
half of this README is dedicated to precisely this, telling
|
||||
you how to dump or otherwise acquire that file; the second
|
||||
half of this README then tells you how to operate on it,
|
||||
using `nvmutil`.
|
||||
This program is operated on dumps of the GbE NVM image, which normally goes in
|
||||
the boot flash (alongside BIOS/UEFI or coreboot, IFD and other regions in
|
||||
the flash). The first half of this README is dedicated to precisely this,
|
||||
telling you how to dump or otherwise acquire that file; the second half of this
|
||||
README then tells you how to operate on it, using `nvmutil`.
|
||||
|
||||
Automatic MAC address changer
|
||||
-----------------------------
|
||||
|
||||
**Please [install build dependencies](../build/) before you do this.**
|
||||
|
||||
Instead of running nvmutil manually, like below, you can
|
||||
also use the inject command, like so (examples):
|
||||
|
||||
./mk inject libreboot-RELEASE_targetname.tar.xz
|
||||
./mk inject libreboot-RELEASE_targetname.tar.xz setmac
|
||||
./mk inject libreboot-RELEASE_targetname.tar.xz setmac 00:1f:16:00:11:22
|
||||
./mk inject libreboot-RELEASE_targetname.tar.xz setmac 00:??:16:0?:1?:22
|
||||
./mk inject libreboot-RELEASE_targetname.tar.xz setmac restore
|
||||
|
||||
This writes the MAC address on the GbE region of the image. You must do this
|
||||
on the tarball, from the ROM image release archives, and then extract the
|
||||
archive.
|
||||
|
||||
These same commands also [download/insert certain vendor files](ivy_has_common.md)
|
||||
if needed, on the given board.
|
||||
|
||||
Without argument after the tarball, it behaves the same as `setmac`. If `setmac`
|
||||
is provided without argument, or no argument is given, the MAC address is
|
||||
randomised. Otherwise, you can specify an arbitrary address.
|
||||
|
||||
The `?` character is random, and you can specify that any of them be random,
|
||||
while setting others (or all of them) arbitrarily. On the corresponding nibble,
|
||||
the bit for unicast/multicast and global/local are set accordingly, so that
|
||||
randomly generated addresses are *always* unicast and *local*, unless the
|
||||
corresponding nibble is set arbitrarily; if the latter, then an error is thrown
|
||||
if the arbitrary nibble corresponds to a multicast MAC address (and when errors
|
||||
are thrown, the file shall remain unchanged). More information about error
|
||||
handling is provided, later in this document.
|
||||
|
||||
The `restore` option restores the original one. The command works by using a
|
||||
reference GbE image file present in Libreboot's build system, for the given
|
||||
motherboard.
|
||||
|
||||
How to download newer versions
|
||||
==============================
|
||||
------------------------------
|
||||
|
||||
Simply pull down the latest changes in `lbmk.git`. The `nvmutil`
|
||||
software is now part of lbmk, since 17 November 2022.
|
||||
|
|
@ -56,7 +86,7 @@ More info about git:
|
|||
* <https://git-scm.com/>
|
||||
|
||||
Context
|
||||
=======
|
||||
-------
|
||||
|
||||
On many Intel systems with an IFD (Intel Flash Descriptor), the
|
||||
Intel PHY (Gigabit Ethernet) stores its configuration, binary
|
||||
|
|
@ -82,13 +112,25 @@ fact work nicely, but software such as Linux will check
|
|||
that this is correct. If the checksum is invalid, your
|
||||
kernel will refuse to make use of the NIC.
|
||||
|
||||
This NVM section is the first 128 bytes of a 4KB region in flash.
|
||||
This 4KB region is then repeated, to make an 8KB region in
|
||||
This NVM section is the first 128 bytes of a *block size* KB region in flash.
|
||||
This *block size* KB region is then repeated, to make an *block size multipled
|
||||
by two* KB region in
|
||||
flash, known as the *GbE region*. In `nvmutil`, the first part
|
||||
is referred to as *part 0* and the second part as *part 1*.
|
||||
|
||||
Known compatible PHYs
|
||||
---------------------
|
||||
The block size can be 4KB, 8KB or 64KB, meaning that GbE files can
|
||||
be 8KB, 16KB or 128KB; the first half is part 0 and the second half is part 1.
|
||||
The first 4KB of each part is what we are concerned with; and in each 4KB part
|
||||
is the 128-byte NVM area at the very start, containing our configuration.
|
||||
|
||||
**NOTE: Support for 16KB and 128KB files was only added *after* the
|
||||
Libreboot 20241206 release. It will be available in all releases after that,
|
||||
or you can simply compile nvmutil from the Libreboot Git repository lbmk,
|
||||
from directory `util/nvmutil/` - on the older releases, and older versions of
|
||||
nvmutil, only 8KB GbE files are supported, but we mostly only use 8KB files
|
||||
anyway (you're very unlikely to encounter 16KB or 128KB files).**
|
||||
|
||||
### Known compatible PHYs
|
||||
|
||||
TODO: write a full list her ofe what actual PHYs are known to work.
|
||||
|
||||
|
|
@ -101,7 +143,7 @@ files; it is assumed that intel would later change the
|
|||
file size and/or checksum value and/or checksum location.
|
||||
|
||||
How to obtain the GbE file
|
||||
==========================
|
||||
--------------------------
|
||||
|
||||
The chip containing your BIOS/UEFI firmware (or coreboot) has
|
||||
it, if you have an Intel PHY for gigabit ethernet.
|
||||
|
|
@ -111,11 +153,12 @@ containing your NIC's configuration. This is the part that
|
|||
many people will struggle with, so we will dedicated an
|
||||
entire next section to it:
|
||||
|
||||
Use flashprog
|
||||
------------
|
||||
### Use flashprog
|
||||
|
||||
NOTE: Libreboot standardises on [flashprog](https://flashprog.org/wiki/Flashprog)
|
||||
**NOTE: Libreboot standardises on [flashprog](https://flashprog.org/wiki/Flashprog)
|
||||
now, as of 27 January 2024, which is a fork of flashrom.
|
||||
The reason why was explained, in
|
||||
the [Libreboot 20240225 release](../../news/libreboot20240225.md#flashprog-now-used-instead-of-flashrom)**
|
||||
|
||||
If you wish to operate on the GbE section that's already
|
||||
flashed, you should *dump* the current full ROM image.
|
||||
|
|
@ -138,7 +181,16 @@ a single-flash setup. In that case, it's recommended to dump
|
|||
both chips, as `spi1.rom` and `spi2.rom`; you can then cat
|
||||
them together:
|
||||
|
||||
cat spi1.rom spi2.rom > rom.bin
|
||||
cat spi1.rom spi2.rom > rom.bin # WARNING: see note below
|
||||
|
||||
**WARNING: After concatenating the files, please ensure that you did so in
|
||||
the correct order. In `hexdump -C rom.bin` you can check for the Intel Flash
|
||||
Descriptor near the start of the file, for the bytes `5a a5 f0 0f`. You may
|
||||
alternatively attempt extraction with `ifdtool -x rom.bin`, adding
|
||||
the `--platform OPTION` option if needed, based on output from `--help` if
|
||||
you need to (it lists platform strings for certain newer Intel platforms). If
|
||||
ifdtool extraction fails, then that is another indication that you did not
|
||||
cat the files correctly.**
|
||||
|
||||
If your GbE region is locked (per IFD settings), you can dump
|
||||
and flash it using external flashing equipment. The Libreboot
|
||||
|
|
@ -152,8 +204,7 @@ option should be changed accordingly. Read flashprog
|
|||
documentation, and make sure you have everything
|
||||
properly configured.
|
||||
|
||||
Use ifdtool
|
||||
-----------
|
||||
### Use ifdtool
|
||||
|
||||
NOTE: This has only been tested on systems that use IFDv1
|
||||
(Intel Flash Descriptor, version 1). This distinction, between
|
||||
|
|
@ -170,12 +221,24 @@ with `make`, to get an ifdtool binary.
|
|||
|
||||
To make internal flashing possible later on, you might do:
|
||||
|
||||
ifdtool --unlock rom.bin
|
||||
ifdtool --unlock rom.bin # READ THE WARNING BELOW FIRST
|
||||
|
||||
**WARNING: On ThinkPad T480/T480s and OptiPlex 3050 Micro, do this instead:**
|
||||
|
||||
ifdtool --platform sklkbl --unlock rom.bin
|
||||
|
||||
Running this command will create a modified image,
|
||||
named `rom.bin.new`. This file will have all regions set
|
||||
to read-write, per configuration in the Intel Flash Descriptor.
|
||||
|
||||
Note: if you want the original image to be modified, without needing to
|
||||
keep track of `rom.bin.new` as mentioned above, use the -O switch. For example,
|
||||
repeating the above command:
|
||||
|
||||
ifdtool --unlock rom.bin -O rom.bin
|
||||
|
||||
(add the `--platform` option if you need to)
|
||||
|
||||
In addition to unlocked regions, you may wish to *neuter* the
|
||||
Intel Management Engine, removing all the nasty spying features
|
||||
from it, using `me_cleaner`. See:
|
||||
|
|
@ -188,7 +251,7 @@ article, so you should read their documentation.
|
|||
|
||||
Now run this:
|
||||
|
||||
ifdtool -x rom.bin
|
||||
ifdtool -x rom.bin # For T480/3050micro, add: --platform sklkbl
|
||||
|
||||
Several files will be created, and the one you need to
|
||||
operate on is named `flashregion_3_gbe.bin` so please
|
||||
|
|
@ -198,7 +261,7 @@ Read the notes below about how to use the `nvmutil` program,
|
|||
operating on this file. When you're done, you can insert the
|
||||
modified GbE file back into your ROM image, like so:
|
||||
|
||||
ifdtool -i gbe:flashregion_3_gbe.bin rom.bin
|
||||
ifdtool -i gbe:flashregion_3_gbe.bin rom.bin # For T480/3050micro, add: --platform sklkbl
|
||||
|
||||
This will create the file `rom.bin.new`, which contains
|
||||
your modified GbE section with the NVM images inside; this
|
||||
|
|
@ -215,6 +278,16 @@ region, like so:
|
|||
|
||||
flashprog -p internal --ifd -i gbe -w rom.bin.new
|
||||
|
||||
**WARNING: If using `--ifd` in flashprog, note that flashprog probably doesn't
|
||||
have anything similar to the `--platform` option in ifdtool. Therefore, you
|
||||
way wish to specify the regions manually. You can do this quite simply, by:**
|
||||
|
||||
ifdtool -f layout.txt rom.bin # For T480/3050micro, add: --platform sklkbl
|
||||
|
||||
and instead of `--ifd` in flashprog, use:
|
||||
|
||||
flashprog -p internal -l layout.txt -i gbe -w rom.bin.new
|
||||
|
||||
If you're running flashprog from host CPU on the target
|
||||
system, and it's dual flash, you can just flash the
|
||||
concatenated image, which you created earlier by running
|
||||
|
|
@ -227,8 +300,11 @@ the `-p internal` parameter to something else. In this
|
|||
situation, you should re-split the file accordingly, if
|
||||
you have a dual-IC flash set, like so:
|
||||
|
||||
dd if=rom.bin.new of=spi2.rom bs=1M skip=8
|
||||
dd if=rom.bin.new of=spi1.rom bs=1M count=8
|
||||
dd if=rom.bin.new of=spi2.rom bs=1M skip=8 # WARNING: see note below
|
||||
dd if=rom.bin.new of=spi1.rom bs=1M count=8 # WARNING: see note below
|
||||
|
||||
**WARNING: The commands above assume SPI1 is 8MB and SPI2 is 4MB, making 12MB
|
||||
total. Please adapt accordingly, for your own configuration.**
|
||||
|
||||
These files would then be flashed externally, separately,
|
||||
using an external programmer.
|
||||
|
|
@ -241,7 +317,7 @@ SPI1. You should adjust the above parameters, according
|
|||
to your configuration.
|
||||
|
||||
How to compile source code
|
||||
==========================
|
||||
--------------------------
|
||||
|
||||
The nvmutil source code is located under `util/nvmutil/` in the
|
||||
lbmk repository. A makefile is included there, for you to build an
|
||||
|
|
@ -266,8 +342,7 @@ The `nvmutil` software has been build-tested on `Clang`, `GCC`
|
|||
and `tcc`. Only standard library functions (plus `err.h`) are
|
||||
used, so you don't need any extra libraries.
|
||||
|
||||
How to compile it
|
||||
-----------------
|
||||
### How to compile nvmutil
|
||||
|
||||
First, ensure that the current working directory is your
|
||||
copy of the nvmutil source code!
|
||||
|
|
@ -283,7 +358,7 @@ whatever is in your `$PATH` for userspace programs).
|
|||
TODO: Add `make install` to the Makefile, portably.
|
||||
|
||||
How to use nvmutil
|
||||
==================
|
||||
------------------
|
||||
|
||||
You run it, passing as argument the path to a file, and you run
|
||||
commands on that file. This section will tell you how to
|
||||
|
|
@ -295,8 +370,7 @@ done that, you could still run it in cwd for instance:
|
|||
|
||||
./nvm bla bla bla
|
||||
|
||||
Exit status
|
||||
-----------
|
||||
### Exit status
|
||||
|
||||
The `nvmutil` program uses `errno` extensively. The best error
|
||||
handling is done this way, the Unix way. Error handling is extremely
|
||||
|
|
@ -317,13 +391,12 @@ command only requires read access on files. Where sufficient permission
|
|||
is not given (read and/or write), nvmutil will exit with non-zero status.
|
||||
|
||||
Non-zero status will also be returned, if the target file is *not*
|
||||
of size *8KB*.
|
||||
of size *8KB*, *16KB* or *128KB*.
|
||||
|
||||
Additional rules regarding exit status shall apply, depending on
|
||||
what command you use. Commands are documented in the following sections:
|
||||
|
||||
Change MAC address
|
||||
------------------
|
||||
### Change MAC address
|
||||
|
||||
The `nvm` program lets you change the MAC address. It sets
|
||||
a valid checksum, after changing the MAC address. This program
|
||||
|
|
@ -388,8 +461,7 @@ corrected if you use the `setchecksum` command
|
|||
in `nvmutil`. It is common for vendor gbe files to contain
|
||||
one valid part and one invalid part, per checksum rules.
|
||||
|
||||
Verify checksums (and show MAC addresses)
|
||||
-----------------------------------------
|
||||
### Verify checksums (and show MAC addresses)
|
||||
|
||||
This command *only* requires *read* access on files.
|
||||
|
||||
|
|
@ -405,13 +477,12 @@ NOTE: This will exit with zero status if at least one part
|
|||
contains a valid checksum. If both parts are invalid, nvmutil
|
||||
will exit with non-zero status.
|
||||
|
||||
Copy part
|
||||
---------
|
||||
### Copy part
|
||||
|
||||
This command requires read *and* write access on files.
|
||||
|
||||
The `nvm` program can copy one NVM part to another. It copies
|
||||
the *entire* 4KB part, within the 8KB file.
|
||||
the *entire* *block size* KB part, within the *two blocks* KB file.
|
||||
|
||||
Overwrite part 0 with the contents of part 1:
|
||||
|
||||
|
|
@ -426,12 +497,11 @@ will be performed, and nvmutil will exit with non-zero status.
|
|||
Otherwise, it will (if all other conditions are met) exit with
|
||||
zero status.
|
||||
|
||||
Swap parts
|
||||
----------
|
||||
### Swap parts
|
||||
|
||||
This command requires read *and* write access on files.
|
||||
|
||||
The `nvm` program can swap both 4KB parts in the GbE
|
||||
The `nvm` program can swap both *block size* KB parts in the GbE
|
||||
file. It does this, via simple XOR swaps.
|
||||
|
||||
How to use:
|
||||
|
|
@ -446,8 +516,7 @@ If *at least one* part is valid, nvmutil will return
|
|||
with zero exit status. If both parts are invalid, it will
|
||||
return non-zero.
|
||||
|
||||
Set valid checksum
|
||||
------------------
|
||||
### Set valid checksum
|
||||
|
||||
This command requires read *and* write access on files.
|
||||
|
||||
|
|
@ -467,8 +536,7 @@ set the checksum. There is no feasible way to guard against
|
|||
use on the wrong file, unlike with the other commands. Please
|
||||
make SURE you're running this on the correct file!*
|
||||
|
||||
Set invalid checksum
|
||||
--------------------
|
||||
### Set invalid checksum
|
||||
|
||||
This command requires read *and* write access on files.
|
||||
|
||||
|
|
@ -498,7 +566,7 @@ Intel gigabit NICs that don't have a valid checksum. This
|
|||
is software-defined, and not enforced by the hardware.
|
||||
|
||||
History
|
||||
=======
|
||||
-------
|
||||
|
||||
A historical change log
|
||||
is included at [docs/install/nvmutilimport.md](nvmutilimport.md),
|
||||
|
|
@ -526,33 +594,13 @@ it was part of osboot, is still available (for reference) here:
|
|||
|
||||
* <https://notabug.org/osboot/nvmutil/>
|
||||
|
||||
LICENSE
|
||||
=======
|
||||
Please use the latest nvmutil version *from lbmk*. The above information is
|
||||
provided only for reference; it may be useful for future auditing.
|
||||
|
||||
This page is released under different copyright terms than most other pages
|
||||
on this website.
|
||||
|
||||
The `nvmutil` software and documentation are released under the following
|
||||
terms:
|
||||
|
||||
Copyright 2022 Leah Rowe
|
||||
|
||||
Permission is hereby granted, free of charge, to any person obtaining a
|
||||
copy of this software and associated documentation files (the
|
||||
"Software"), to deal in the Software without restriction, including
|
||||
without limitation the rights to use, copy, modify, merge, publish,
|
||||
distribute, sublicense, and/or sell copies of the Software, and to
|
||||
permit persons to whom the Software is furnished to do so, subject to
|
||||
the following conditions:
|
||||
|
||||
The above copyright notice and this permission notice shall be included
|
||||
in all copies or substantial portions of the Software.
|
||||
|
||||
THE SOFTWARE IS PROVIDED "AS IS", WITHOUT WARRANTY OF ANY KIND, EXPRESS
|
||||
OR IMPLIED, INCLUDING BUT NOT LIMITED TO THE WARRANTIES OF
|
||||
MERCHANTABILITY, FITNESS FOR A PARTICULAR PURPOSE AND NONINFRINGEMENT.
|
||||
IN NO EVENT SHALL THE AUTHORS OR COPYRIGHT HOLDERS BE LIABLE FOR ANY
|
||||
CLAIM, DAMAGES OR OTHER LIABILITY, WHETHER IN AN ACTION OF CONTRACT,
|
||||
TORT OR OTHERWISE, ARISING FROM, OUT OF OR IN CONNECTION WITH THE
|
||||
SOFTWARE OR THE USE OR OTHER DEALINGS IN THE SOFTWARE.
|
||||
TODO
|
||||
----
|
||||
|
||||
* Adapt this into a manpage (useful for Linux package repositories / BSD ports)
|
||||
* Send nvmutil upstream to coreboot, for inclusion under `util/`
|
||||
* In addition to the manpage, when sending to coreboot, also adapt this page
|
||||
for inclusion into doc.coreboot.org
|
||||
|
|
|
|||
|
|
@ -0,0 +1 @@
|
|||
Instructions pertaining to nvmutil, which is software that can modify the MAC address and other information inside Intel GbE NVM images.
|
||||
|
|
@ -1,12 +1,9 @@
|
|||
nvmutil assimilation
|
||||
====================
|
||||
nvmutil import notes
|
||||
--------------------
|
||||
|
||||
Detailed revision history can be found in the Git repository; for code,
|
||||
look at `lbmk.git` and for documentation, look at `lbwww.git`.
|
||||
|
||||
Assimilation by Libreboot
|
||||
=========================
|
||||
|
||||
With no additional changes to nvmutil, the project became part of lbmk,
|
||||
which is the Libreboot build system. Please refer to Libreboot's imported
|
||||
version of the nvmutil documentation: [nvmutil.md](nvmutil.md)
|
||||
|
|
@ -22,8 +19,10 @@ shall be preserved on notabug. See:
|
|||
|
||||
<https://notabug.org/osboot/nvmutil>
|
||||
|
||||
nvmutil 20221106
|
||||
================
|
||||
Version history (osboot)
|
||||
------------------------
|
||||
|
||||
### nvmutil 20221106
|
||||
|
||||
Very minor bugfix release:
|
||||
|
||||
|
|
@ -33,8 +32,7 @@ Very minor bugfix release:
|
|||
* Documentation inaccuracies fixed (pertaining to nvmutil exit statuses)
|
||||
* Documentation generally tidied up a bit
|
||||
|
||||
nvmutil 20221103
|
||||
================
|
||||
### nvmutil 20221103
|
||||
|
||||
Not much has changed, as this just fixes minor bugs and behavioural
|
||||
quirks seen in the previous release:
|
||||
|
|
@ -49,8 +47,7 @@ quirks seen in the previous release:
|
|||
fully readable. Previously, nvmutil would exit non-zero if one or both
|
||||
checksums was correct, but it now only does this if both are invalid
|
||||
|
||||
nvmutil 20220828
|
||||
================
|
||||
### nvmutil 20220828
|
||||
|
||||
No new features have been added. This is a code cleanup and bugfix release.
|
||||
|
||||
|
|
@ -73,8 +70,7 @@ No new features have been added. This is a code cleanup and bugfix release.
|
|||
were made (e.g. cleaner argument handling). Tested with tcc on an x86\_64
|
||||
machine, where a 0.16% binary size increase was observed.
|
||||
|
||||
nvmutil 20220815
|
||||
================
|
||||
### nvmutil 20220815
|
||||
|
||||
No new features have been added. This is a code cleanup and bugfix release.
|
||||
|
||||
|
|
@ -105,8 +101,7 @@ No new features have been added. This is a code cleanup and bugfix release.
|
|||
reduces code bloat in nvmutil. The code still warns you if the MAC address
|
||||
is multicast
|
||||
|
||||
nvmutil 20220810
|
||||
================
|
||||
### nvmutil 20220810
|
||||
|
||||
* 3.4% reduction in binary size (as tested with tcc on x86\_64),
|
||||
due to code optimizations, *while* adding new checks and new features.
|
||||
|
|
@ -130,8 +125,7 @@ nvmutil 20220810
|
|||
* The `setmac` command can now be used without specifying a MAC address,
|
||||
which will cause the same behaviour as `setmac ??:??:??:??:??:??`
|
||||
|
||||
nvmutil 20220808
|
||||
================
|
||||
### nvmutil 20220808
|
||||
|
||||
Released on 8 August 2022. Changes:
|
||||
|
||||
|
|
@ -173,8 +167,7 @@ Released on 8 August 2022. Changes:
|
|||
reduction; the other 2/3 of that reduction is due to increased
|
||||
code efficiency in general.
|
||||
|
||||
Regarding code size reduction
|
||||
-----------------------------
|
||||
#### Regarding code size reduction
|
||||
|
||||
My test setup is an x86\_64 machine with `tcc` used
|
||||
as the compiler; the libc doesn't really matter, if
|
||||
|
|
@ -215,8 +208,7 @@ binary sizes are much larger with those compilers, even with
|
|||
optimization flags; despite this, the Makefile in nvmutil
|
||||
assumes GCC/Clang and sets `CFLAGS` to `-Os`.
|
||||
|
||||
nvmutil 20220802
|
||||
================
|
||||
### nvmutil 20220802
|
||||
|
||||
Released on 2 August 2022. Changes:
|
||||
|
||||
|
|
@ -236,8 +228,7 @@ Released on 2 August 2022. Changes:
|
|||
* More human-friendly messages and help text
|
||||
* help/version commands actually listed in help output
|
||||
|
||||
nvmutil 20220731
|
||||
================
|
||||
### nvmutil 20220731
|
||||
|
||||
Released on 31 July 2022. Changes:
|
||||
|
||||
|
|
@ -250,8 +241,7 @@ Released on 31 July 2022. Changes:
|
|||
|
||||
That's it. Bug fixes and safety features added. Enjoy!
|
||||
|
||||
nvmutil 20220728
|
||||
================
|
||||
### nvmutil 20220728
|
||||
|
||||
Initial release. It is functionally equivalent to the
|
||||
older `nvmutils`, developed for the osboot project. This
|
||||
|
|
|
|||
|
|
@ -0,0 +1 @@
|
|||
Historical information pertaining to nvmutil which can modify MAC addresses on Intel GbE NVM images.
|
||||
|
|
@ -1,10 +1,12 @@
|
|||
---
|
||||
title: Sony PlayStation (PS1/PSX)
|
||||
title: Install Libreboot Open BIOS on Sony PlayStation (PS1/PSX)
|
||||
x-toc-enable: true
|
||||
...
|
||||
|
||||
The PlayStation is a computer like any other. It ought to run all Free Software
|
||||
if you want it to, and you can!
|
||||
The PlayStation is a computer like any other. It ought to run
|
||||
all [Free Software](https://writefreesoftware.org/learn) if you want it to, and
|
||||
you can! In this document, you will learn how to replace the Sony BIOS on your
|
||||
PlayStation, with a fully Open Source one instead.
|
||||
|
||||
<div class="specs">
|
||||
<center>
|
||||
|
|
@ -27,21 +29,32 @@ if you want it to, and you can!
|
|||
| **Original boot firmware** | Sony PS1 BIOS (USA/JPN/EU) |
|
||||
| **Flash chip** | 512KB Mask ROM |
|
||||
</div>
|
||||
Introduction
|
||||
============
|
||||
|
||||
Open source playstation (PS1/PSX) BIOS
|
||||
---------------------------------
|
||||
|
||||
This uses the free/opensource BIOS developed by the PCSX-Redux team, which you
|
||||
can learn more about here:
|
||||
|
||||
<https://github.com/grumpycoders/pcsx-redux/tree/main/src/mips/openbios>
|
||||
|
||||
Build from source
|
||||
-----------------
|
||||
### Download pre-built BIOS
|
||||
|
||||
Pre-compiled builds will be in the next Libreboot release, after
|
||||
version 20240612. For now, you must compile it from source, but the Libreboot
|
||||
build system provides automation for this. Please use the latest lbmk
|
||||
revision [from Git](../../git.md).
|
||||
Get it here:
|
||||
|
||||
<https://www.mirrorservice.org/sites/libreboot.org/release/stable/20241206/roms/playstation/>
|
||||
|
||||
Other mirrors are available, at the [Canoeboot download](../../download.md)
|
||||
page; look in the `roms/playstation/` directory for a given Libreboot release.
|
||||
This is built from the available sources in Libreboot releases, based on the
|
||||
information written below.
|
||||
|
||||
You can use this in a PlayStation emulator or on real hardware - the rest of
|
||||
this page will tell you how to use it.
|
||||
|
||||
### Build from source
|
||||
|
||||
OPTIONAL: You could alternatively use the pre-built version (see above).
|
||||
|
||||
First, please make sure you have build dependencies. The build logic in lbmk
|
||||
has been tested on Debian 12 (x86\_64) and you can do this for example, as root:
|
||||
|
|
@ -67,7 +80,7 @@ This commonly only builds the BIOS part. If you want to build all of PCSX-Redux,
|
|||
you can, but lbmk does not provide automation for this.
|
||||
|
||||
Installation
|
||||
============
|
||||
------------
|
||||
|
||||
If all went well, you should see `openbios.bin` located
|
||||
under the `bin/playstation/` (within lbmk). Alternatively, you may be using
|
||||
|
|
@ -75,8 +88,7 @@ a release *after* Libreboot 20240612 that has it pre-built. Either way is fine.
|
|||
|
||||
The `openbios.bin` file is your new BIOS build.
|
||||
|
||||
Emulators
|
||||
---------
|
||||
### Emulators
|
||||
|
||||
Most PlayStation emulators rely on low-level emulation to execute the real BIOS.
|
||||
The Open BIOS by PCSX-Redux (as distributed by Libreboot) can also be used, and
|
||||
|
|
@ -91,8 +103,7 @@ provided with your chosen PlayStation emulator. You can even freely
|
|||
redistribute this BIOS, because it's free software (released under MIT license),
|
||||
which is a major advantage over Sony's original BIOS.
|
||||
|
||||
Hardware
|
||||
--------
|
||||
### Hardware
|
||||
|
||||
Not yet tested by the Libreboot project, but the PCSX-Redux developers have
|
||||
stated that it will work on the real console. *It should be noted that the Open
|
||||
|
|
@ -116,7 +127,7 @@ BIOS much more polished, but a number of games have been tested and it's more
|
|||
or less fully reliable in most cases.
|
||||
|
||||
Game compatibility
|
||||
==================
|
||||
------------------
|
||||
|
||||
The upstream maintains a compatibility list, here:
|
||||
|
||||
|
|
@ -126,7 +137,7 @@ NOTE: Google Docs, but an option exists on there to export it for LibreOffice
|
|||
Calc. The list is provided as a spreadsheet.
|
||||
|
||||
Remarks about hardware
|
||||
====================
|
||||
----------------------
|
||||
|
||||
Modern NOR flash can be used. You specifically want a TSOP-32 SMD/SMT type device,
|
||||
one that operates at 3.3v (tolerance 2.7 to 3.6v), organised into 512KB blocks,
|
||||
|
|
@ -146,10 +157,28 @@ We do not yet provide instructions for how to install this on real hardware, in
|
|||
the Libreboot project, but this can be done at a future date.
|
||||
|
||||
Other mods (hardware)
|
||||
===============
|
||||
---------------------
|
||||
|
||||
Video timings
|
||||
-------------
|
||||
### Modchip (mayumi v4) example
|
||||
|
||||
Click the photo for full size. It shows a Mayumi v4 modchip and Dual Frequency
|
||||
Oscillator mod installed (blue board is the modchip and the black board is
|
||||
the DFO mod). Mods installed by Leah Rowe, as a proof of concept:
|
||||
|
||||
<img tabindex=1 alt="Sony PlayStation (PSOne) console" class="p" src="https://av.libreboot.org/playstation/mayumi.jpg" /><span class="f"><img src="https://av.libreboot.org/playstation/mayumi.jpg" /></span>
|
||||
|
||||
The modchip disables the copy protection and region restrictions. A modchip is
|
||||
still advised, even if using an Open BIOS. The Open BIOS could be modified to
|
||||
send commands that disable the wobble check, thus invalidating the need for
|
||||
a modchip, but even then there are still caveats. Please read:
|
||||
|
||||
<https://psx-spx.consoledev.net/cdromdrive/#cdrom-secret-unlock-commands>
|
||||
|
||||
The most technically correct solution, regardless of which BIOS you have, to
|
||||
also install the modchip and DFO board, as shown. More info is written about
|
||||
these in the next sections below:
|
||||
|
||||
### Video timings
|
||||
|
||||
The Open BIOS will not implement any DRM, so it's possible that you might boot
|
||||
out of region games. In an emulator, this is no problem, but it can prove
|
||||
|
|
@ -199,8 +228,7 @@ By fixing the timings in this way, your region-free console will also have
|
|||
correct timings, thus maximum game compatibility, and colours will always be
|
||||
correct no matter what video cable you're using.
|
||||
|
||||
Modchips
|
||||
--------
|
||||
### Modchips
|
||||
|
||||
If using hardware, you will probably still want a modchip. Many proprietary
|
||||
modchip firmwares exist, such as Old crow, MultiMode3 and Mayumi; these run on
|
||||
|
|
@ -228,8 +256,7 @@ not yet been confirmed by the Libreboot project.
|
|||
More hardware testing is planned, but the Open BIOS works perfectly in emulators.
|
||||
Give it a try!
|
||||
|
||||
Boot games on SD cards
|
||||
-----------------------
|
||||
### Boot games on SD cards
|
||||
|
||||
The [PicoStation](https://github.com/paulocode/picostation) project provides
|
||||
free firmware for RP2040 devices, which you can solder into a modboard which
|
||||
|
|
@ -240,8 +267,7 @@ real playstation (the picostation replaces your CD drive).
|
|||
Not only is this useful in a development context, but it can also be used when
|
||||
your CD drive has worn out and no longer reads discs properly.
|
||||
|
||||
Final remarks
|
||||
-------------
|
||||
### Final remarks
|
||||
|
||||
Combined with PsNee and PicoStation, the Open BIOS from PCSX-Redux team will
|
||||
turn your 90s PlayStation into a very hackable machine. There is
|
||||
|
|
@ -253,7 +279,7 @@ simply computers, fully reprogrammable and as such, Libreboot is happy to provid
|
|||
this support, for the Sony PlayStation
|
||||
|
||||
Credit
|
||||
======
|
||||
------
|
||||
|
||||
Thanks go to the PCSX-Redux team for their excellent work reverse engineering
|
||||
the Sony PS1 BIOS.
|
||||
|
|
|
|||
|
|
@ -0,0 +1 @@
|
|||
Install free/opensource BIOS boot firmware on your Sony PlayStation (PS1/PSX), optionally compiling it with GNU GCC. This uses PCSX-Redux Open BIOS.
|
||||
|
|
@ -1,5 +1,5 @@
|
|||
---
|
||||
title: Flashing the ThinkPad R400
|
||||
title: Install Libreboot on Lenovo ThinkPad R400
|
||||
x-toc-enable: true
|
||||
...
|
||||
|
||||
|
|
@ -28,12 +28,12 @@ x-toc-enable: true
|
|||
| **Flash chip** | SOIC-8/SOIC-16 4MiB/8MiB (Upgradable to 16MiB) |
|
||||
|
||||
```
|
||||
W+: Works without blobs;
|
||||
W+: Works without vendor firmware;
|
||||
N: Doesn't work;
|
||||
W*: Works with blobs;
|
||||
W*: Works with vendor firmware;
|
||||
U: Untested;
|
||||
P+: Partially works;
|
||||
P*: Partially works with blobs
|
||||
P*: Partially works with vendor firmware
|
||||
```
|
||||
|
||||
| ***Features*** | |
|
||||
|
|
@ -52,16 +52,13 @@ P*: Partially works with blobs
|
|||
| **SeaBIOS with GRUB** | Works |
|
||||
</div>
|
||||
|
||||
Dell Latitude E6400
|
||||
===================
|
||||
Open source BIOS/UEFI firmware
|
||||
-------------------------
|
||||
|
||||
**If you haven't bought an R400 yet: the [Dell Latitude
|
||||
E6400](../install/latitude.md) is much easier to flash; no disassembly required,
|
||||
it can be flashed entirely in software from Dell BIOS to Libreboot. It is the
|
||||
same hardware generation (GM45), with same CPUs, video processor, etc.**
|
||||
|
||||
Introduction
|
||||
============
|
||||
This document will teach you how to install Libreboot, on your
|
||||
Lenovo ThinkPad R400 laptop motherboard.
|
||||
Libreboot is a [Free Software](https://writefreesoftware.org/learn) project
|
||||
that replaces proprietary BIOS/UEFI firmware.
|
||||
|
||||
It is believed that all or most R400 laptops are compatible. See notes
|
||||
about [CPU
|
||||
|
|
@ -74,17 +71,26 @@ the palmrest: 4MiB is SOIC-8, 8MiB is SOIC-16.
|
|||
|
||||
*The R400 laptops come with the ME (and sometimes AMT in addition)
|
||||
before flashing libreboot. libreboot disables and removes it by using a
|
||||
modified descriptor: see [../install/ich9utils.md](../install/ich9utils.md)*
|
||||
(contains notes, plus instructions)
|
||||
modified descriptor.*
|
||||
|
||||
Flashing instructions can be found at
|
||||
[../install/\#flashprog](../install/#flashprog)
|
||||
|
||||
NOTE: Libreboot standardises on [flashprog](https://flashprog.org/wiki/Flashprog)
|
||||
**NOTE: Libreboot standardises on [flashprog](https://flashprog.org/wiki/Flashprog)
|
||||
now, as of 27 January 2024, which is a fork of flashrom.
|
||||
The reason why was explained, in
|
||||
the [Libreboot 20240225 release](../../news/libreboot20240225.md#flashprog-now-used-instead-of-flashrom)**
|
||||
|
||||
Dell Latitude E6400
|
||||
-------------------
|
||||
|
||||
**If you haven't bought an R400 yet: the [Dell Latitude
|
||||
E6400](../install/latitude.md) is much easier to flash; no disassembly required,
|
||||
it can be flashed entirely in software from Dell BIOS to Libreboot. It is the
|
||||
same hardware generation (GM45), with same CPUs, video processor, etc.**
|
||||
|
||||
EC update {#ecupdate}
|
||||
=========
|
||||
--------------------
|
||||
|
||||
It is recommended that you update to the latest EC firmware version. The
|
||||
[EC firmware](../../faq.md#ec-embedded-controller-firmware) is separate from
|
||||
|
|
@ -109,7 +115,7 @@ TODO: put hardware register logs here like on the [X200](x200.md) and
|
|||
[T400](t400.md) page.
|
||||
|
||||
Installation notes
|
||||
==================
|
||||
------------------
|
||||
|
||||
[External flashing](spi.md) required, if Lenovo BIOS is running.
|
||||
|
||||
|
|
@ -129,15 +135,14 @@ ROM properly first. Although ROM images are provided pre-built in
|
|||
libreboot, there are some modifications that you need to make to the one
|
||||
you chose before flashing. (instructions referenced later in this guide)
|
||||
|
||||
Serial port {#serial_port}
|
||||
-----------
|
||||
### Serial port {#serial_port}
|
||||
|
||||
EHCI debug might not be needed. It has been reported that the docking
|
||||
station for this laptop has a serial port, so it might be possible to
|
||||
use that instead.
|
||||
|
||||
A note about CPUs
|
||||
=================
|
||||
-----------------
|
||||
|
||||
[ThinkWiki](http://www.thinkwiki.org/wiki/Category:R400) has a list of
|
||||
CPUs for this system. The Core 2 Duo P8400 and P8600 are believed to
|
||||
|
|
@ -145,13 +150,12 @@ work in libreboot. The Core 2 Duo T9600 was confirmed to work, so the
|
|||
T9400 probably also works. *The Core 2 Duo T5870/5670 and Celeron M
|
||||
575/585 are untested!*
|
||||
|
||||
Quad-core CPUs
|
||||
--------------
|
||||
### Quad-core CPUs
|
||||
|
||||
Incompatible. Do not use.
|
||||
|
||||
A note about GPUs
|
||||
=================
|
||||
-----------------
|
||||
|
||||
Some models have an Intel GPU, while others have both an ATI and an
|
||||
Intel GPU; this is referred to as "Dual Graphics" (previously
|
||||
|
|
@ -165,32 +169,33 @@ Intel GPU is used and the ATI GPU is disabled, so native graphics
|
|||
initialization works all the same.
|
||||
|
||||
CPU paste required
|
||||
==================
|
||||
------------------
|
||||
|
||||
See [\#paste](#paste).
|
||||
|
||||
Flash chip size {#flashchips}
|
||||
===============
|
||||
-----------------------------
|
||||
|
||||
Use this to find out:
|
||||
|
||||
flashprog -p internal
|
||||
|
||||
NOTE: Libreboot standardises on [flashprog](https://flashprog.org/wiki/Flashprog)
|
||||
**NOTE: Libreboot standardises on [flashprog](https://flashprog.org/wiki/Flashprog)
|
||||
now, as of 27 January 2024, which is a fork of flashrom.
|
||||
The reason why was explained, in
|
||||
the [Libreboot 20240225 release](../../news/libreboot20240225.md#flashprog-now-used-instead-of-flashrom)**
|
||||
|
||||
MAC address {#macaddress}
|
||||
===========
|
||||
-------------------------
|
||||
|
||||
Refer to [mac\_address.md](../install/mac_address.md).
|
||||
|
||||
External flashing
|
||||
=================
|
||||
-----------------
|
||||
|
||||
Refer to [spi.md](spi.md) as a guide for external re-flashing.
|
||||
|
||||
Disassembly
|
||||
-----------
|
||||
### Disassembly
|
||||
|
||||
Remove all screws:\
|
||||
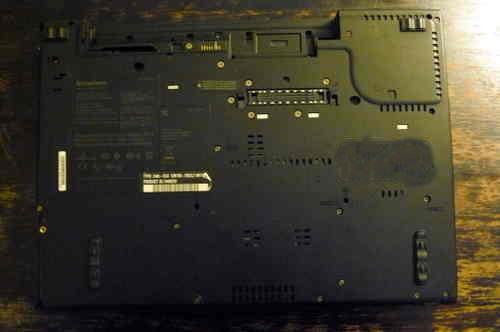\
|
||||
|
|
@ -276,7 +281,7 @@ Read [this article](spi.md) to learn how you may flash the chip, which is near
|
|||
to the RAM.
|
||||
|
||||
Thermal paste (IMPORTANT)
|
||||
=========================
|
||||
-------------------------
|
||||
|
||||
Because part of this procedure involved removing the heatsink, you will
|
||||
need to apply new paste. Arctic MX-4 is ok. You will also need isopropyl
|
||||
|
|
@ -293,7 +298,7 @@ show how to properly apply the thermal paste. Other guides online detail
|
|||
the proper application procedure.
|
||||
|
||||
Memory
|
||||
======
|
||||
------
|
||||
|
||||
In DDR3 machines with Cantiga (GM45/GS45/PM45), northbridge requires sticks
|
||||
that will work as PC3-8500 (faster PC3/PC3L sticks can work as PC3-8500).
|
||||
|
|
|
|||
|
|
@ -0,0 +1 @@
|
|||
ThinkPad R400 installation. Libreboot is a free/opensource BIOS/UEFI boot firmware distribution based on coreboot with payloads like GNU GRUB boot loader.
|
||||
|
|
@ -4,7 +4,7 @@ x-toc-enable: true
|
|||
...
|
||||
|
||||
Need help?
|
||||
==========
|
||||
----------
|
||||
|
||||
Help is available on [Libreboot IRC](../../contact.md) and other channels.
|
||||
|
||||
|
|
@ -16,14 +16,51 @@ if you want to send your machine in to have Libreboot installed for you.
|
|||
Leah Rowe, the founder and lead developer of Libreboot, also owns and
|
||||
operates Minifree Ltd; sales provide funding for the Libreboot project.
|
||||
|
||||
Introduction
|
||||
============
|
||||
Install open source BIOS/UEFI firmware
|
||||
--------------------------------------
|
||||
|
||||
NOTE: Libreboot standardises on [flashprog](https://flashprog.org/wiki/Flashprog)
|
||||
This guide is predominantly about *installing Libreboot* (flashing it) onto
|
||||
your motherboard's main system flash. You can also adapt this guide for dumping,
|
||||
erasing and verifying firmware images; this guide shows you how to use
|
||||
the [flashprog](https://flashprog.org/) software with various external
|
||||
25XX NOR flash programmers. This guide is written for *Linux* users, but BSD
|
||||
operating systems are also compatible with flashprog; Windows might be feasible,
|
||||
ditto Apple's MacOS, as flashprog can also run on those, but they are not
|
||||
officially supported by Libreboot, and *we recommend* that you use Linux/BSD.
|
||||
|
||||
Although this documentation is written *for the Libreboot project*, it can be
|
||||
used on any compatible 25xx NOR flash, on any number of devices, such as home
|
||||
routers and even certain videogame systems. If you're a refurbisher, and not
|
||||
a Libreboot-based one, but just a regular refurbisher e.g. on eBay, dealing
|
||||
with proprietary UEFI firmware (and perhaps Windows installations), it may be
|
||||
that on some of them, SMM-based flash writes are performed to store UEFI firmware
|
||||
configurations (instead of the old NVRAM/CMOS memory); you could adapt this
|
||||
guide (and read flashprog documentation) to erase/flash custom configurations,
|
||||
for example when unlocking boot passwords on the computers that you sell. This
|
||||
is the power of [Free Software](https://writefreesoftware.org/learn); flashprog
|
||||
is a Free Software project. The use-case scenario of the humble eBay seller is
|
||||
real; several of them have in fact used this guide in the past.
|
||||
|
||||
So keep that in mind; this is part of the Libreboot installation instructions,
|
||||
but it can be used for *any* flashing operation on *any* 25xx NOR flash, with
|
||||
all sorts of firmware; you could also use this to *reverse* a Libreboot
|
||||
installation, re-flashing the original vendor firmware if you made a dump of it,
|
||||
**and we definitely recommend backing that up prior to Libreboot installation**.
|
||||
|
||||
**Please ensure that your programmer's voltage matches that of the flash IC,
|
||||
and read this guide carefully to account for proper electrical safety. In
|
||||
general, these programmers operate at 3.3v, so you'll need a logic level
|
||||
adapter and e.g. buck converter, if you're dealing with a 1.8V flash IC.**
|
||||
|
||||
**NOTE: Libreboot standardises on [flashprog](https://flashprog.org/wiki/Flashprog)
|
||||
now, as of 27 January 2024, which is a fork of flashrom.
|
||||
The reason why was explained, in
|
||||
the [Libreboot 20240225 release](../../news/libreboot20240225.md#flashprog-now-used-instead-of-flashrom)**
|
||||
|
||||
**[PLEASE READ THESE INSTRUCTIONS BEFORE INSTALLING](../../news/safety.md),
|
||||
OR YOU MIGHT BRICK YOUR MACHINE: [SAFETY PRECAUTIONS](../../news/safety.md)**
|
||||
**[PLEASE READ THESE INSTRUCTIONS BEFORE INSTALLING](ivy_has_common.md), OR
|
||||
YOU MAY BRICK YOUR MACHINE!! - Please click the link and follow the instructions
|
||||
there, before flashing. For posterity,
|
||||
[here is the link again](ivy_has_common.md).**
|
||||
|
||||
This guide will teach you how to use various tools for externally reprogramming
|
||||
a 25xx NOR flash via SPI protocol. This is the most common type of flash IC for
|
||||
|
|
@ -33,12 +70,12 @@ which uses LPC flash in a PLCC32 socket, which you can simply hot-swap after
|
|||
booting the vendor firmware, and then flash internally. Simple!
|
||||
|
||||
We will be using
|
||||
the [flashprog](https://flashprog.org/Flashrom) software which is written to
|
||||
the [flashprog](https://flashprog.org/) software which is written to
|
||||
dump, erase and rewrite these flash chips.
|
||||
|
||||
libreboot currently documents how to use these SPI programmers:
|
||||
Libreboot currently documents how to use these SPI programmers:
|
||||
|
||||
* Raspberry Pi Pico
|
||||
* Raspberry Pi Pico / Pico 2
|
||||
* Raspberry Pi (RPi) single-board computers
|
||||
* BeagleBone Black (BBB)
|
||||
* Libre Computer 'Le Potato'
|
||||
|
|
@ -58,10 +95,19 @@ SPI flash, using an on-board SPI programmer (which all boards have). You do this
|
|||
from Linux, with flashprog.
|
||||
|
||||
*This* guide that you're reading now is for using an *external* programmer. It
|
||||
is called *external* because it's not the *internal* one on your mainboard.
|
||||
is called *external* because it's not the *internal* one on your motherboard.
|
||||
|
||||
Raspberry Pi Pico
|
||||
=================
|
||||
-----------------
|
||||
|
||||
### RP2040/RP2530 both supported
|
||||
|
||||
**Pico 2 and other RP2530 dongles also supported, on Libreboot 20241206 rev8
|
||||
or higher. Releases before this only supported the original Pico, and other
|
||||
RP2040 dongles; newer Libreboot releases now support both RP2040 and RP2530.**
|
||||
|
||||
The pinout on Raspberry Pi Pico and Raspberry Pi Pico 2 are identical, but you
|
||||
must take care to flash the correct image on either device.
|
||||
|
||||
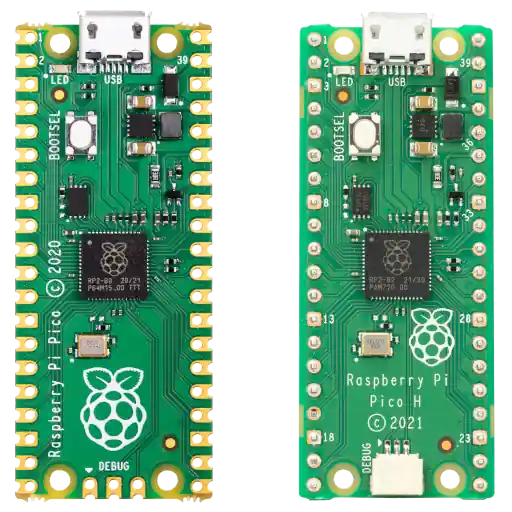
|
||||
|
||||
|
|
@ -72,16 +118,19 @@ Additionally, all the software running on it is free, down to the full
|
|||
versions (Pico W & Pico WH) need vendor firmware to use the Wi-Fi chip,
|
||||
but that is not needed for following this guide.
|
||||
|
||||
A Pico has proper 3.3V logic levels, unlike a ch341a. Which means it won't
|
||||
destroy your board by sending 5V to it. If you have a 1.8V flash chip,
|
||||
you need to add a logic level converter.
|
||||
### Download serprog firmware pre-compiled
|
||||
|
||||
First, connect just the Pico to your computer with a micro-USB cable.
|
||||
Mount it like any other USB flash drive. If it isn't detected, you might need
|
||||
to press the BOOTSEL button while you plug it in (this forces it into the
|
||||
bootloader mode).
|
||||
Download the pico serprog tarball from Libreboot releases. For example, the
|
||||
Libreboot 20241206rev8 one would be
|
||||
named: `libreboot-20241206rev8_pico_serprog.tar.xz` - it's available under
|
||||
the `roms/` directory in each release. With these binaries, you can easily
|
||||
get started.
|
||||
|
||||
You can download the serprog firmware here:\
|
||||
### Build serprog firmware from source (OPTIONAL)
|
||||
|
||||
**Pre-compiled binaries are also available, in Libreboot releases.**
|
||||
|
||||
You can alternatively download the serprog firmware here:\
|
||||
<https://codeberg.org/libreboot/pico-serprog>\
|
||||
or here:\
|
||||
<https://notabug.org/libreboot/pico-serprog>
|
||||
|
|
@ -90,7 +139,7 @@ You can also find the source code for these, under `src/` in Libreboot release
|
|||
archives (source code tarball), and/or under `src/` in `lbmk.git` if downloading
|
||||
using the build instructions below.
|
||||
|
||||
Copy the file `rpi-pico-serprog.uf2` into your Pico. To build this firmware, you
|
||||
Alternatively to the binaries, you
|
||||
could build it yourself or you could also clone `lbmk.git` and [install build
|
||||
dependencies](../build/#first-install-build-dependencies), then inside lbmk,
|
||||
do:
|
||||
|
|
@ -98,8 +147,35 @@ do:
|
|||
./mk -b pico-serprog
|
||||
|
||||
This will automatically build the rpi-pico firmware, and the file will be
|
||||
at `bin/serprog_rp2040/serprog_pico.uf2`
|
||||
and `bin/serprog_rp2040/serprog_pico_w.uf2`.
|
||||
at `bin/serprog_pico/serprog_pico.uf2`
|
||||
and `bin/serprog_pico/serprog_pico_w.uf2` - images with `pico2` in the
|
||||
file name are for the Pico 2, and they can also be used.
|
||||
|
||||
### Install the serprog firmware
|
||||
|
||||
First, connect just the Pico to your computer with a micro-USB cable.
|
||||
Mount it like any other USB flash drive. If it isn't detected, you might need
|
||||
to press the BOOTSEL button while you plug it in (this forces it into the
|
||||
bootloader mode).
|
||||
|
||||
When you have the build, or if you're using a release build, copy the
|
||||
file `.uf2` file into your Pico. You must make sure to build the correct
|
||||
target, or otherwise copy the correct file, because many RP2040 and RP2530
|
||||
devices exist and Libreboot provides images for **all of them** in the same
|
||||
release tarball.
|
||||
|
||||
**NOTE: Other RP2040/2530 devices will also work. You just have to match
|
||||
the right pins and use the correct firmware file!**
|
||||
|
||||
### Logic levels
|
||||
|
||||
A Pico has proper 3.3V logic levels, unlike a ch341a. Which means it won't
|
||||
destroy your board by sending 5V to it. If you have a 1.8V flash chip,
|
||||
you need to add a logic level converter. **Please ensure that you have matched
|
||||
the voltage of your programmer to the voltage of your chip; both the data lines
|
||||
and power lines to the chip must match.**
|
||||
|
||||
### Wiring
|
||||
|
||||
Disconnect the Pico and proceed to wire it to your
|
||||
[flash chip](/docs/install/spi.html#identify-which-flash-type-you-have).
|
||||
|
|
@ -113,6 +189,8 @@ above](https://av.libreboot.org/rpi_pico/pinout_serprog.png)
|
|||
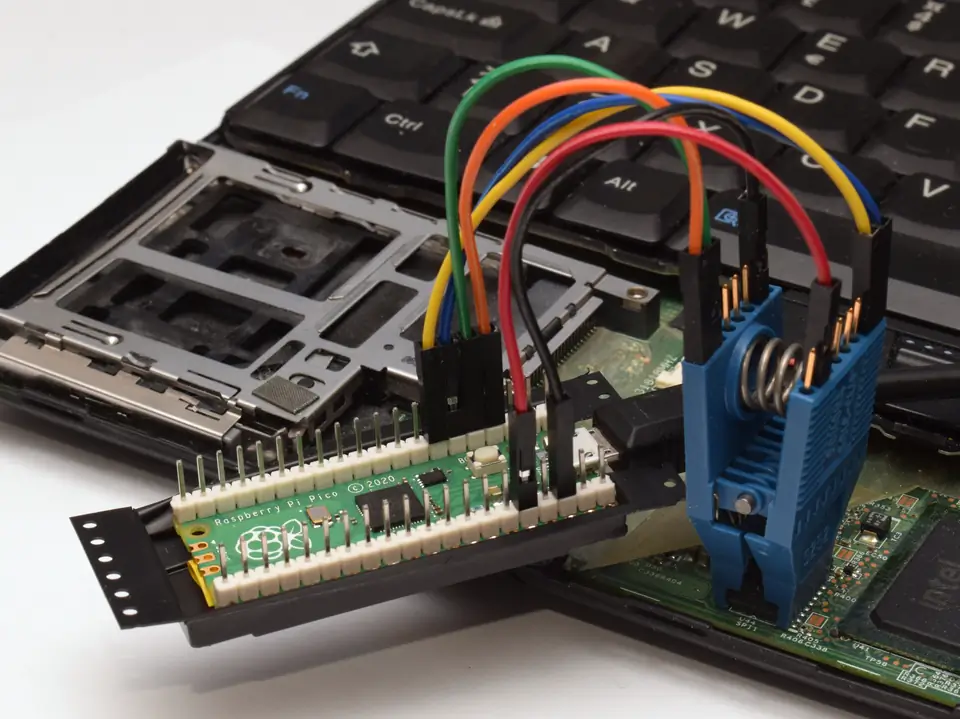
|
||||
|
||||
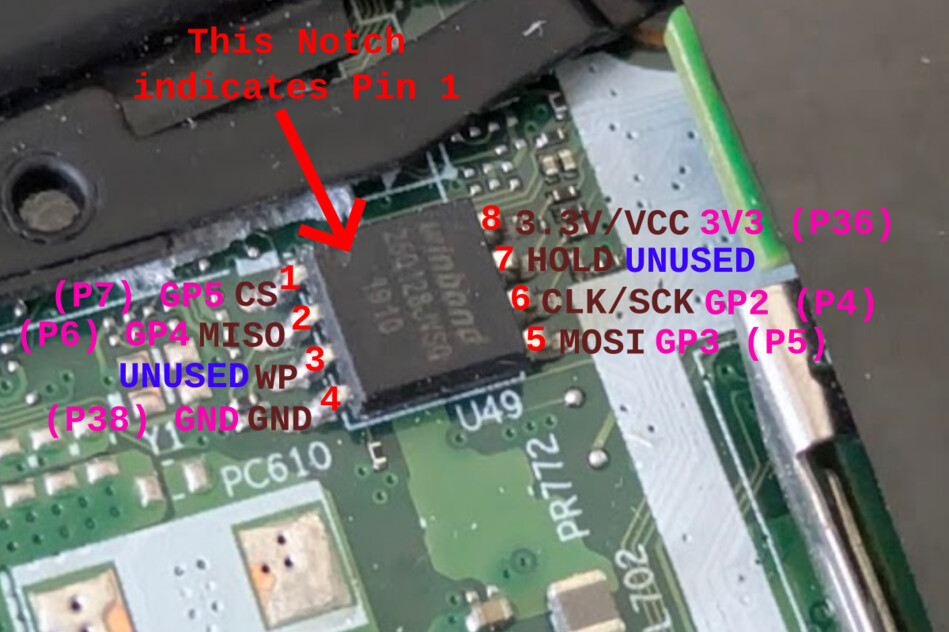
|
||||
|
||||
Headers were manually soldered on the top side, and the plastic packaging
|
||||
was repurposed as an insulating base. These might be nice to have, but by no
|
||||
means necessary. If your headers are on the other side, just keep in mind
|
||||
|
|
@ -123,7 +201,7 @@ will appear:
|
|||
|
||||
[453876.669019] cdc_acm 2-1.2:1.0: ttyACMx: USB ACM device
|
||||
|
||||
Take note of the ttyACMx. Flashrom is now usable
|
||||
Take note of the ttyACMx. Flashprog is now usable
|
||||
(substitute ttyACMx with what you observed earlier).
|
||||
|
||||
flashprog -p serprog:dev=/dev/ttyACMx,spispeed=16M
|
||||
|
|
@ -131,11 +209,13 @@ Take note of the ttyACMx. Flashrom is now usable
|
|||
spispeed=32M usually works, but since it's not much faster it's probably
|
||||
not worth it. The 12Mbps USB port is limiting the actual speed here.
|
||||
|
||||
Do not use CH341A!
|
||||
==================
|
||||
Higher speeds might work nicely, on Pico 2.
|
||||
|
||||
Do not buy CH341A!
|
||||
------------------
|
||||
|
||||
NOR flashes on libreboot systems run on 3.3V DC or 1.8V DC, and this includes
|
||||
data lines. CH341A has 5V logic levels on data lines, which will damage your
|
||||
data lines. CH341A can have 5V logic levels on data lines, which can damage your
|
||||
SPI flash and also the southbridge that it's connected to, plus anything else
|
||||
that it's connected to.
|
||||
|
||||
|
|
@ -162,12 +242,12 @@ build up and possibly fire (and definitely damaged circuitry). On SOIC8, pin 3
|
|||
is WP and 4 is GND, so a direct 3.3v connection there is quite hazardous for
|
||||
that reason; all the more reason to use a pull-up resistor.**
|
||||
|
||||
The mainboard that you want to flash (if using e.g. pomona clip) will probably
|
||||
The motherboard that you want to flash (if using e.g. pomona clip) will probably
|
||||
have pull-up resistors on it already for WP/HOLD, so simply cutting WP/HOLD
|
||||
on the CH341A would also be acceptable. The pull-up resistors that you
|
||||
place (in such a mod) on the CH341A are only useful if you also want to flash
|
||||
chips in the ZIF socket. If pull-up resistors exist both on e.g. the laptop
|
||||
mainboard and on the CH341A, it just means the equivalent series resistance
|
||||
motherboard and on the CH341A, it just means the equivalent series resistance
|
||||
will be of the two resistors (on each line) in parallel. If we assume that
|
||||
a laptop is likely to have a resistor size of ~3.3k for pull-ups, then a value
|
||||
of ~5.6k ohms on the CH341A side seems reasonable.
|
||||
|
|
@ -193,10 +273,71 @@ resistors) performed, on the black CH341A:\
|
|||
<img tabindex=1 src="https://av.libreboot.org/ch341a/0001_th.jpg" /><span class="f"><img src="https://av.libreboot.org/ch341a/0001.jpg" /></span>
|
||||
|
||||
The green version (not shown above) may come with 3.3v logic already wired, but
|
||||
still needs to have pull-up resistors placed for WP/HOLD.
|
||||
still needs to have pull-up resistors placed for WP/HOLD. Some of them may have
|
||||
switchable voltage instead, via a physical toggle on the board.
|
||||
|
||||
Disclaimer: A few (not many, but wily) people have criticised this section of the
|
||||
documentation, due to a misconception about what it really means and also because
|
||||
this section was previously very poorly written. So to be clear:
|
||||
|
||||
Yes, we are quite well aware that the CH341A can in fact operate at 3.3v,
|
||||
even unmodified black models; the VCC line is 3.3v, and if when you either
|
||||
directly wire VCC to WP/HOLD pins yourself, or a pull-up resistor on the
|
||||
motherboard you're flashing pulls these high at 3.3v, then the logic levels
|
||||
on the data lines do in fact switch to 3V *during an erase, read or write cycle*.
|
||||
When no flashing operation is underway, the data lines are outputting at almost
|
||||
negligable current, so the actual amount of heat generated will be negligable,
|
||||
and therefore damage is unlikely. However, as stated above and as we will state
|
||||
again:
|
||||
|
||||
* This is bad electrical design. The CH341A can switch flexibly between 3V
|
||||
and 5V operation, but most flashes today are 1.8V or 3V anyway, and there are
|
||||
all kinds of scenarios (such as over-current or surge event) where this 5V
|
||||
idle logic level could still be applied. Modifying your CH341a to 3.3v
|
||||
only, as defined in the datasheet (and by this page) is highly recommended.
|
||||
* The drive level is extremely poor anyway, on CH341a, making ISP-based
|
||||
flashing ill advisable in many cases, such as where the PCH (Intel platforms)
|
||||
is partly active and the data lines have lower resistance, because some
|
||||
boards have 0ohms or very low resistance on these lines.
|
||||
* No pull-ups on the WP/hold lines, when flashing in the socket; they are high
|
||||
via 0ohm trace to VCC, whereas you are advised to use a pull-up resistor to
|
||||
mitigate over-current events.
|
||||
* Crap LDO on the board, and no ESD/overcurrent protection; the CH341a probably
|
||||
can't provide much current on the VCC line, especially for ISP-based flashing
|
||||
where the flash shares a common power rail with many other components.
|
||||
|
||||
CH341a is cheap junk. Get yourself a Raspberry Pi Pico instead; it's about the
|
||||
same price, but of much higher quality from an electrical design perspective,
|
||||
supports much higher (12mA!) drive levels on data lines, can control multiple
|
||||
chip selects at once; it's just better, in every way. And the Raspberry Pi is
|
||||
completely reprogrammable, so you can use it for something else when you're
|
||||
done, e.g. UART dongle, or if you're wily enough, [PlayStation 1 Optical Disc
|
||||
Emulator](https://github.com/paulocode/picostation) - the Pico is simply a
|
||||
highly versatile tool, much better value for money.
|
||||
|
||||
There is only one instance where the CH341a is *good*, and that is when you're
|
||||
actually flashing a loose (not soldered) chip, in the ZIF socket on the CH341a
|
||||
board. It's a DIP-8 socket, and you can also buy WSON-8 and SOIC-8 or SOIC-16
|
||||
adapters for it; you can also plug a special adapter board into it that converts
|
||||
the voltages (VCC and data lines) to 1.8V, for 1.8V flashes (you could also
|
||||
use that same 1.8V adapter circuit in a breadboard wired to your Pico). On
|
||||
socket-based flashing, *which is specifically what the CH341a was designed
|
||||
for*, you don't have to worry about weak drive level because there is nothing
|
||||
contending with it on the flash IC's data pins.
|
||||
|
||||
The *socket-based* flashing operation is what we recommend this programmer
|
||||
for, *only if you already have one*. We still recommend fixing the issue with
|
||||
the WP/HOLD pins as described above; if you're doing this, note that there are
|
||||
also newer models that have a voltage switch and logic level shifter already
|
||||
on the board, which can be very useful. *Clip-based* flashing (ISP / in-system
|
||||
programming) is, specifically, what we advise against using the CH341a for.
|
||||
|
||||
Why pay $10 for a CH341a when you can pay $10 for a Raspberry Pi Pico which is
|
||||
electrically and functionally superior in every way? And the Pico is completely
|
||||
open source, right down to the boot rom.
|
||||
|
||||
Identify which flash type you have
|
||||
==================================
|
||||
----------------------------------
|
||||
|
||||
In all of them, a dot or marking shows pin 1 (in the case of WSON8, pad 1).
|
||||
|
||||
|
|
@ -204,8 +345,7 @@ Use the following photos and then look at your board. When you've figured out
|
|||
what type of chip you have, use that knowledge and the rest of this guide, to
|
||||
accomplish your goal, which is to read from and/or write to the boot flash.
|
||||
|
||||
SOIC8
|
||||
-----
|
||||
### SOIC8
|
||||
|
||||

|
||||
|
||||
|
|
@ -220,8 +360,7 @@ SOIC8
|
|||
| 7 | HOLD |
|
||||
| 8 | VCC |
|
||||
|
||||
SOIC16
|
||||
------
|
||||
### SOIC16
|
||||
|
||||
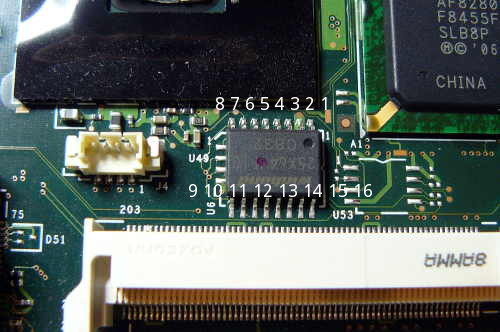
|
||||
|
||||
|
|
@ -238,8 +377,7 @@ SOIC16
|
|||
|
||||
SOIC8 and SOIC16 are the most common types, but there are others:
|
||||
|
||||
WSON8
|
||||
-----
|
||||
### WSON8
|
||||
|
||||
It will be like this on an X200S or X200 Tablet:\
|
||||
|
||||
|
|
@ -250,15 +388,13 @@ On T400S, it is in this location near the RAM:\
|
|||
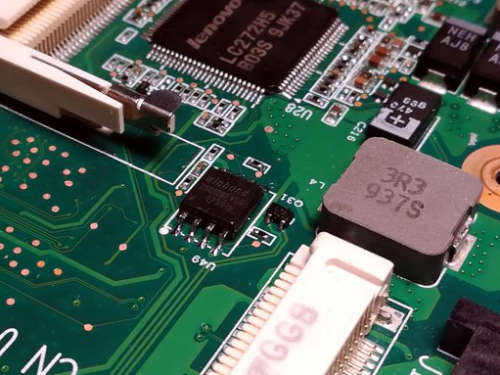\
|
||||
NOTE: in this photo, the chip has been replaced with SOIC8.
|
||||
|
||||
DIP8
|
||||
----
|
||||
### DIP8
|
||||
|
||||
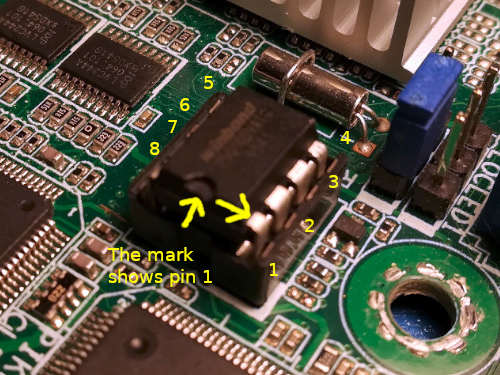
|
||||
|
||||
Pinout is the same as SOIC8 above.
|
||||
|
||||
Supply Voltage
|
||||
--------------
|
||||
### Supply Voltage
|
||||
|
||||
Historically, all boards that Libreboot supports happened to have SPI NOR chips
|
||||
which work at 3.3V DC. With the recent addition of Chromebooks whose chips are
|
||||
|
|
@ -271,18 +407,16 @@ connect it to the chip through an adapter or logic level converter, never
|
|||
directly.
|
||||
|
||||
Software configuration
|
||||
======================
|
||||
----------------------
|
||||
|
||||
General/Le potato
|
||||
-----------------
|
||||
### General/Le potato
|
||||
|
||||
The [generic guide](spi_generic.md) is intended to help those looking to use an
|
||||
SBC which is not listed in this guide.
|
||||
The guide will, however, use the libre computer 'Le Potato' as a reference board.
|
||||
If you have that board, you should refer to the [generic guide.](spi_generic.md)
|
||||
|
||||
BeagleBone Black (BBB)
|
||||
----------------------
|
||||
### BeagleBone Black (BBB)
|
||||
|
||||
SSH into your BeagleBone Black. It is assumed that you are running Debian 9 on
|
||||
your BBB. You will run `flashprog` from your BBB.
|
||||
|
|
@ -344,8 +478,7 @@ Note: flashprog can never write if the flash chip isn't found automatically.
|
|||
This means that it's working (the clip isn't connected to any flash
|
||||
chip, so the error is fine).
|
||||
|
||||
Caution about BBB
|
||||
-----------------
|
||||
### Caution about BBB
|
||||
|
||||
BeagleBone Black is not recommended, because it's very slow and unstable for
|
||||
SPI flashing, and nowadays much better options exist. We used to mainly
|
||||
|
|
@ -354,8 +487,7 @@ Software on it, but nowadays there are superior options.
|
|||
|
||||
TODO: document other SPI flashers
|
||||
|
||||
Rasberry Pi (RPi)
|
||||
-----------------
|
||||
### Rasberry Pi (RPi)
|
||||
|
||||
SSH into your Raspberry Pi. You will run `flashprog` from your Raspberry Pi.
|
||||
|
||||
|
|
@ -374,9 +506,9 @@ Under the Interface section, you can enable SPI.
|
|||
|
||||
The device for communicating via SPI as at `/dev/spidev0.0`
|
||||
|
||||
RPi Drive Strength
|
||||
------------------
|
||||
Flashrom on the RPi may not be able to detect the SPI flash chip on some
|
||||
### RPi Drive Strength
|
||||
|
||||
Flashprog on the RPi may not be able to detect the SPI flash chip on some
|
||||
systems, even if your wiring and clip are set up perfectly. This may be due to
|
||||
the drive strength of the Raspberry Pi GPIOs, which is 8mA by default. Drive
|
||||
strength is essentially the maximum current the pin can output while also
|
||||
|
|
@ -432,8 +564,7 @@ See
|
|||
<https://www.raspberrypi.com/documentation/computers/raspberry-pi.html#gpio-pads-control>
|
||||
for more information about the drive strength control on the Pi.
|
||||
|
||||
Caution about RPi
|
||||
-----------------
|
||||
### Caution about RPi
|
||||
|
||||
Basically, the Raspbian project, now called Raspberry Pi OS, put in their repo
|
||||
an update that added a new "trusted" repository, which just so happened to be
|
||||
|
|
@ -453,8 +584,7 @@ They then removed it, after a public backlash, via the following commits:
|
|||
* <https://github.com/RPi-Distro/raspberrypi-sys-mods/commit/ed96790e6de281bc393b575c38aa8071ce39b555>
|
||||
* <https://github.com/RPi-Distro/raspberrypi-sys-mods/commit/4d1afece91008f3787495b520ac03b53fef754c6>
|
||||
|
||||
Libre firmware on RPi
|
||||
---------------------
|
||||
### Libre firmware on RPi
|
||||
|
||||
The boot firmware on older Raspberry Pi models can be replaced, with entirely
|
||||
libre firmware. This may be a useful additional step, for some users. See:
|
||||
|
|
@ -465,12 +595,11 @@ Website:
|
|||
|
||||
<https://librerpi.github.io/>
|
||||
|
||||
Install flashprog
|
||||
----------------
|
||||
### Install flashprog
|
||||
|
||||
If you're using a BBB or RPi, you will do this while SSH'd into those.
|
||||
|
||||
Flashrom is the software that you will use, for dumping, erasing and rewriting
|
||||
Flashprog is the software that you will use, for dumping, erasing and rewriting
|
||||
the contents of your NOR flash.
|
||||
|
||||
In the libreboot build system, from the Git repository, you can download and
|
||||
|
|
@ -499,7 +628,7 @@ for use on x86-64 systems running Ubuntu 20.04, but it should work in Raspbian
|
|||
on the Raspberry Pi.
|
||||
|
||||
Alternatively, you may download flashprog directly from upstream
|
||||
at <https://flashprog.org/Flashrom>
|
||||
at <https://flashprog.org/Flashprog>
|
||||
|
||||
If you're flashing a Macronix flashchip on a ThinkPad X200, you will want to
|
||||
use a special patched version of flashprog, which you can download here:
|
||||
|
|
@ -514,13 +643,12 @@ at `config/dependencies/` which you can install
|
|||
using the `apt-get` software.
|
||||
|
||||
How to use flashprog
|
||||
===================
|
||||
--------------------
|
||||
|
||||
Read past these sections, further down this page, to learn about specific chip
|
||||
types and how to wire them.
|
||||
|
||||
Reading
|
||||
-------
|
||||
### Reading
|
||||
|
||||
Before flashing a new ROM image, it is highly advisable that you dump the
|
||||
current chip contents to a file.
|
||||
|
|
@ -580,8 +708,7 @@ You can combine both flashes together with `cat` for example:
|
|||
Note that you will need this combined rom if you intend to manually extract vendor
|
||||
files, which is a method not officially supported by Libreboot's build system.
|
||||
|
||||
Writing
|
||||
-------
|
||||
### Writing
|
||||
|
||||
Next, run this command (RPi):
|
||||
|
||||
|
|
@ -617,15 +744,13 @@ For example, to split a rom for the x230, t430, t530, or t440p run:
|
|||
|
||||
Flash the resulting roms to each of their respective chips according to the above instructions.
|
||||
|
||||
|
||||
Hardware configuration
|
||||
======================
|
||||
----------------------
|
||||
|
||||
Refer to the above guidance about software configuration. The following advice
|
||||
will teach you how to wire each type of flash chip.
|
||||
|
||||
WARNINGS
|
||||
--------
|
||||
### WARNINGS
|
||||
|
||||
Do not connect the power source until your chip is otherwise properly
|
||||
wired. For instance, do not connect a test clip that has power attached.
|
||||
|
|
@ -648,24 +773,22 @@ voltage range is between 2.7V and 3.6V, but 3.3V is the most ideal level).
|
|||
|
||||
DO NOT connect more than 1 DC power source to your flash chip either!
|
||||
Mixing voltages like that can easily cause damage to your equipment, and to
|
||||
your chip/mainboard.
|
||||
your chip/motherboard.
|
||||
|
||||
MISO/MOSI/CS/CLK lines
|
||||
----------------------
|
||||
### MISO/MOSI/CS/CLK lines
|
||||
|
||||
You may want to add 47ohm series resistors on these lines, when flashing the
|
||||
chips. Only do it on those lines (NOT the VCC or GND lines). This provides
|
||||
some protection from over-current. On Intel platforms, the SPI flash is usually
|
||||
connected via such resistors, directly to the Southbridge chipset.
|
||||
|
||||
ISP programming and VCC diode
|
||||
-----------------------------
|
||||
### ISP programming and VCC diode
|
||||
|
||||
ISP means in-system programming. It's when you flash a chip that is already
|
||||
mounted to the mainboard of your computer that you wish to install libreboot
|
||||
mounted to the motherboard of your computer that you wish to install libreboot
|
||||
on.
|
||||
|
||||
It may be beneficial to modify the mainboard so that the SPI flash is powered
|
||||
It may be beneficial to modify the motherboard so that the SPI flash is powered
|
||||
(on the VCC pin) through a diode, but please note: a diode will cause a voltage
|
||||
drop. The tolerated range for a chip expecting 3.3V VCC is usually around 2.7V
|
||||
to 3.6V DC, and the drop may cause the voltage to fall outside that. If you do
|
||||
|
|
@ -685,7 +808,7 @@ other components on that board, which share the same power rail. Further,
|
|||
ensure that the pull-up resistors for WP/HOLD are *only* connected to the side
|
||||
of the diode that has continuity with the VCC pin (this is important because if
|
||||
they're not, they won't be held high while doing ISP flashing, even if they're
|
||||
still held high when the mainboard is fully powered on).
|
||||
still held high when the motherboard is fully powered on).
|
||||
|
||||
Furthermore: ensure that the SPI flash is operating at the appropriate supply
|
||||
voltage (2.7V to 3.6V for a 3.3V chip) when fully powered on, after installing
|
||||
|
|
@ -696,11 +819,10 @@ the SOIC8/WSON8 if it uses that, and replace with an IC socket (for SOIC8,
|
|||
WSON8 or DIP8, whatever you want), because then you could easily just insert
|
||||
the flash into a breadboard when flashing.
|
||||
|
||||
TODO: Make a page on libreboot.org, showing how to do this on all mainboards
|
||||
TODO: Make a page on libreboot.org, showing how to do this on all motherboards
|
||||
supported by libreboot.
|
||||
|
||||
GPIO pins on BeagleBone Black (BBB)
|
||||
-----------------------------------
|
||||
### GPIO pins on BeagleBone Black (BBB)
|
||||
|
||||
Use this image for reference when connecting the pomona to the BBB:
|
||||
<https://beagleboard.org/Support/bone101#headers> (D0 = MISO or connects
|
||||
|
|
@ -709,8 +831,7 @@ to MISO).
|
|||
On that page, look at the *P9 header*. It is what you will use to wire up your
|
||||
chip for flashing.
|
||||
|
||||
GPIO pins on Raspberry Pi (RPi) 40 Pin
|
||||
--------------------------------------
|
||||
### GPIO pins on Raspberry Pi (RPi) 40 Pin
|
||||
|
||||
This diagram shows the pinout for most modern Pi's and Pi derivatives.
|
||||
The diagram shows the pins of an RPi on the left and the two SOIC clips
|
||||
|
|
@ -718,8 +839,7 @@ on the left.
|
|||
|
||||
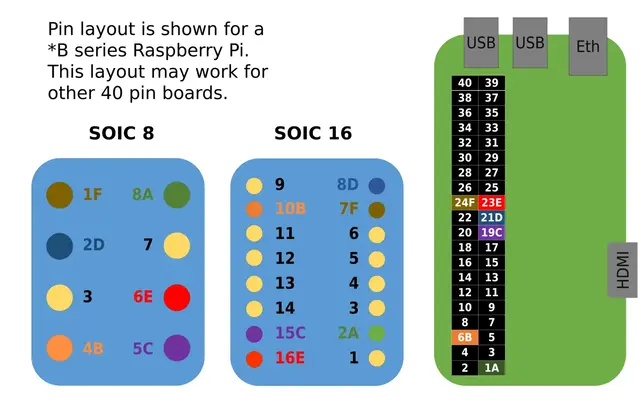
|
||||
|
||||
GPIO pins on Raspberry Pi (RPi) 26 Pin
|
||||
-------------------------------
|
||||
### GPIO pins on Raspberry Pi (RPi) 26 Pin
|
||||
|
||||
Diagram of the 26 GPIO Pins of the Raspberry Pi Model B (for the Model
|
||||
B+ with 40 pins, start counting from the right and leave 14 pins):
|
||||
|
|
@ -728,8 +848,7 @@ B+ with 40 pins, start counting from the right and leave 14 pins):
|
|||
|
||||
Use this as a reference for the other sections in this page, seen below:
|
||||
|
||||
SOIC8/DIP8/WSON8 wiring diagram
|
||||
-------------------------------
|
||||
### SOIC8/DIP8/WSON8 wiring diagram
|
||||
|
||||
Refer to this diagram:
|
||||
|
||||
|
|
@ -751,13 +870,12 @@ use pull-up resistors on those (see notes below), and decoupling capacitor on
|
|||
pin 8 (VCC).
|
||||
|
||||
NOTE: On X60/T60 thinkpads, don't connect pin 8. Instead, plug in your the PSU
|
||||
to the charging port on your mainboard, but do not power on the mainboard. This
|
||||
to the charging port on your motherboard, but do not power on the motherboard. This
|
||||
will provide a stable 3.3V voltage, with adequate current levels. On those
|
||||
laptops, this is necessary because the flash shares a common 3.3V DC rail with
|
||||
many other ICs that all draw quite a lot of current.
|
||||
|
||||
SOIC16 wiring diagram (Raspberry Pi)
|
||||
------------------------------------
|
||||
### SOIC16 wiring diagram (Raspberry Pi)
|
||||
|
||||
RPi GPIO header:\
|
||||
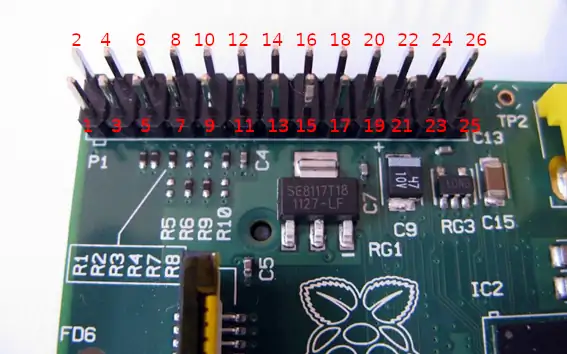
|
||||
|
|
@ -795,14 +913,13 @@ NOTE: pins 1 and 9 are WP/HOLD pins. If flashing a chip on a breadboard, please
|
|||
use pull-up resistors on those (see notes below), and decoupling capacitor on
|
||||
pin 2 (VCC).
|
||||
|
||||
Pull-up resistors and decoupling capacitors
|
||||
-------------------------------------------
|
||||
### Pull-up resistors and decoupling capacitors
|
||||
|
||||
**Do this for chips mounted to a breadboard. Ignore this section if you're
|
||||
flashing a chip that is already soldered to a mainboard.**
|
||||
flashing a chip that is already soldered to a motherboard.**
|
||||
|
||||
This section is only relevant if you're flashing a new chip that is not yet
|
||||
mounted to a mainboard. You need pull-up resistors on the WP and HOLD pins,
|
||||
mounted to a motherboard. You need pull-up resistors on the WP and HOLD pins,
|
||||
and decoupling capacitors on the VCC pin. If the chip is already mounted to a
|
||||
board, whether soldered or in a socket, these capacitors and resistors will
|
||||
probably already exist on the board and you can just flash it without pulling
|
||||
|
|
@ -819,11 +936,11 @@ The best way is as follows:
|
|||
SOIC8/WSON8/DIP8: pin 3 and 7 must be held to a high logic state, which means
|
||||
that each pin has its own pull-up resistor to VCC (from the voltage plane that
|
||||
pin 8 connects to); anything from 1Kohm to 10Kohm will do. When you're flashing
|
||||
a chip that's already on a laptop/desktop/server mainboard, pin 3 and 7 are
|
||||
a chip that's already on a laptop/desktop/server motherboard, pin 3 and 7 are
|
||||
likely already held high, so you don't need to bother.
|
||||
|
||||
SOIC8/WSON8/DIP8: pin 8, which is VCC, will already have decoupling capacitors on it
|
||||
if the chip is on a mainboard, but lone chip flashing means that these capacitors
|
||||
if the chip is on a motherboard, but lone chip flashing means that these capacitors
|
||||
do not exist. A capacitor passes AC but blocks DC. Due to electromagnetic
|
||||
indunctance, and RF noise from high-speed switching ICs, a DC voltage line isn't
|
||||
actually straight (when viewed on an oscilloscope), but actually has low voltage
|
||||
|
|
@ -844,12 +961,11 @@ WP/HOLD are not pin 3/7 like above, but instead pins 1 and 9, so wire your
|
|||
pull-up resistors on those. VCC on SOIC16 is pin 2, so wire your decoupling
|
||||
capacitors up on that.
|
||||
|
||||
SOIC8/WSON8/DIP8/SOIC16 not mounted to a mainboard
|
||||
--------------------------------------------------
|
||||
### SOIC8/WSON8/DIP8/SOIC16 not mounted to a motherboard
|
||||
|
||||
If your system has lower capacity SPI flash, you can upgrade. On *most* systems,
|
||||
SPI flash is memory mapped and the maximum (in practise) that you can use is a
|
||||
16MiB chip. For example, KGPE-D16 and KCMA-D8 mainboards in libreboot have
|
||||
16MiB chip. For example, KGPE-D16 and KCMA-D8 motherboards in libreboot have
|
||||
2MiB flash by default, but you can easily upgrade these. Another example is the
|
||||
ThinkPad X200S, X200 Tablet and T400S, all of which have WSON8 where the best
|
||||
course of action is to replace it with a SOIC8 flash chip.
|
||||
|
|
@ -886,7 +1002,7 @@ video, but for WSON8. Sometimes they are called DFN8 or QFN8 sockets. Get one
|
|||
that is 1.27mm pitch.
|
||||
|
||||
If you're flashing/dumping a lone WSON8, get a WSON8/QFN8/DFN8 socket (1.27mm
|
||||
pitch) and mount it to a breadboard for flashing. If your mainboard's landing
|
||||
pitch) and mount it to a breadboard for flashing. If your motherboard's landing
|
||||
pads for the flash IC can take a SOIC8, we recommend that you use a SOIC8
|
||||
instead because a test clip is possible later on when you wish to re-flash it,
|
||||
however you may be dealing with a board where replacing existing WSON8 with
|
||||
|
|
@ -917,8 +1033,7 @@ and good 60/40 or 63/37 leaded solder (don't use lead-free):
|
|||
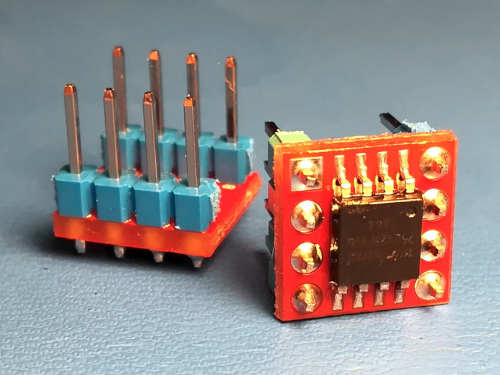
|
||||
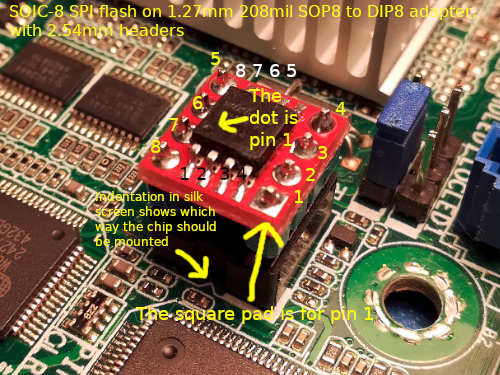
|
||||
|
||||
SOIC8/SOIC16 soldered to a mainboard
|
||||
------------------------------------
|
||||
### SOIC8/SOIC16 soldered to a motherboard
|
||||
|
||||
This is an example of *in-system programming* or *ISP* for short.
|
||||
|
||||
|
|
@ -926,16 +1041,16 @@ SOIC8:\
|
|||
Pomona 5250 is a SOIC8 test clip. There are others available, but this is the
|
||||
best one. Use that. Use the SOIC8 diagram (see above) to wire up your Raspberry
|
||||
Pi.
|
||||
Your mainboard likely already pulls WP/HOLD (pins 3 and 7) high, so don't
|
||||
Your motherboard likely already pulls WP/HOLD (pins 3 and 7) high, so don't
|
||||
connect these. VCC on SOIC8's pin 8 probably already has decoupling
|
||||
capacitors on the mainboard, so just hook that up without using a capacitor.
|
||||
capacitors on the motherboard, so just hook that up without using a capacitor.
|
||||
|
||||
SOIC16:\
|
||||
Pomona 5252 is a SOIC16 test clip. There are others available, but this is the
|
||||
best one. Use that. Use the SOIC16 diagram (see above) to wire up your Raspberry
|
||||
Pi. WP/HOLD pins are pins 1 and 9, and likely already held high, so no pull-up
|
||||
resistors needed. You do not need a decoupling capacitor for pin 2 (VCC) either
|
||||
because the mainboard will already have one.
|
||||
because the motherboard will already have one.
|
||||
|
||||
Here is an example of a test clip connected for SOIC16:\
|
||||
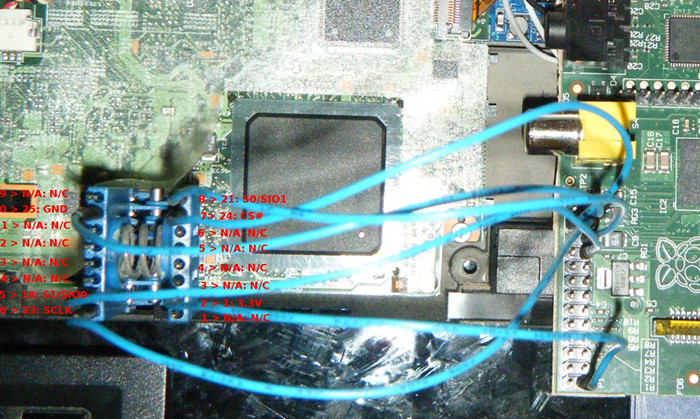
|
||||
|
|
@ -943,10 +1058,9 @@ Here is an example of a test clip connected for SOIC16:\
|
|||
And here is an example photo for SOIC8:\
|
||||
|
||||
|
||||
DIP8 soldered to the mainboard
|
||||
------------------------------
|
||||
### DIP8 soldered to the motherboard
|
||||
|
||||
It is extremely cursed for DIP8 to be soldered directly to the mainboard. It is
|
||||
It is extremely cursed for DIP8 to be soldered directly to the motherboard. It is
|
||||
usually mounted to a socket.
|
||||
|
||||
The pins are large enough that you can just use test hooks to wire up your chip
|
||||
|
|
@ -959,8 +1073,7 @@ directly soldered. It is almost always mounted in a socket.
|
|||
|
||||
Your DIP8 IC has the same pinout as a SOIC8 IC.
|
||||
|
||||
Replace WSON8 IC with SOIC8
|
||||
---------------------------
|
||||
### Replace WSON8 IC with SOIC8
|
||||
|
||||
**NOTE: You can alternatively purchase WSON8 probes from a site like Aliexpress.
|
||||
They look similar to SOIC8 clips, and they work similarly.**
|
||||
|
|
@ -1075,7 +1188,7 @@ evaporates quickly and it does not leave a corrosive residue.
|
|||
-------------------------------------------------------------------------------
|
||||
|
||||
LICENSING
|
||||
=========
|
||||
---------
|
||||
|
||||
This page is released under different copyright terms than most other pages
|
||||
on this website.
|
||||
|
|
|
|||
|
|
@ -0,0 +1 @@
|
|||
Learn how to install Libreboot free/opensource BIOS/UEFI boot firmware by way of external flashing, using compatible 25xx NOR programmer (SPI flasher).
|
||||
|
|
@ -4,7 +4,7 @@ x-toc-enable: true
|
|||
...
|
||||
|
||||
Need help?
|
||||
==========
|
||||
----------
|
||||
|
||||
Help is available on [Libreboot IRC](../../contact.md) and other channels.
|
||||
|
||||
|
|
@ -16,18 +16,18 @@ if you want to send your machine in to have Libreboot installed for you.
|
|||
Leah Rowe, the founder and lead developer of Libreboot, also owns and
|
||||
operates Minifree Ltd; sales provide funding for the Libreboot project.
|
||||
|
||||
Introduction
|
||||
============
|
||||
Install open source BIOS/UEFI firmware
|
||||
------------
|
||||
|
||||
**[安装之前请先阅读这些指示](../../news/safety.md),否则你的机器可能会成砖:[安全措施](../../news/safety.md)**
|
||||
**[安装之前请先阅读这些指示](ivy_has_common.md),否则你的机器可能会成砖:[安全措施](ivy_has_common.md)**
|
||||
|
||||
本指南将教你怎样使用各种工具,通过 SPI 协议对 25xx NOR flash 进行外部再编程。这是 coreboot 所支持的计算机中,最常见的 flash IC 类型。目前 libreboot 支持的每个系统,基本都使用这种类型的引导 flash;唯一的例外就是 ASUS KFSN4-DRE,它在 PLCC32 芯片座中使用了 LPC flash,你可以在供应商固件启动后,对其进行热切换,然后再内部刷入。十分简单!
|
||||
|
||||
我们会用到 [flashprog](https://flashprog.org/Flashrom) 软件,这个软件可以读出、擦除及重写这些 flash 芯片。
|
||||
我们会用到 [flashprog](https://flashprog.org/) 软件,这个软件可以读出、擦除及重写这些 flash 芯片。
|
||||
|
||||
libreboot 目前记录了这些 SPI 编程器的使用方法:
|
||||
|
||||
* Raspberry Pi Pico
|
||||
* Raspberry Pi Pico / Pico 2
|
||||
* 树莓派(Raspberry Pi,RPi)
|
||||
* BeagleBone Black(BBB)
|
||||
* Libre Computer 'Le Potato'
|
||||
|
|
@ -41,7 +41,16 @@ libreboot 目前记录了这些 SPI 编程器的使用方法:
|
|||
你在读的*这个*教程,使用的是*外部*编程器。之所以叫*外部*,是因为用的不是主板上的*内部*编程器。
|
||||
|
||||
Raspberry Pi Pico
|
||||
=================
|
||||
-----------------
|
||||
|
||||
### RP2040/RP2530 both supported
|
||||
|
||||
**Pico 2 and other RP2530 dongles also supported, on Libreboot 20241206 rev8
|
||||
or higher. Releases before this only supported the original Pico, and other
|
||||
RP2040 dongles; newer Libreboot releases now support both RP2040 and RP2530.**
|
||||
|
||||
The pinout on Raspberry Pi Pico and Raspberry Pi Pico 2 are identical, but you
|
||||
must take care to flash the correct image on either device.
|
||||
|
||||

|
||||
|
||||
|
|
@ -52,21 +61,26 @@ Additionally, all the software running on it is free, down to the full
|
|||
versions (Pico W & Pico WH) need vendor firmware to use the Wi-Fi chip,
|
||||
but that is not needed for following this guide.
|
||||
|
||||
A Pico has proper 3.3V logic levels, unlike a ch341a. Which means it won't
|
||||
destroy your board by sending 5V to it. If you have a 1.8V flash chip,
|
||||
you need to add a logic level converter.
|
||||
### Download serprog firmware pre-compiled
|
||||
|
||||
First, connect just the Pico to your computer with a micro-USB cable.
|
||||
Mount it like any other USB flash drive. If it isn't detected, you might need
|
||||
to press the BOOTSEL button while you plug it in (this forces it into the
|
||||
bootloader mode).
|
||||
Download the pico serprog tarball from Libreboot releases. For example, the
|
||||
Libreboot 20241206rev8 one would be
|
||||
named: `libreboot-20241206rev8_pico_serprog.tar.xz` - it's available under
|
||||
the `roms/` directory in each release. With these binaries, you can easily
|
||||
get started.
|
||||
|
||||
You can download the serprog firmware here:\
|
||||
### Build serprog firmware from source
|
||||
|
||||
You can alternatively download the serprog firmware here:\
|
||||
<https://codeberg.org/libreboot/pico-serprog>\
|
||||
or here:\
|
||||
<https://notabug.org/libreboot/pico-serprog>
|
||||
|
||||
Copy the file `rpi-pico-serprog.uf2` into your Pico. To build this firmware, you
|
||||
You can also find the source code for these, under `src/` in Libreboot release
|
||||
archives (source code tarball), and/or under `src/` in `lbmk.git` if downloading
|
||||
using the build instructions below.
|
||||
|
||||
Alternatively to the binaries, you
|
||||
could build it yourself or you could also clone `lbmk.git` and [install build
|
||||
dependencies](../build/#first-install-build-dependencies), then inside lbmk,
|
||||
do:
|
||||
|
|
@ -74,15 +88,49 @@ do:
|
|||
./mk -b pico-serprog
|
||||
|
||||
This will automatically build the rpi-pico firmware, and the file will be
|
||||
at `bin/serprog_rp2040/serprog_pico.uf2`
|
||||
and `bin/serprog_rp2040/serprog_pico_w.uf2`.
|
||||
at `bin/serprog_pico/serprog_pico.uf2`
|
||||
and `bin/serprog_pico/serprog_pico_w.uf2` - images with `pico2` in the
|
||||
file name are for the Pico 2, and they can also be used.
|
||||
|
||||
### Install the serprog firmware
|
||||
|
||||
First, connect just the Pico to your computer with a micro-USB cable.
|
||||
Mount it like any other USB flash drive. If it isn't detected, you might need
|
||||
to press the BOOTSEL button while you plug it in (this forces it into the
|
||||
bootloader mode).
|
||||
|
||||
When you have the build, or if you're using a release build, copy the
|
||||
file `.uf2` file into your Pico. You must make sure to build the correct
|
||||
target, or otherwise copy the correct file, because many RP2040 and RP2530
|
||||
devices exist and Libreboot provides images for **all of them** in the same
|
||||
release tarball.
|
||||
|
||||
**NOTE: Other RP2040/2530 devices will also work. You just have to match
|
||||
the right pins and use the correct firmware file!**
|
||||
|
||||
### Logic levels
|
||||
|
||||
A Pico has proper 3.3V logic levels, unlike a ch341a. Which means it won't
|
||||
destroy your board by sending 5V to it. If you have a 1.8V flash chip,
|
||||
you need to add a logic level converter. **Please ensure that you have matched
|
||||
the voltage of your programmer to the voltage of your chip; both the data lines
|
||||
and power lines to the chip must match.**
|
||||
|
||||
### Wiring
|
||||
|
||||
Disconnect the Pico and proceed to wire it to your
|
||||
[flash chip](/docs/install/spi.html#identify-which-flash-type-you-have).
|
||||
|
||||
|
||||
**NOTE: SCK and CLK mean the same thing. The diagram below says SCK, and other
|
||||
parts of this guide say CLK. It's the same thing!**
|
||||
|
||||

|
||||

|
||||
|
||||

|
||||
|
||||

|
||||
|
||||
Headers were manually soldered on the top side, and the plastic packaging
|
||||
was repurposed as an insulating base. These might be nice to have, but by no
|
||||
|
|
@ -94,7 +142,7 @@ will appear:
|
|||
|
||||
[453876.669019] cdc_acm 2-1.2:1.0: ttyACMx: USB ACM device
|
||||
|
||||
Take note of the ttyACMx. Flashrom is now usable
|
||||
Take note of the ttyACMx. Flashprog is now usable
|
||||
(substitute ttyACMx with what you observed earlier).
|
||||
|
||||
flashprog -p serprog:dev=/dev/ttyACMx,spispeed=16M
|
||||
|
|
@ -102,8 +150,10 @@ Take note of the ttyACMx. Flashrom is now usable
|
|||
spispeed=32M usually works, but since it's not much faster it's probably
|
||||
not worth it. The 12Mbps USB port is limiting the actual speed here.
|
||||
|
||||
Higher speeds might work nicely, on Pico 2.
|
||||
|
||||
不要使用 CH341A!
|
||||
==================
|
||||
----------------
|
||||
|
||||
libreboot 支持的机器,NOR flash 使用的是 3.3V DC 或 1.8V DC,这也包括了数据线路。CH341A 在数据线路上有 5V 逻辑电平,这会损伤 SPI flash 和它连接的南桥,以及它连接的其它任何东西。
|
||||
|
||||
|
|
@ -134,26 +184,23 @@ libreboot 支持的机器,NOR flash 使用的是 3.3V DC 或 1.8V DC,这也
|
|||
绿色版本(上面未展示)可能已经连接了 3.3v 逻辑电平,但仍然需要为 WP/HOLD 增加上拉电阻。
|
||||
|
||||
识别你的 flash 类型
|
||||
==================================
|
||||
-------------------
|
||||
|
||||
每一个 flash,都会有一个点或者标记,表明这是第 1 引脚(如 WSON8 的第 1 焊盘)。
|
||||
|
||||
参考下面的图片,再看看你的主板。搞清楚你的芯片类型之后,根据你了解的情况及本教程剩下的部分,来实现你的目标,即对你的引导 flash 进行读/写。
|
||||
|
||||
SOIC8
|
||||
-----
|
||||
### SOIC8
|
||||
|
||||

|
||||
|
||||
SOIC16
|
||||
------
|
||||
### SOIC16
|
||||
|
||||

|
||||
|
||||
SOIC8 和 SOIC16 是最常见的类型,但也有其他的类型:
|
||||
|
||||
WSON8
|
||||
-----
|
||||
### WSON8
|
||||
|
||||
X200S 或 X200 Tablet 上是像这样的:\
|
||||
|
||||
|
|
@ -162,28 +209,24 @@ T400S 上,是在 RAM 附近的这个位置:\
|
|||
\
|
||||
注意: 本照片中的芯片换成了 SOIC8
|
||||
|
||||
DIP8
|
||||
----
|
||||
### DIP8
|
||||
|
||||

|
||||
|
||||
电源电压
|
||||
--------------
|
||||
### 电源电压
|
||||
|
||||
之前,Libreboot 支持的所有主板,刚好都有在 3.3V DC 下工作的 SPI NOR 芯片。因为最近添加了额定 1.8V DC 芯片的 Chromebook,所以就不再是这么回事了。
|
||||
|
||||
检查主板上芯片的元件型号,再查找一下它的数据表。找出它需要的电源电压并记下来。如果它和你外部刷写硬件的输出电压不匹配,那你只能通过适配器或者逻辑电平转换器,把它连至芯片,而绝不能直接连接。
|
||||
|
||||
软件配置
|
||||
======================
|
||||
--------
|
||||
|
||||
通用/Le potato
|
||||
-----------------
|
||||
### 通用/Le potato
|
||||
|
||||
[通用指南](spi_generic.md)可以帮助你使用本指南未列出的 SBC(单板电脑)。不过,那份指南会使用 libre computer 'Le Potato' 作为参考板。如果你有那块板子,你应该参考 [通用指南](spi_generic.md)。
|
||||
|
||||
BeagleBone Black(BBB)
|
||||
----------------------
|
||||
### BeagleBone Black(BBB)
|
||||
|
||||
SSH 连接到你的 BeagleBone Black。假定你在 BBB 上用的是 Debian 9。你将在 BBB 上运行 `flashprog`。
|
||||
|
||||
|
|
@ -240,15 +283,13 @@ Note: flashprog can never write if the flash chip isn't found automatically.
|
|||
|
||||
这表示正常工作了(夹子没连接任何 flash 芯片,所以出错是正常的)。
|
||||
|
||||
BBB 注意事项
|
||||
-----------------
|
||||
### BBB 注意事项
|
||||
|
||||
不建议使用 BeagleBone Black,因为拿它来进行 SPI 刷写,速度很慢而且不稳定,并且现在有更好的选择了。我们以前建议使用 BBB,因为它可以完全运行自由软件,但现在有了更佳的选择。
|
||||
|
||||
计划:讲解其他 SPI 刷写工具
|
||||
|
||||
Rasberry Pi(RPi)
|
||||
-----------------
|
||||
### Rasberry Pi(RPi)
|
||||
|
||||
SSH 连接到树莓派。你将在树莓派上运行 `flashprog`。
|
||||
|
||||
|
|
@ -265,8 +306,7 @@ SSH 连接到树莓派。你将在树莓派上运行 `flashprog`。
|
|||
|
||||
用于 SPI 通讯的设备位于 `/dev/spidev0.0`。
|
||||
|
||||
RPi 驱动强度(Drive Strength)
|
||||
------------------
|
||||
### RPi 驱动强度(Drive Strength)
|
||||
|
||||
RPi 的 flashprog 可能无法检测到一些系统的 SPI flash,即使你已经完美地连好了线并夹住了芯片。这可能是因为树莓派 GPIO 的驱动强度,它默认是 8mA。驱动强度本质上就是,在保持高电平最低电压的同时,引脚最高能输出的电流。对树莓派而言,这个电压是 3.0 V。
|
||||
|
||||
|
|
@ -296,8 +336,7 @@ RPi 的 flashprog 可能无法检测到一些系统的 SPI flash,即使你已
|
|||
|
||||
见 <https://www.raspberrypi.com/documentation/computers/raspberry-pi.html#gpio-pads-control> 了解树莓派上的驱动强度控制。
|
||||
|
||||
RPi 注意事项
|
||||
-----------------
|
||||
### RPi 注意事项
|
||||
|
||||
基本上,Raspbian 项目,即现在的 Raspberry Pi OS,对其仓库进行了更新,增加了一个新的“受信任”仓库,这刚好是一个微软软件仓库。他们这么做,似乎是为了 VS Code,但问题在于,这可以让微软自由地控制他们喜欢的依赖(根据 apt-get 规则)。每当你更新,你都会对微软的服务器发送请求。不觉得这很奇怪吗?
|
||||
|
||||
|
|
@ -310,8 +349,7 @@ RPi 注意事项
|
|||
* <https://github.com/RPi-Distro/raspberrypi-sys-mods/commit/ed96790e6de281bc393b575c38aa8071ce39b555>
|
||||
* <https://github.com/RPi-Distro/raspberrypi-sys-mods/commit/4d1afece91008f3787495b520ac03b53fef754c6>
|
||||
|
||||
RPi 的自由固件
|
||||
---------------------
|
||||
### RPi 的自由固件
|
||||
|
||||
旧款树莓派的引导固件可以替换成完全自由的固件。对有些用户而言,这额外的一步可能很有用。参见:
|
||||
|
||||
|
|
@ -321,12 +359,11 @@ RPi 的自由固件
|
|||
|
||||
<https://librerpi.github.io/>
|
||||
|
||||
安装 flashprog
|
||||
----------------
|
||||
### 安装 flashprog
|
||||
|
||||
如果你在使用 BBB 或者 RPi,你需要在 SSH 进去之后再这么做。
|
||||
|
||||
Flashrom 是用来读出、擦除、重写 NOR flash 内容的软件。
|
||||
Flashprog 是用来读出、擦除、重写 NOR flash 内容的软件。
|
||||
|
||||
使用 Git 仓库中的 libreboot 构建系统,你可以下载并安装 flashprog。首先下载 [lbmk Git 仓库](https://codeberg.org/libreboot/lbmk),然后执行:
|
||||
|
||||
|
|
@ -341,19 +378,18 @@ Flashrom 是用来读出、擦除、重写 NOR flash 内容的软件。
|
|||
|
||||
接下来,会出现一个 `flashprog/` 目录,其中有一个 `flashprog` 可执行文件。如果你在运行上面的依赖命令的时候,出现了缺失包的错误,则修改 `config/dependencies/ubuntu2004`。那个脚本会在 apt-get 中下载并安装构建依赖,它是为运行 Ubuntu 的 x86-64 系统写的,但在树莓派上的 Raspbian 应该能用。
|
||||
|
||||
或者,你可以直接从上游下载 flashprog,位于:<https://flashprog.org/Flashrom>
|
||||
或者,你可以直接从上游下载 flashprog,位于:<https://flashprog.org/>
|
||||
|
||||
如果你是在 ThinkPad X200 上刷写 Macronix flash 芯片,则要使用一个 flashprog 的特别修改版,下载地址在这里:<https://vimuser.org/hackrom.tar.xz> —— 其中有修改版的源代码,也有可以直接运行的二进制文件。将 `--workaround-mx` 参数传给 flashprog。这会缓解稳定性问题。
|
||||
|
||||
如果你直接下载了 flashprog 源代码,你可以进入目录并直接运行 `make`。在 libreboot 构建系统中,`config/dependencies/` 处的脚本写明了构建依赖,你可以直接使用 `apt-get` 软件安装。
|
||||
|
||||
如何使用 flashprog
|
||||
===================
|
||||
------------------
|
||||
|
||||
请先阅读本页更下方的部分,了解特定的芯片类型及其接线方法。
|
||||
|
||||
读出
|
||||
-------
|
||||
### 读出
|
||||
|
||||
刷入新的 ROM 镜像之前,强烈建议你将当前芯片的内容读出到一个文件。
|
||||
|
||||
|
|
@ -393,8 +429,7 @@ BBB 的话,这样:
|
|||
|
||||
注意,如果你要手动提取 blob,那你就需要这个组合而成的 rom。
|
||||
|
||||
写入
|
||||
-------
|
||||
### 写入
|
||||
|
||||
接下来,运行这个命令(RPi):
|
||||
|
||||
|
|
@ -427,12 +462,11 @@ Verifying flash... VERIFIED.
|
|||
|
||||
|
||||
硬件配置
|
||||
======================
|
||||
--------
|
||||
|
||||
软件配置请参考上面的教程。下面的建议会教你如何为每种 flash 芯片接线。
|
||||
|
||||
警告
|
||||
--------
|
||||
### 警告
|
||||
|
||||
在芯片还没有正确接好线时,先不要连接电源。例如,不要连接到接通电源的测试夹。
|
||||
|
||||
|
|
@ -444,13 +478,11 @@ Verifying flash... VERIFIED.
|
|||
|
||||
也不要给你的 flash 芯片连接超过 1 个 DC 电源!那样混合电压的话,很容易损伤你的设备及芯片/主板。
|
||||
|
||||
MISO/MOSI/CS/CLK 接线
|
||||
----------------------
|
||||
### MISO/MOSI/CS/CLK 接线
|
||||
|
||||
在刷写这些芯片的时候,你可能也想增加 47 欧姆的串联电阻(不是加在 VCC 或 GND 线上)。这可以提供一些过流保护。在 Intel 平台上,SPI flash 直接连接到南桥芯片组时,通常会通过这样的电阻。
|
||||
|
||||
ISP 编程及 VCC 二极管
|
||||
-----------------------------
|
||||
### ISP 编程及 VCC 二极管
|
||||
|
||||
ISP 即系统内编程(in-system programming)。它指的是,一块芯片已经装在了你想安装 libreboot 的电脑的主板上,而你要对这块芯片进行刷写。
|
||||
|
||||
|
|
@ -466,22 +498,19 @@ ISP 即系统内编程(in-system programming)。它指的是,一块芯片
|
|||
|
||||
计划:在 libreboot.org 创建一个页面,讲怎么在 libreboot 支持的所有主板这么做。
|
||||
|
||||
BeagleBone Black(BBB)上的 GPIO 引脚
|
||||
-----------------------------------
|
||||
### BeagleBone Black(BBB)上的 GPIO 引脚
|
||||
|
||||
把 pomona 夹子连接到 BBB 时,参考这张图片:<https://beagleboard.org/Support/bone101#headers> (D0 = MISO 或连接到 MISO)。
|
||||
|
||||
如果你要用 *P9 排针*来连接芯片刷写的话,请看那个页面的那个部分。
|
||||
|
||||
40 引脚树莓派(RPi)的 GPIO 引脚
|
||||
--------------------------------------
|
||||
### 40 引脚树莓派(RPi)的 GPIO 引脚
|
||||
|
||||
下图展示了大多数现代树莓派及其衍生版的引脚分配。图中右边是 RPi 的引脚,左边是两个 SOIC 夹。
|
||||
|
||||

|
||||
|
||||
26 引脚树莓派(RPi)的 GPIO 引脚
|
||||
-------------------------------
|
||||
### 26 引脚树莓派(RPi)的 GPIO 引脚
|
||||
|
||||
树莓派 B 款 26 GPIO 引脚图(对 40 引脚的 B+ 款而言,从右边开始数,剩下 14 个引脚):
|
||||
|
||||
|
|
@ -489,8 +518,7 @@ BeagleBone Black(BBB)上的 GPIO 引脚
|
|||
|
||||
此处的信息,也请在阅读以下其他部分时参考:
|
||||
|
||||
SOIC8/DIP8/WSON8 接线图
|
||||
-------------------------------
|
||||
### SOIC8/DIP8/WSON8 接线图
|
||||
|
||||
参考此表:
|
||||
|
||||
|
|
@ -511,8 +539,7 @@ SOIC8/DIP8/WSON8 接线图
|
|||
|
||||
注意:在 X60/T60 thinkpad 上,不要连接第 8 引脚。而是将你的 PSU 接在主板供电口上,但不要启动主板。这会提供稳定的 3.3V 电压及足够的电流。在这些笔记本上,这是必要的,因为 flash 和其他许多 IC 共用一路 3.3V DC 电源,这些 IC 都会分走很多电流。
|
||||
|
||||
SOIC16 接线图(树莓派)
|
||||
------------------------------------
|
||||
### SOIC16 接线图(树莓派)
|
||||
|
||||
RPi GPIO 排针:\
|
||||

|
||||
|
|
@ -548,8 +575,7 @@ BBB P9 排针:\
|
|||
|
||||
注意:第 1 和第 9 引脚是 WP/HOLD 引脚。在面包板上刷写芯片时,请对它们使用上拉电阻(见上面的注记),并在第 2 引脚(VCC)使用去耦电容。
|
||||
|
||||
上拉电阻和去耦电容
|
||||
-------------------------------------------
|
||||
### 上拉电阻和去耦电容
|
||||
|
||||
**如果芯片是装在面包板上的,那请遵循这里的步骤。如果你要刷写的芯片已经焊接在了主板上,那请忽略这一部分。**
|
||||
|
||||
|
|
@ -570,8 +596,7 @@ SOIC8/WSON8/DIP8:如果芯片在主板上,那第 8 引脚,即 VCC,就已
|
|||
|
||||
SOIC16:同上,但在面包板上使用 SOIC16 socket。在 SOIC16 上,WP/HOLD 不同于上面的第 3/7 引脚,而是第 1 和第 9 引脚,所以要把上拉电阻接到那里。SOIC16 上的 VCC 是第 2 引脚,所以要把去耦电容接到那里。
|
||||
|
||||
SOIC8/WSON8/DIP8/SOIC16 未安装在主板上
|
||||
--------------------------------------------------
|
||||
### SOIC8/WSON8/DIP8/SOIC16 未安装在主板上
|
||||
|
||||
如果你的机器的 SPI flash 容量较低,那你可以升级。在*大多数*机器上,SPI flash 是经过映射的内存,而(实际上)你最大可以使用 16MiB 的芯片。例如,libreboot 的 KGPE-D16 和 KCMA-D8 主板默认有 2MiB flash,但你可以对它们轻松升级。另一个例子是 ThinkPad X200S、X200 Tablet 和 T400S,它们都有 WSON8,而最佳的方案就是将它替换为 SOIC8 flash 芯片。
|
||||
|
||||
|
|
@ -608,8 +633,7 @@ SOIC8/WSON8/DIP8/SOIC16 未安装在主板上
|
|||

|
||||

|
||||
|
||||
SOIC8/SOIC16 焊接在主板上
|
||||
------------------------------------
|
||||
### SOIC8/SOIC16 焊接在主板上
|
||||
|
||||
这是*系统内编程*或 *ISP* 的一个简短例子。
|
||||
|
||||
|
|
@ -625,8 +649,7 @@ Pomona 5252 是一个 SOIC16 测试夹。也有其他的可以用,但这个是
|
|||
SOIC8 例子的照片如下:\
|
||||

|
||||
|
||||
DIP8 焊接在主板上
|
||||
------------------------------
|
||||
### DIP8 焊接在主板上
|
||||
|
||||
把 DIP8 直接焊接在主板上怪异至极。它通常是安装在芯片座上的。
|
||||
|
||||
|
|
@ -636,8 +659,7 @@ DIP8 焊接在主板上
|
|||
|
||||
DIP8 IC 的引脚分配和 SOIC8 IC 一样。
|
||||
|
||||
使用 SOIC8 替换 WSON8 IC
|
||||
---------------------------
|
||||
### 使用 SOIC8 替换 WSON8 IC
|
||||
|
||||
**NOTE: You can alternatively purchase WSON8 probes from a site like Aliexpress.
|
||||
They look similar to SOIC8 clips, and they work similarly.**
|
||||
|
|
@ -703,7 +725,7 @@ WSON8 IC:\
|
|||
-------------------------------------------------------------------------------
|
||||
|
||||
许可证
|
||||
=========
|
||||
------
|
||||
|
||||
本页面发布所使用的版权条款,不同于本网站上大多数其他页面。
|
||||
|
||||
|
|
|
|||
|
|
@ -1,13 +1,20 @@
|
|||
---
|
||||
title: Generic SPI Flashing Guide
|
||||
title: Generic SPI Flashing Guide for Libreboot Installation
|
||||
x-toc-enable: true
|
||||
...
|
||||
|
||||
NOTE: Libreboot standardises on [flashprog](https://flashprog.org/wiki/Flashprog)
|
||||
**NOTE: Libreboot standardises on [flashprog](https://flashprog.org/wiki/Flashprog)
|
||||
now, as of 27 January 2024, which is a fork of flashrom.
|
||||
The reason why was explained, in
|
||||
the [Libreboot 20240225 release](../../news/libreboot20240225.md#flashprog-now-used-instead-of-flashrom)**
|
||||
|
||||
**[PLEASE READ THESE INSTRUCTIONS BEFORE INSTALLING](../../news/safety.md),
|
||||
OR YOU MIGHT BRICK YOUR MACHINE: [SAFETY PRECAUTIONS](../../news/safety.md)**
|
||||
**[PLEASE READ THESE INSTRUCTIONS BEFORE INSTALLING](ivy_has_common.md), OR
|
||||
YOU MAY BRICK YOUR MACHINE!! - Please click the link and follow the instructions
|
||||
there, before flashing. For posterity,
|
||||
[here is the link again](ivy_has_common.md).**
|
||||
|
||||
Background information
|
||||
----------------------
|
||||
|
||||
There are a plethora of single board computers with which you can flash libreboot to a SOIC chip.
|
||||
Some users might be daunted by the price of a raspberry pi.
|
||||
|
|
@ -25,7 +32,7 @@ All of this means that you should try to find a board that is *known* to support
|
|||
It is *not* enough to know that the board itself supports SPI.
|
||||
|
||||
Selecting an Operating System
|
||||
=============================
|
||||
-----------------------------
|
||||
|
||||
In theory, any linux based operating system will do.
|
||||
In practice, many distros are highly limited when it comes to single-board-computers.
|
||||
|
|
@ -39,7 +46,7 @@ If your SBC supports [Raspbian](https://www.raspberrypi.com/software/) then usin
|
|||
As a bonus, you may refer to the [main guide](spi.md) if the SBC you have supports raspbian, should you get confused with this guide.
|
||||
|
||||
Connecting to your Programmer
|
||||
=============================
|
||||
-----------------------------
|
||||
|
||||
Many SBC operating systems enable ssh by default.
|
||||
If the OS you chose does not enable ssh on first boot, try checking the distro documentation and looking for terms such as 'headless install.'
|
||||
|
|
@ -57,10 +64,10 @@ SSH to your programmer using the default credentials as specified in your distro
|
|||
The IP address is the one determined in the earlier step.
|
||||
For example:
|
||||
|
||||
`ssh root@192.168.0.167`
|
||||
ssh root@192.168.0.167
|
||||
|
||||
Finding GPIO Pins
|
||||
=================
|
||||
-----------------
|
||||
|
||||
If you have determined that a board supports SPI then the only step left is to
|
||||
determine the correct location of the SPI pins.
|
||||
|
|
@ -72,7 +79,7 @@ Match each of the categories in the 'signal' column with those in the 'pin' colu
|
|||
Using this method, you can theoretically use any single board computer with SPI support.
|
||||
|
||||
Enabling SPI
|
||||
============
|
||||
------------
|
||||
|
||||
The modules needed and methods to enable SPI vary based on the SBC you choose.
|
||||
You should always make sure there is a well documented method for enabling SPI on your SBC before purchasing.
|
||||
|
|
@ -83,8 +90,8 @@ sudo ldto enable spicc spicc-spidev
|
|||
sudo ldto merge spicc spicc-spidev
|
||||
```
|
||||
|
||||
Using Flashrom
|
||||
==============
|
||||
Using flashprog
|
||||
--------------
|
||||
|
||||
Most linux distros will provide flashprog in their default repositories.
|
||||
You can also download flashprog in binary form with [libreboot utils.](https://libreboot.org/download.html#https)
|
||||
|
|
|
|||
|
|
@ -0,0 +1 @@
|
|||
Learn how to flash Libreboot using Le Potato, which supports SPI flashing on NOR 25xx ICs.
|
||||
|
|
@ -1,10 +1,12 @@
|
|||
---
|
||||
title: Dell Precision T1650
|
||||
title: Install Libreboot on Dell Precision T1650
|
||||
x-toc-enable: true
|
||||
...
|
||||
|
||||
**[PLEASE READ THESE INSTRUCTIONS BEFORE INSTALLING](../../news/safety.md),
|
||||
OR YOU MIGHT BRICK YOUR MACHINE: [SAFETY PRECAUTIONS](../../news/safety.md)**
|
||||
**[PLEASE READ THESE INSTRUCTIONS BEFORE INSTALLING](ivy_has_common.md), OR
|
||||
YOU MAY BRICK YOUR MACHINE!! - Please click the link and follow the instructions
|
||||
there, before flashing. For posterity,
|
||||
[here is the link again](ivy_has_common.md).**
|
||||
|
||||
<div class="specs">
|
||||
<center>
|
||||
|
|
@ -29,20 +31,20 @@ OR YOU MIGHT BRICK YOUR MACHINE: [SAFETY PRECAUTIONS](../../news/safety.md)**
|
|||
|
||||
|
||||
```
|
||||
W+: Works without blobs;
|
||||
W+: Works without vendor firmware;
|
||||
N: Doesn't work;
|
||||
W*: Works with blobs;
|
||||
W*: Works with vendor firmware;
|
||||
U: Untested;
|
||||
P+: Partially works;
|
||||
P*: Partially works with blobs
|
||||
P*: Partially works with vendor firmware
|
||||
?: UNKNOWN AT THIS TIME
|
||||
```
|
||||
|
||||
| ***Features*** | |
|
||||
|---------------------------------------------------|----|
|
||||
| **Internal flashing with original boot firmware** | ? |
|
||||
| **Internal flashing with original boot firmware** | W* |
|
||||
| **Display (if Intel GPU)** | W+ |
|
||||
| **Display (discrete CPU, SeaBIOS payload only)** | W* |
|
||||
| **Display (discrete GPU, SeaBIOS payload only)** | W* |
|
||||
| **Audio** | W+ |
|
||||
| **RAM Init** | W+ |
|
||||
|
||||
|
|
@ -52,8 +54,14 @@ P*: Partially works with blobs
|
|||
| **SeaBIOS** | Works |
|
||||
| **SeaBIOS with GRUB** | Works |
|
||||
</div>
|
||||
Introduction
|
||||
============
|
||||
|
||||
Open source BIOS/UEFI firmware
|
||||
------------------------------
|
||||
|
||||
This document will teach you how to install Libreboot, on your
|
||||
Dell Precision T1650 desktop motherboard.
|
||||
Libreboot is a [Free Software](https://writefreesoftware.org/learn) project
|
||||
that replaces proprietary BIOS/UEFI firmware.
|
||||
|
||||
**Unavailable in Libreboot 20230625 or earlier. You must [compile from
|
||||
source](../build/), or use at least Libreboot 20231021.**
|
||||
|
|
@ -65,18 +73,19 @@ This is similar code-wise to [Dell
|
|||
OptiPlex 9010](https://doc.coreboot.org/mainboard/dell/optiplex_9010.html)
|
||||
which coreboot supports.
|
||||
|
||||
Build ROM image from source
|
||||
---------------------------
|
||||
### Build ROM image from source
|
||||
|
||||
The build target, when building from source, is thus:
|
||||
|
||||
./mk -b coreboot t1650_12mb
|
||||
|
||||
Installation
|
||||
============
|
||||
Alternatively, you can use release images, but please ensure that you've
|
||||
inserted vendor files prior to flashing; see notes.
|
||||
|
||||
Insert binary files
|
||||
-------------------
|
||||
Install Libreboot
|
||||
-----------------
|
||||
|
||||
### Insert vendor files
|
||||
|
||||
If you're using a release ROM, please ensure that you've inserted extra firmware
|
||||
required refer to the [guide](../install/ivy_has_common.md) for that. (failure
|
||||
|
|
@ -86,15 +95,13 @@ Libreboot's build system automatically downloads and processes these files if
|
|||
you build Libreboot from source, but the same logic that it uses must be re-run
|
||||
if you're using a release image.
|
||||
|
||||
Set MAC address
|
||||
---------------
|
||||
### Set MAC address
|
||||
|
||||
This platform uses an Intel Flash Descriptor, and defines an Intel GbE NVM
|
||||
region. As such, release/build ROMs will contain the same MAC address. To
|
||||
change the MAC address, please read [nvmutil documentation](../install/nvmutil.md).
|
||||
|
||||
WARNING about CPU/GPU compatibility
|
||||
-------------------------------
|
||||
### WARNING about CPU/GPU compatibility
|
||||
|
||||
At the time of testing this board, I didn't have a CPU with graphics built in,
|
||||
so I could only use discrete graphics on the PCI-E slot (in my case, Nvidia
|
||||
|
|
@ -127,14 +134,27 @@ way (SeaBIOS first) because Libreboot's configuration does not tell *coreboot*
|
|||
to execute VGA Option ROMs, and it's important that we try to prevent bricks
|
||||
whenever possible.
|
||||
|
||||
Flash a ROM image (software)
|
||||
-----------------
|
||||
### Flash a ROM image (software)
|
||||
|
||||
If you're already running Libreboot, and you don't have flash protection
|
||||
turned on, [internal flashing](../install/) is possible.
|
||||
|
||||
Flash a ROM image (hardware)
|
||||
-----------------
|
||||
Internal flashing is *also* possible from the factory BIOS, if you set the
|
||||
service mode jumper. This shorts `HDA_SDO` (Soft Descriptor Override), which
|
||||
disables the ME after early bringup and disables IFD-based flash protections.
|
||||
|
||||
Observe, below the PCI slots:
|
||||
|
||||
<img tabindex=1 style="max-width:35%;" src="https://av.libreboot.org/t1650/t1650_motherboard.jpg" /><span class="f"><img src="https://av.libreboot.org/t1650/t1650_motherboard.jpg" /></span>
|
||||
|
||||
Here is a close-up:
|
||||
|
||||
<img tabindex=1 style="max-width:35%;" src="https://av.libreboot.org/t1650/t1650_service_mode.jpg" /><span class="f"><img src="https://av.libreboot.org/t1650/t1650_service_mode.jpg" /></span>
|
||||
|
||||
Simply short those pins, on the header, using a jumper. When you do this, all
|
||||
flash protections will be disabled.
|
||||
|
||||
### Flash a ROM image (hardware)
|
||||
|
||||
**REMOVE all power sources and connectors from the machine, before doing this.
|
||||
This is to prevent short circuiting and power surges while flashing.**
|
||||
|
|
@ -183,4 +203,4 @@ flashing instructions [in Chinese](../install/spi.zh-cn.md):
|
|||
Other aspects of the machine are not much to write home about. It's a standard
|
||||
desktop PC form factor, and you can just run whatever you want on it.
|
||||
|
||||
Enjoy!
|
||||
Enjoy your Libreboot machine!
|
||||
|
|
|
|||
|
|
@ -0,0 +1 @@
|
|||
Learn how to install Libreboot free/opensource BIOS/UEFI boot firmware on your Dell Precision T1650.
|
||||
|
|
@ -1,5 +1,5 @@
|
|||
---
|
||||
title: Flashing the ThinkPad T400 externally
|
||||
title: Install Libreboot on Lenovo ThinkPad T400
|
||||
x-toc-enable: true
|
||||
...
|
||||
|
||||
|
|
@ -27,12 +27,12 @@ x-toc-enable: true
|
|||
| **Flash chip** | SOIC-8/SOIC-16/WSON-8 4MiB/8MiB (Upgradable
|
||||
to 16MiB) |
|
||||
```
|
||||
W+: Works without blobs;
|
||||
W+: Works without vendor firmware;
|
||||
N: Doesn't work;
|
||||
W*: Works with blobs;
|
||||
W*: Works with vendor firmware;
|
||||
U: Untested;
|
||||
P+: Partially works;
|
||||
P*: Partially works with blobs
|
||||
P*: Partially works with vendor firmware
|
||||
```
|
||||
|
||||
| ***Features*** | |
|
||||
|
|
@ -51,16 +51,13 @@ P*: Partially works with blobs
|
|||
| **SeaBIOS with GRUB** | Works |
|
||||
</div>
|
||||
|
||||
Dell Latitude E6400
|
||||
===================
|
||||
Open source BIOS/UEFI firmware
|
||||
-------------------------
|
||||
|
||||
**If you haven't bought an T400 yet: the [Dell Latitude
|
||||
E6400](../install/latitude.md) is much easier to flash; no disassembly required,
|
||||
it can be flashed entirely in software from Dell BIOS to Libreboot. It is the
|
||||
same hardware generation (GM45), with same CPUs, video processor, etc.**
|
||||
|
||||
Introduction
|
||||
============
|
||||
This document will teach you how to install Libreboot, on your
|
||||
Lenovo ThinkPad T400 laptop motherboard.
|
||||
Libreboot is a [Free Software](https://writefreesoftware.org/learn) project
|
||||
that replaces proprietary BIOS/UEFI firmware.
|
||||
|
||||
It is believed that all or most laptops of the model T400 are compatible. See notes
|
||||
about [CPU
|
||||
|
|
@ -73,17 +70,26 @@ the palmrest: 4MiB is SOIC-8, 8MiB is SOIC-16.
|
|||
|
||||
*The T400 laptops come with the ME (and sometimes AMT in addition)
|
||||
before flashing libreboot. libreboot disables and removes it by using a
|
||||
modified descriptor: see [../install/ich9utils.md](../install/ich9utils.md)*
|
||||
(contains notes, plus instructions)
|
||||
modified descriptor.*
|
||||
|
||||
Flashing instructions can be found at
|
||||
[../install/\#flashprog](../install/#flashprog)
|
||||
|
||||
NOTE: Libreboot standardises on [flashprog](https://flashprog.org/wiki/Flashprog)
|
||||
**NOTE: Libreboot standardises on [flashprog](https://flashprog.org/wiki/Flashprog)
|
||||
now, as of 27 January 2024, which is a fork of flashrom.
|
||||
The reason why was explained, in
|
||||
the [Libreboot 20240225 release](../../news/libreboot20240225.md#flashprog-now-used-instead-of-flashrom)**
|
||||
|
||||
Dell Latitude E6400
|
||||
-------------------
|
||||
|
||||
**If you haven't bought an T400 yet: the [Dell Latitude
|
||||
E6400](../install/latitude.md) is much easier to flash; no disassembly required,
|
||||
it can be flashed entirely in software from Dell BIOS to Libreboot. It is the
|
||||
same hardware generation (GM45), with same CPUs, video processor, etc.**
|
||||
|
||||
EC update {#ecupdate}
|
||||
=========
|
||||
---------------------
|
||||
|
||||
It is recommended that you update to the latest EC firmware version. The
|
||||
[EC firmware](../../faq.md#ec-embedded-controller-firmware) is separate from
|
||||
|
|
@ -105,7 +111,7 @@ The T400 is almost identical to the X200, code-wise. See
|
|||
[x200.md](x200.md).
|
||||
|
||||
Installation notes
|
||||
============
|
||||
------------------
|
||||
|
||||
[External flashing](spi.md) required, if Lenovo BIOS is running.
|
||||
|
||||
|
|
@ -121,15 +127,14 @@ the screws on page 114 (with title "1130 Keyboard bezel") are swapped
|
|||
and if you follow the HMM you will punch a hole through the bezel in the
|
||||
upper right corner.
|
||||
|
||||
Serial port {#serial_port}
|
||||
-----------
|
||||
### Serial port {#serial_port}
|
||||
|
||||
EHCI debug might not be needed. It has been reported that the docking
|
||||
station for this laptop has a serial port, so it might be possible to
|
||||
use that instead.
|
||||
|
||||
A note about CPUs
|
||||
=================
|
||||
-----------------
|
||||
|
||||
[ThinkWiki](http://www.thinkwiki.org/wiki/Category:T400) has a list of
|
||||
CPUs for this system. The Core 2 Duo P8400, P8600 and P8700 are believed
|
||||
|
|
@ -137,8 +142,7 @@ to work in libreboot.
|
|||
|
||||
T9600, T9500, T9550 and T9900 are all compatible, as reported by users.
|
||||
|
||||
Quad-core CPUs
|
||||
--------------
|
||||
### Quad-core CPUs
|
||||
|
||||
Very likely to be compatible, but requires hardware modification.
|
||||
Based on info from German forum post about installing Core Quad CPU on T500 found in coreboot mailing list. Currently work in progress and no guide available.
|
||||
|
|
@ -146,9 +150,8 @@ Based on info from German forum post about installing Core Quad CPU on T500 foun
|
|||
- [Coreboot mailing list post](https://mail.coreboot.org/pipermail/coreboot/2016-November/082463.html)
|
||||
- [German forum post about install Core Quad on T500](https://thinkpad-forum.de/threads/199129)
|
||||
|
||||
|
||||
A note about GPUs
|
||||
=================
|
||||
-----------------
|
||||
|
||||
Some models have an Intel GPU, while others have both an ATI and an
|
||||
Intel GPU; this is referred to as "switchable graphics". In the *BIOS
|
||||
|
|
@ -161,29 +164,28 @@ Intel GPU is used and the ATI GPU is disabled, so native graphics
|
|||
initialization works all the same.
|
||||
|
||||
CPU paste required
|
||||
==================
|
||||
------------------
|
||||
|
||||
See [\#paste](#paste).
|
||||
|
||||
Flash chip size {#flashchips}
|
||||
===============
|
||||
---------------------------
|
||||
|
||||
Use this to find out:
|
||||
|
||||
flashprog -p internal
|
||||
|
||||
MAC address {#macaddress}
|
||||
===========
|
||||
------------------------
|
||||
|
||||
Refer to [mac\_address.md](mac_address.md).
|
||||
|
||||
How to flash externally
|
||||
=========================
|
||||
-----------------------
|
||||
|
||||
Refer to [spi.md](spi.md) as a guide for external re-flashing.
|
||||
|
||||
The procedure
|
||||
-------------
|
||||
### The procedure
|
||||
|
||||
Remove *all* screws, placing them in the order that you removed them:\
|
||||
|
||||
|
|
@ -281,7 +283,7 @@ Refer to the external flashing instructions [here](spi.md), and when you're
|
|||
done, re-assemble your laptop.
|
||||
|
||||
Thermal paste (IMPORTANT)
|
||||
=========================
|
||||
-------------------------
|
||||
|
||||
Because part of this procedure involved removing the heatsink, you will
|
||||
need to apply new paste. Arctic MX-4 is ok. You will also need isopropyl
|
||||
|
|
@ -298,7 +300,7 @@ show how to properly apply the thermal paste. Other guides online detail
|
|||
the proper application procedure.
|
||||
|
||||
Memory
|
||||
======
|
||||
------
|
||||
|
||||
In DDR3 machines with Cantiga (GM45/GS45/PM45), northbridge requires sticks
|
||||
that will work as PC3-8500 (faster PC3/PC3L sticks can work as PC3-8500).
|
||||
|
|
|
|||
Some files were not shown because too many files have changed in this diff Show More
Loading…
Reference in New Issue